Vegan Biscuits Without Butter or Oil
Servings:6 servings
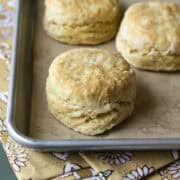
Imagine soft and buttery-tasting vegan biscuits without plant-based butter, oil, or shortening! Growing up in Alabama made me a bit of a biscuit snob, and I can tell you that these oil-free vegan biscuits are breaking the rules in the best way! Yield: makes 6-8 biscuits depending on the size of your biscuit cutter; 2¾-inch round=7 biscuits.
Ingredients
- ½ cup blanched almond butter - or regular smooth almond butter; see Notes
- 2 cups all purpose flour (240g), plus more for shaping the dough - or whole wheat pastry flour
- 2 teaspoons baking powder
- 1 teaspoon baking soda
- 1 teaspoon fine sea salt
- ⅔ cup plain unsweetened soy milk - or other unflavored non-dairy milk
- ¼ cup yellow corn - I use frozen
- 2 teaspoons apple cider vinegar
Instructions
- Prep: Review the Tips and FAQs in the recipe notes below. Additional helpful info about ingredients can be found in the post above.
- Preheat the oven to 450°F (230°C), and line a small baking sheet with parchment paper.
- In a large bowl, whisk the flour, baking powder, baking soda, and salt. Set aside.
- For the vegan buttermilk, combine the milk and corn in a blender. Blend until completely smooth. Stir in the vinegar and set aside.
- Drizzle about half of the almond butter onto the dry ingredients and use a fork to cut it in. Add the rest, and continue to break it up with the fork until there are no large clumps of almond butter. Tip: The purpose of the nut butter is to coat some of the flour with fat, but it doesn't melt like butter, obviously! So we don't want any big clumps remaining.
- Pour the blended vegan "buttermilk" into the bowl. Use a folding motion to gently incorporate wet and dry, stirring as little as possible and working quickly. Do NOT overmix. The dough will look clumpy and shaggy.
- Scoop the dough onto a floured work surface. Gently pull it together with your hands. If it's too sticky, sprinkle with a little flour. Use your hands to flatten the dough into a rectangle about ½-inch thick. We're doing an abbreviated version of the classic fold over technique used to create flaky layers in biscuits. Since we aren't using butter, only do the fold over once or twice to avoid overworking the dough.Like you're folding a letter to fit in an envelope, fold one side toward the center, then the other.
- Now gently flatten the dough into a circle about ¾-inch thick. With a biscuit cutter, press straight down and lift straight up - don't twist. Cut out as many biscuits as you can. Then pull the scraps together, press out again, and cut the remaining biscuits.
- Place the biscuits on the baking sheet so that they're barely touching each other and are up against an edge of the pan, if possible. Having support on the sides helps them rise. Bake for 9-11 minutes or until the tops and bottoms are light golden brown.
- Allow your vegan biscuits rest on the pan for 5 minutes before serving.
Notes
Starting with whole raw almonds? See: How to Blanch Almonds
I use these blanched almonds for a shortcut. You can also find several brands of white almond butter online, but it's more affordable to make it yourself.
If you're new to making nut butter, find a full tutorial here: Blanched Almond Butter. Note that Erin's recipe calls for roasting the nuts first, but you don't need to for the biscuits. Also, only add a pinch of salt. You'll have enough for several batches of vegan biscuits. Store the almond butter in an airtight container in the fridge for up to 1 month.
I haven't tested the recipe yet with any gluten-free flours.
Tips for Making Vegan Biscuits
- Make the nut butter in advance. It will be warm after blending, so allow at least 30 minutes for the almond butter to chill in the fridge before making biscuits. It doesn't need to be super cold, just not warm.
- Properly measure flour. Ideally, weigh flour with a kitchen scale (2 cups flour=240 grams). Otherwise, whisk the flour, spoon into a measuring cup, and level off the excess.
- Don't overwork the dough! Be gentle and efficient when stirring in the vegan buttermilk and pressing out the dough. Less is more. Feel free to skip the foldover step if you're concerned. It's true that biscuit-making is as much about technique as it is ingredients.
Nutrition
Calories: 230kcal | Carbohydrates: 29g | Protein: 8g | Fat: 10g | Cholesterol: 0mg
