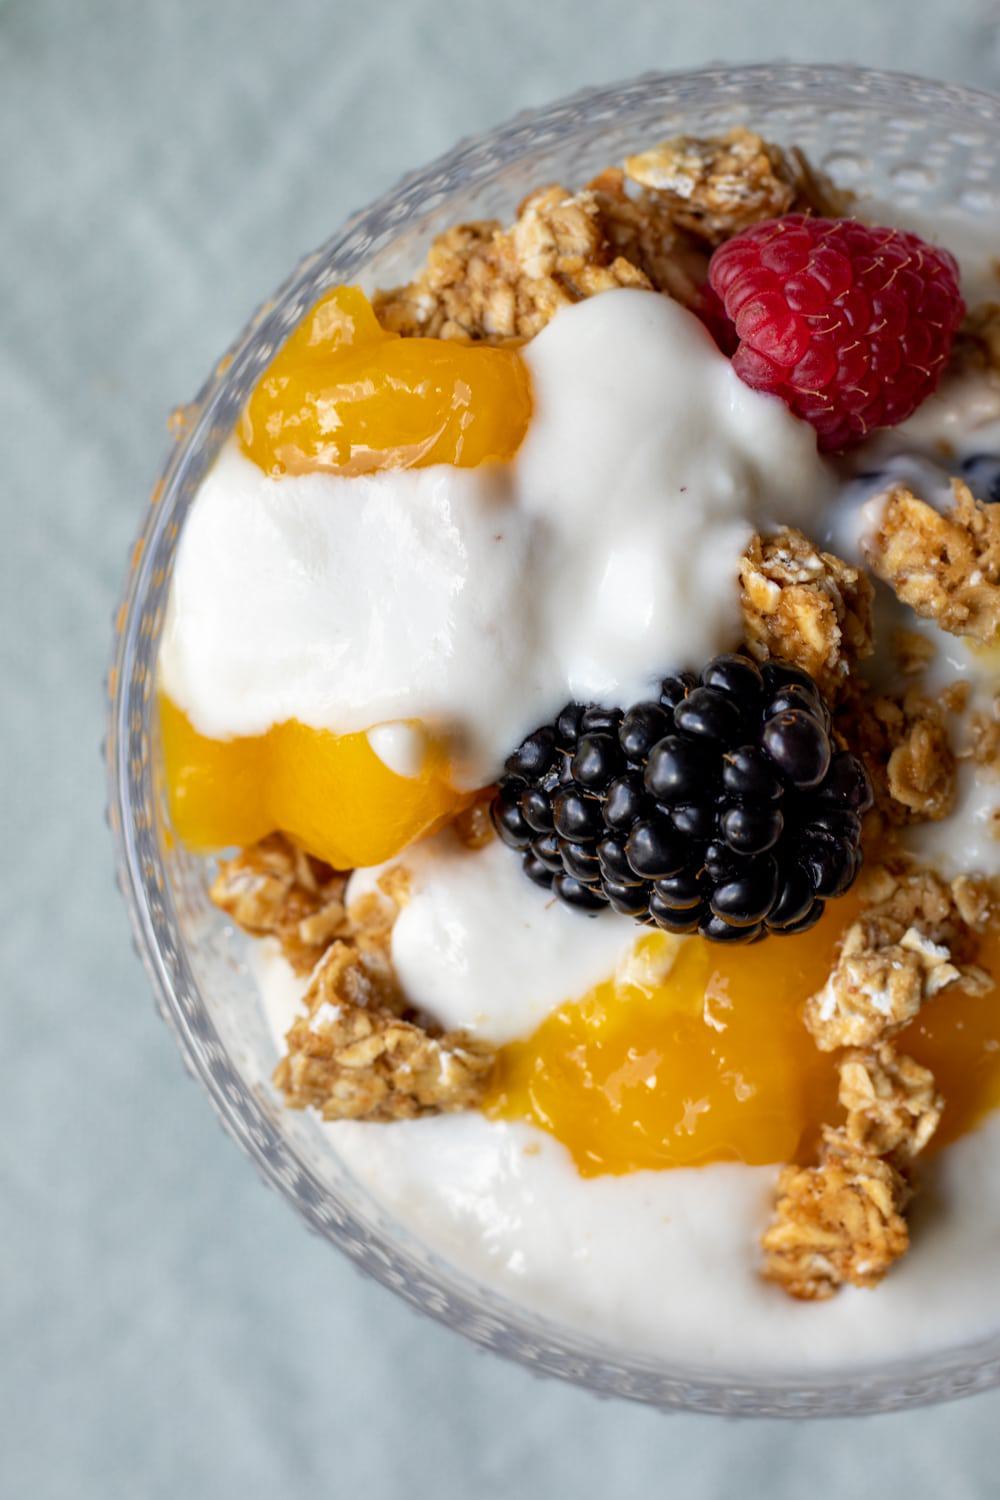
Homemade cashew yogurt is deliciously tangy, creamy, light in calories, and made with just 2 ingredients. This vegan yogurt recipe has no gums or added sugar, and can also be made without an Instant Pot. A few key tips and ingredients will ensure yogurt success every time. Also includes tips for making a thicker vegan Greek-style yogurt!
📩 Email me the recipe!
We respect your privacy. Opt out anytime.
Why You'll Love It
This non-dairy cashew yogurt recipe:
- has only 135 calories per 8 ounce cup. Compare that to those tiny servings of store-bought yogurts. Of course, the caloric value changes if you make the Greek-style option.
- cuts down on single-use plastic containers.
- can be more or less tangy, depending on your preference.
- is 100% unsweetened, which makes it perfect for savory dishes, too, like vegan mashed potatoes!
- is naturally creamy, not gelatinous like some store-bought yogurts with additives.
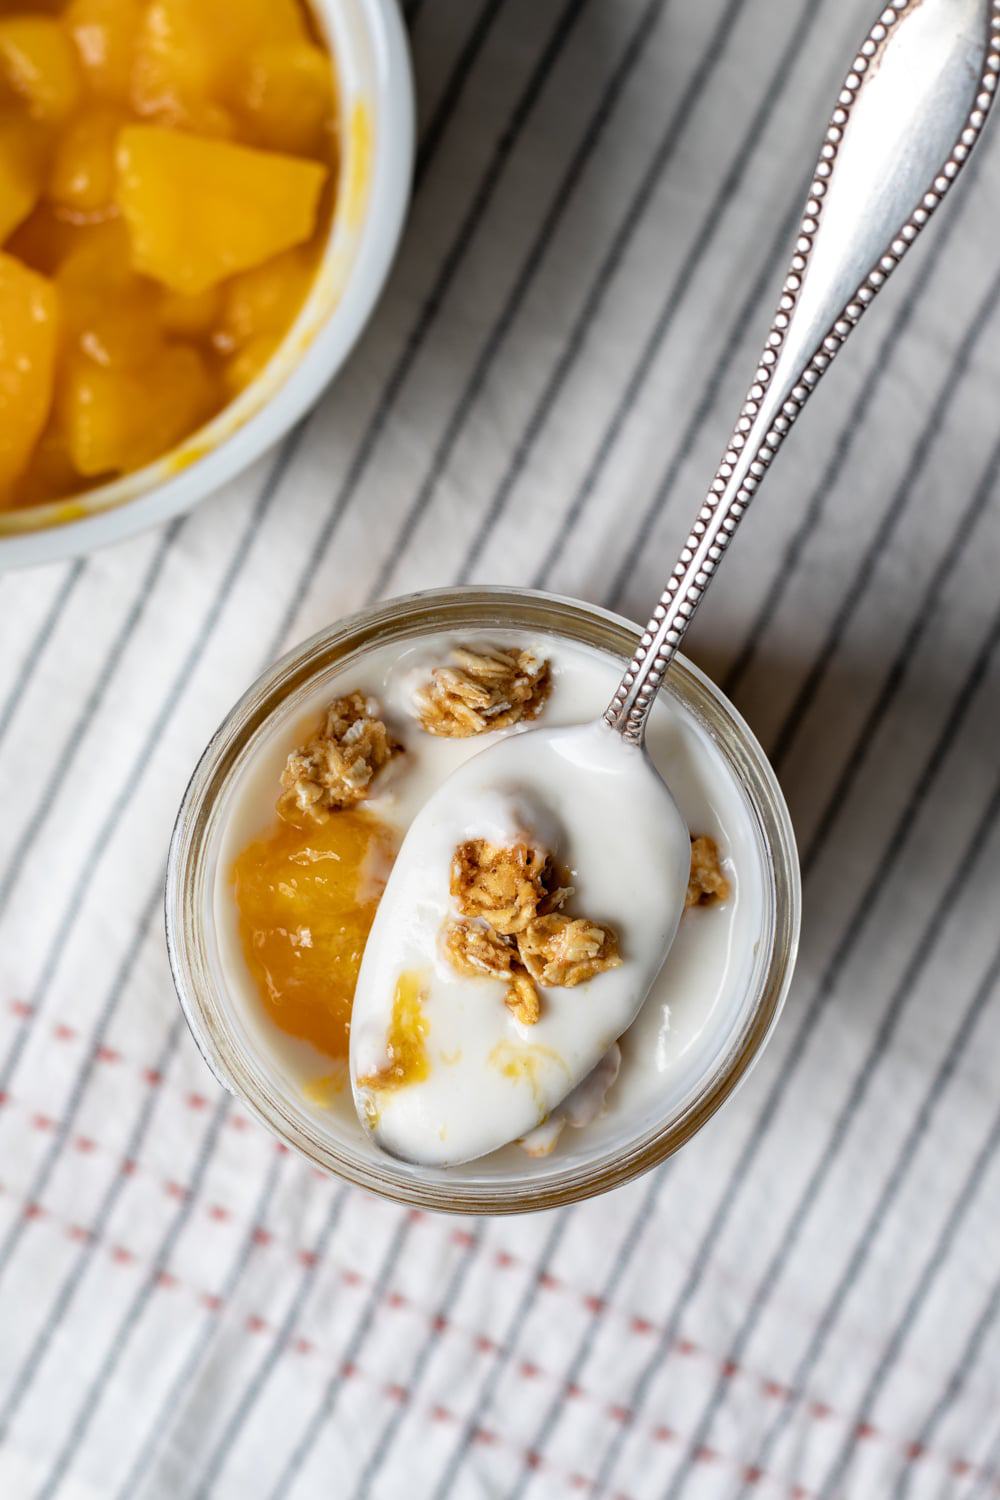
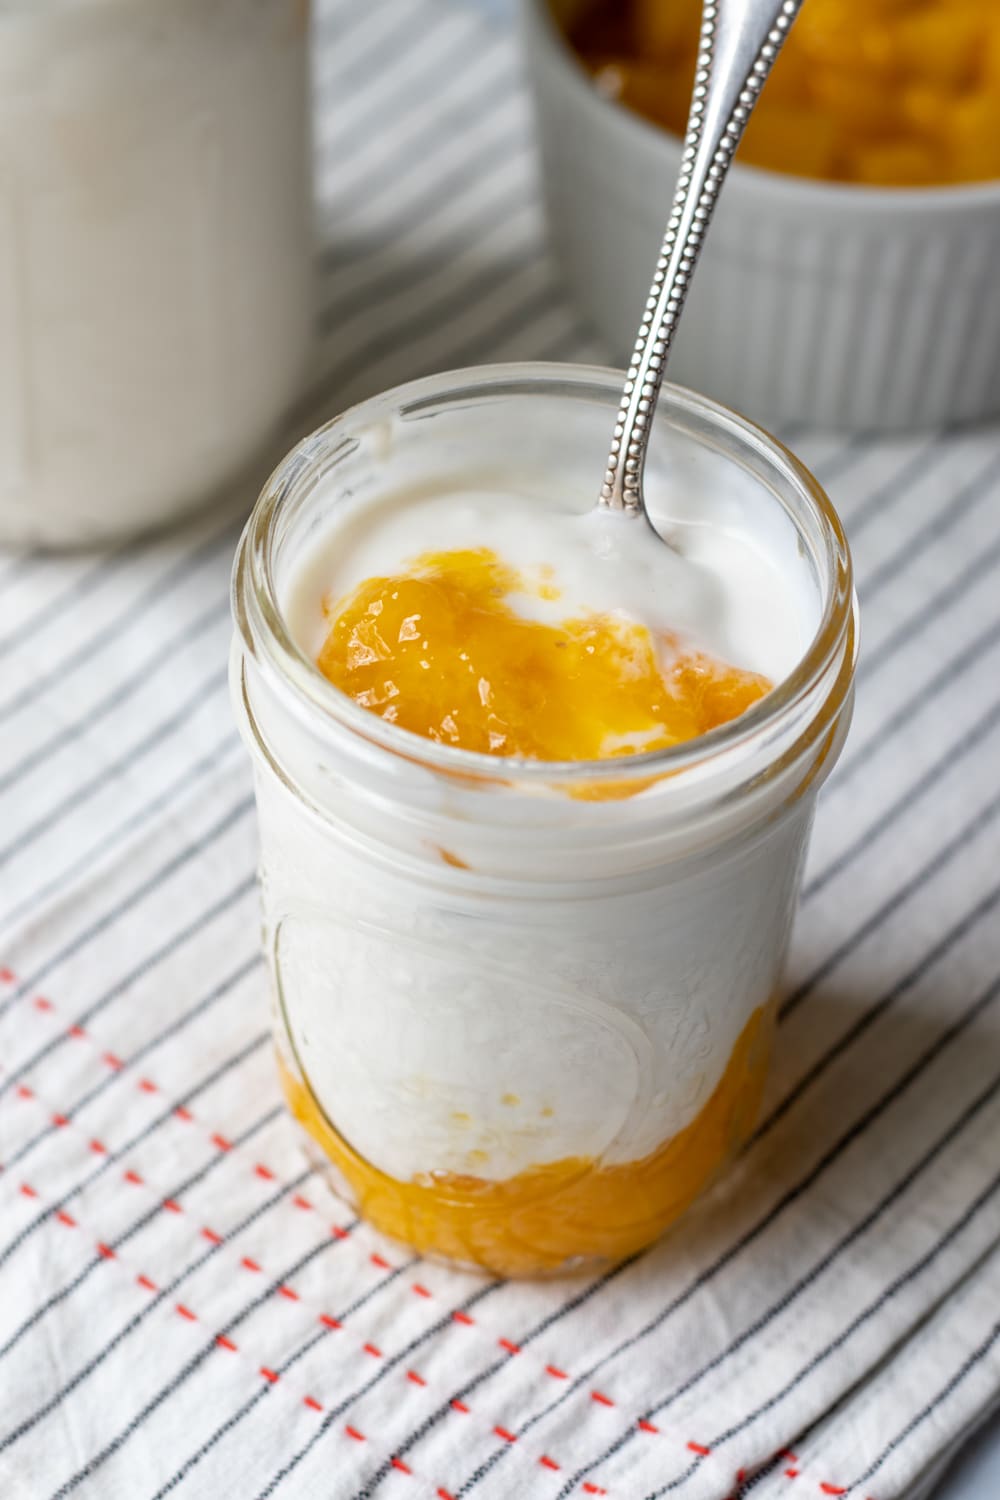
- can be sweetened any way you like! From jam to fruit puree to maple syrup, add your favorite sweetener to individual servings for ultimate flexibility.

I consider myself pretty new to the Instant Pot. In fact, this is the very first Instant Pot recipe I'm sharing on the blog (woohoo)! I held off on buying one because we don't have a lot of storage or counter space, but about 5 months ago, I finally gave in. And one of the very first things I wanted to try with my new Instant Pot was homemade vegan yogurt.
I started with soy yogurt, and that first batch blew my mind! The flavor was so simple, clean, and delicious. I would even describe it as crave-able, not to mention affordable!
If you're interested in making soy yogurt, Becky over at Glue & Glitter has a great tutorial.
UPDATE: I now have two more yogurt recipes for you to try - Almond Milk Yogurt and Tofu Yogurt!
Cost Comparison
After several batches of tasty soy yogurt, I started experimenting with cashew yogurt in an attempt to replicate Forager, my favorite brand. It's not that I don't want to support them, but my husband and I want to enjoy yogurt every day! So I really needed a more affordable option.
Most store-bought vegan yogurts are around $7 for a large, 24 ounce container (3 cups). But homemade vegan yogurt only costs about $2.50 per quart. That's 4 cups!
Why This Recipe Works
Last summer, before I bought an Instant Pot, I experimented with homemade cashew yogurt a few times. I left it on the kitchen counter overnight to culture. It was surprisingly successful, but something about the process didn't sit right with me.
I wanted it to feel safer and more predictable. And since household temperatures fluctuate depending on the season, it was never going to be foolproof.
So I did some research on making dairy yogurt in the Instant Pot and combined that with what I've learned about making soy yogurt, and voila! A creamy, dreamy, 2-ingredient cashew yogurt recipe.
Other than the fact that we're blending our own milk and briefly heating it on the stove, making cashew yogurt is every bit as easy as making soy yogurt from boxed milk.
How to Make Cashew Milk Yogurt
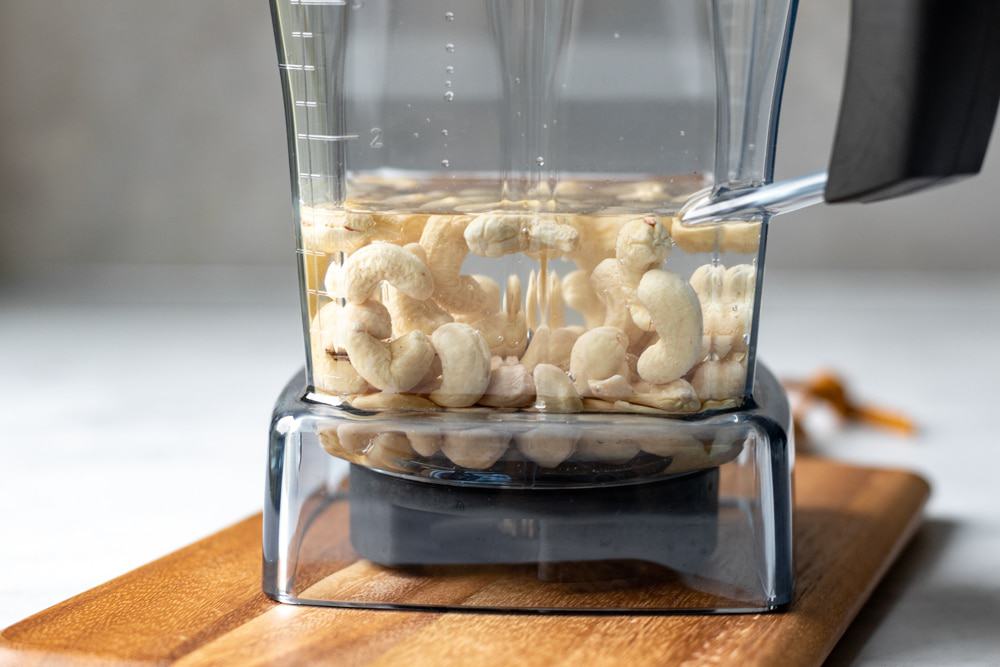
First, you'll make cashew milk. A high-speed blender like Vitamix creates the creamiest cashew yogurt, but a standard blender will also work.
If using a regular blender, it helps to soak the cashews first. Place cashews in a bowl, cover with water, and let sit overnight at room temperature. Alternatively, you can quick-soak the cashews in hot water for about 2 hours, then drain. If using a high-speed blender, there's no need to soak.
Begin by blending ¾ cup raw cashews with 1 cup of water until completely smooth (for vegan Greek yogurt, you'll use different amounts; more on this below).
I run my Vitamix on high for about 2 minutes to make extra sure I end up with the smoothest consistency. If you under-blend the cashews you'll end up with a slightly grainy looking yogurt, which is fine and certainly doesn't hurt anything.
For ultra smooth yogurt, be sure to run the blender longer than you might expect. In fact, the mixture will start to warm up, and that's okay.
Next, add the remaining 2.5 cups of water to the blender, and blend for a few seconds to combine.
Option: Add a Thickener
This step is completely optional, and honestly, I don't usually do it. I don't mind my yogurt a bit on the thinner side, but if you prefer a thicker yogurt, add 2 tablespoons of arrowroot or tapioca starch to the freshly blended cashew milk, and blend to combine.
*See updated section below to learn how to make vegan Greek yogurt. No extra starch needed!
Heat the Cashew Milk
This step is quick and easy but very important. It helps in a few ways:
- Simmering the cashew milk destroys any bad bacteria that may have come from the blender or the nuts.
- The naturally occurring starch in cashews thickens when heated. Since cashews aren't high in protein, like soy milk is, we need to activate that starch to help thicken the yogurt.
- If you include the optional tapioca starch, it also needs to be simmered in order to thicken.
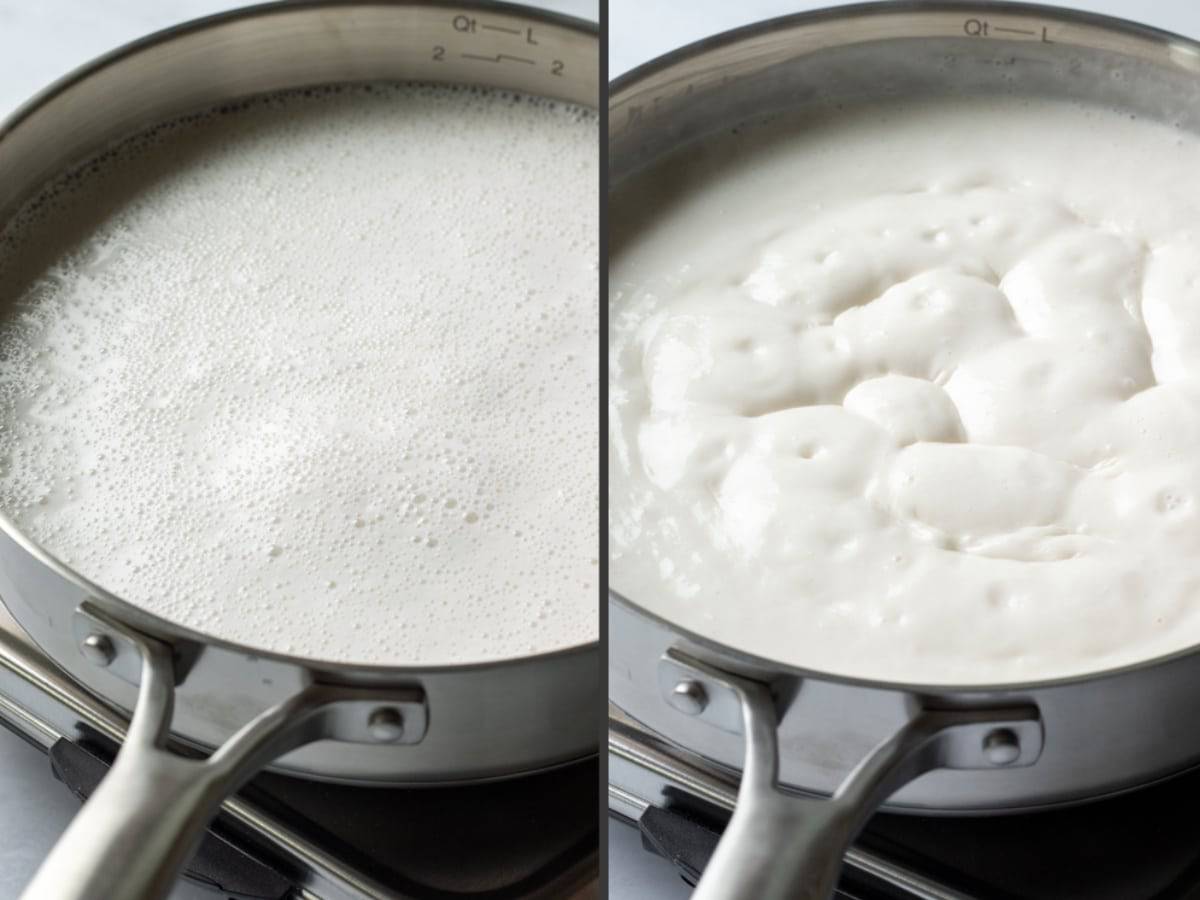
Pour the cashew milk into a non-reactive sauce pan, and bring to a simmer (stainless steel is fine). Whisk frequently as the milk is coming to temperature. Be sure to scrape the bottom and corners of the pan, where most of the thickening occurs.
After simmering the cashew milk for about 1 minute, immediately remove the pan from heat. Allow the mixture to cool until it reaches 100 to 110 degrees Fahrenheit. I've timed this repeatedly, and it takes about 30 minutes.
Don't have a thermometer? No problem! Grab a clean spoon, and either taste the cashew milk or place a drop on the back of your wrist. If it feels warm, similar to body temperature, but not hot, it's time to add the probiotic.
Add the Culture
Open one or two capsules of vegan-friendly probiotic (read more about selecting a probiotic in the Tips section below), and sprinkle the powder onto the cashew milk. The number of capsules needed depends on the strength of the probiotic. Aim for 20 to 30 billion live bacteria.
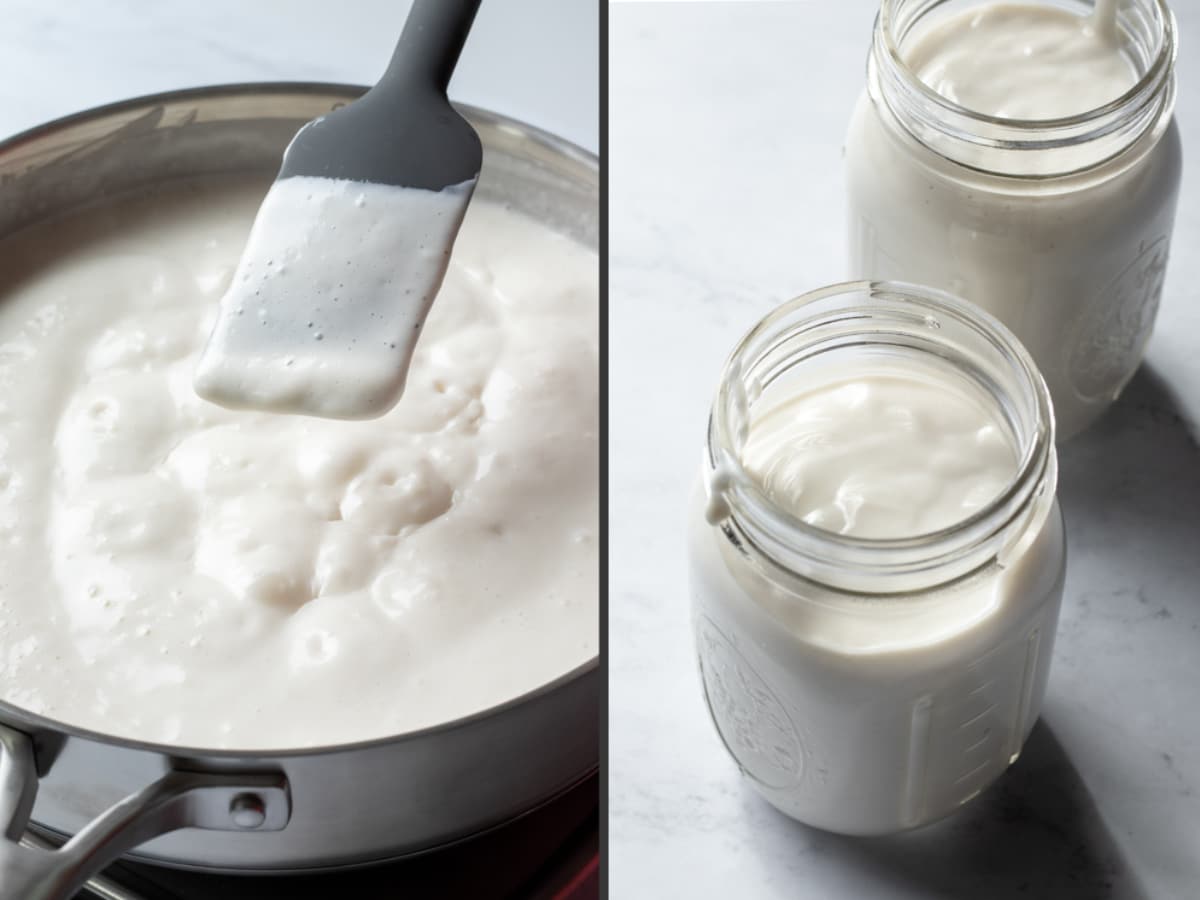
Whisk to incorporate the powder, then immediately pour the mixture into clean jars. This recipe makes just under 4 cups of yogurt, so I usually use 1 quart jar (32 oz) or 2 pint jars (16 oz).
This vegan yogurt starter from Cultures for Health is a great option but not as widely available as probiotic capsules. It's also more expensive, so if you use yogurt starter you'll want to save a small amount of yogurt from each batch to use as the starter for your next batch. Using yogurt as a starter definitely works with soy, but I haven't tested it yet with cashew milk yogurt.
Set the Instant Pot
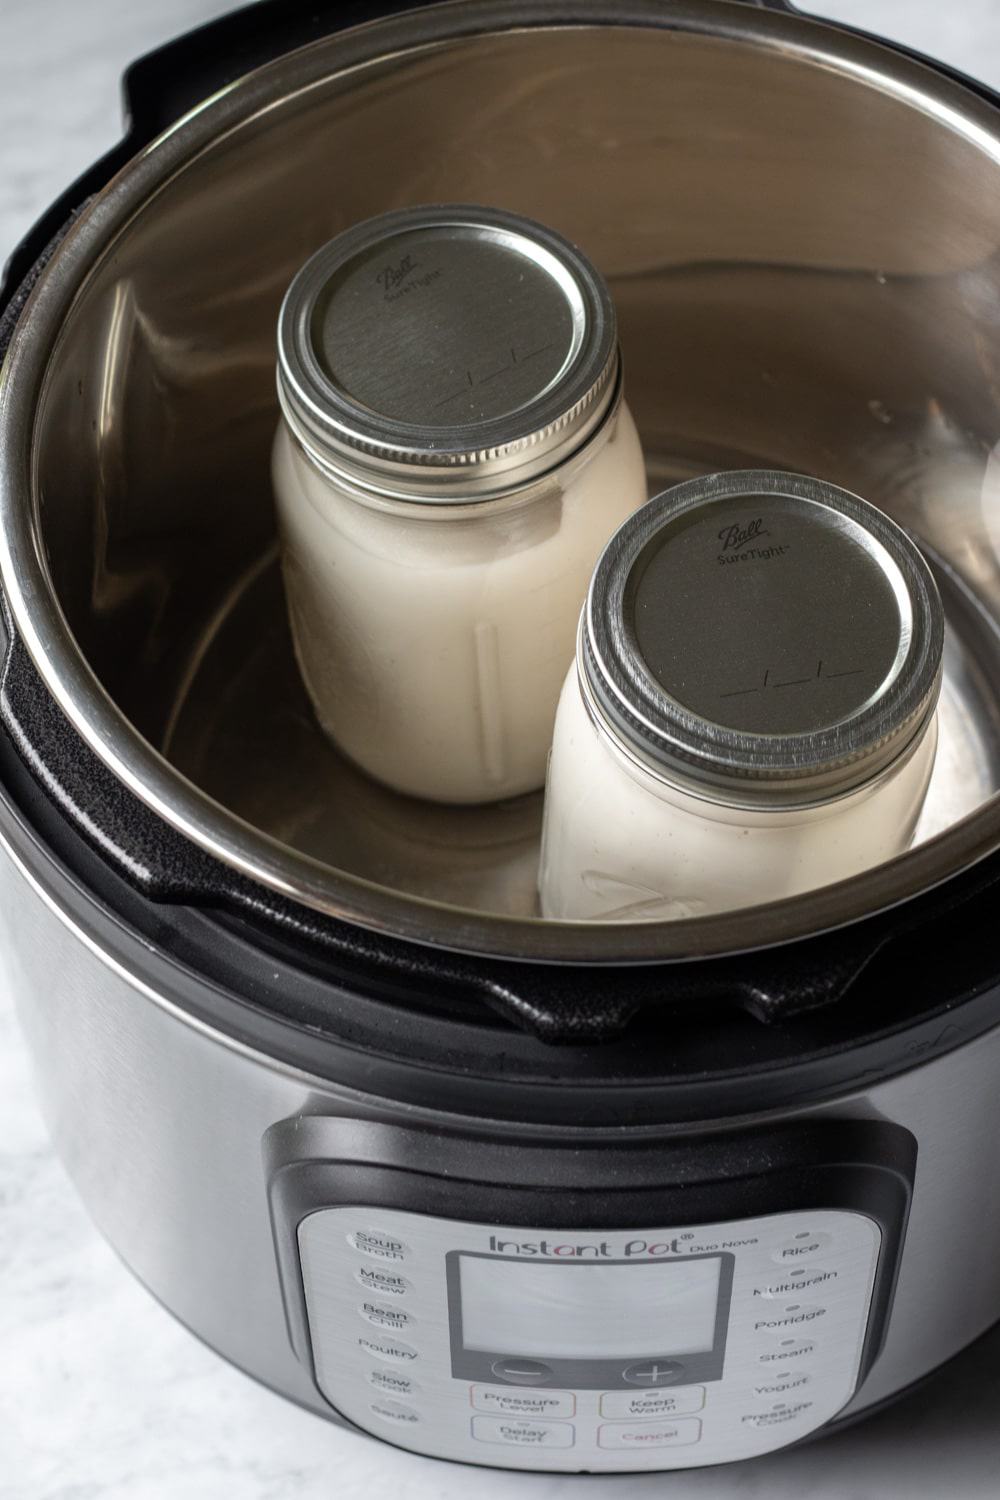
Place the jars inside the Instant Pot (no need to add water), cover, and turn the lid to the locked/sealed position. Press the Yogurt button. My particular Instant Pot defaults to 10:00 hours on the yogurt function. Use the + and - buttons to adjust the time.
If you prefer a less tangy yogurt, start with 10 hours. For tangier yogurt you'll want to experiment with 12, 13, or even 14 hours of incubation. I typically do 12 or 13 hours.
See the Tips below for the best time of day to start this process!
Cashew Yogurt Tips
- Begin the process after dinner time, so your Instant Pot isn't tied up all day.
- Consider using a new capsule(s) of probiotic each time.
Many people like to use a small amount of yogurt from an existing batch as the culture for the next batch. But I've read that with certain non-dairy yogurts this doesn't always work. So for cashew yogurt and for the sake of consistency, I like to use a fresh capsule of probiotic each time. - Choose the right kind of probiotic. We always have a bottle of Jarro-dophilus in the fridge, so it's easy to just grab a new capsule (or two, depending on the strength). I've been using their products for almost 20 years, so I'm comfortable with the brand, and it's easy to find.
I recommend one of the high potency, multi-strain Jarro-dophilus products like the one linked above. It contains L. acidophilus and B. lactis, two strains important for making yogurt.
Troubleshooting
Make sure your utensils and other equipment are clean, and pay close attention to each step to avoid contamination.
- Heating the cashew milk is critical. This kills any unwanted bacteria or mold spores that may have made it into the milk via the blender, cashews, or air. Heating also activates the starches which thickens the yogurt.
- Avoid double dipping spoons or dipping fingers into the cashew milk once it has been heated.
- Cover the jars, and leave a bit of space between the lid and the yogurt.
I've successfully made yogurt in the Instant Pot leaving the jars uncovered, but if you've recently made spicy or very fragrant food in your Instant Pot, those odors can impact the flavor of your yogurt. Covering the jars keeps the odors out. - Trust your nose and eyes. Yogurt should smell tangy and appealing, not sour or "off." Bad bacteria can make it into the yogurt any number of ways, and then multiply during the culturing process. If in doubt, throw it out.
- If the yogurt develops a pinkish color, often referred to as "pink mold," this indicates contamination with bacteria, and the yogurt should be discarded.
- If your first batch doesn't work, don't give up! Review your process and environment, and identify potential ways bacteria made it into the yogurt or what else may have gone wrong.
- Remember, different buildings and environments have varying levels of bacteria and mold in the air. You may need to take extra precautions with the next batch. Sterilize the jars, lids, and all utensils. And while the milk is cooling (before adding the probiotic) place the pot in a safe spot where there isn't a lot of activity and air flow.
Most importantly, don't let these tips scare you away from making yogurt at home. Once you get the hang of the process, it really is easy!
My job is to share as much information as possible to help you make perfect yogurt every time!
How to Make Vegan Greek Yogurt
The easiest way to make a super thick, Greek-style cashew yogurt is to simply decrease the amount of water, increase the cashews, or do a little of both.
Remember, cashews contain starch that naturally thickens when heated. So when the ratio of cashews to water increases, so does the thickness of the yogurt.
For a thicker Greek-style yogurt, use 1 ¼ cups cashews, and decrease the total amount of water to 3 cups. This ratio is flexible. After you try it once, feel free to adjust the amounts until you get the consistency exactly how you like it.
How to Make Yogurt Without a Yogurt Maker
While a yogurt maker or Instant Pot with the yogurt function makes the process super easy, it's certainly not the only way to make yogurt at home!
The goal is to keep the cashew milk around 100 to 110 degrees F. Here are a few alternative ways to do it:
- Fill an insulated cooler with warm water (110 degrees) up to the necks of the jars, and keep the cooler closed.
- Place the jars in a draft-free spot in the house. Wrap them with a towel, and wrap a heating pad around the towel. Set it on low, cycling it on and off as needed so it doesn't get too warm.
- Pre-heat a slow cooker, then turn it off. Line it with a towel, and set the jars on the towel. Cover with the lid and another towel for extra insulation. Occasionally turn on the "warm" function if needed.
- Find a warm, sunny spot in the house. Wrap the jars with a towel, and place in the sun.
Storage
Store the jar(s) of yogurt in the refrigerator and use within 1 week.
As with any yogurt, some liquid might separate during storage. Either discard it, or stir it back into the yogurt.
You Might Like
- Tofu Yogurt
- Almond Milk Yogurt
- Vegan Yogurt Cake
- Mango-Mint Yogurt Smoothie
- 2-Minute Easy Vegan Yogurt Oats
- Mashed Sweet Potatoes With Yogurt
- Oil-Free Vegan Aquafaba Mayo
- Healthy Oil-Free Granola
Recipe Video
If you try this cashew yogurt recipe I would love to hear from you! Leave a comment and star rating below to let us know! ⭐️⭐️⭐️⭐️⭐️
Recipe

Instant Pot Cashew Yogurt
Ingredients
- ¾ cup raw whole cashews - See Notes for Greek-style.
- 3 ½ cups water, divided
- 1 to 3 capsules vegan probiotic (the type with powder inside); aim for 20 to 30 billion live bacteria (see Tips in post above) - I like Jarro-dophilus high potency, multi-strain, allergen-free; find it in the refrigerated section of most health food stores.
- 2 tablespoons arrowroot or tapioca starch, optional - This produces a slightly thicker yogurt.
Instructions
- If not using a high-speed blender, soak cashews overnight or soak in hot water for 2 hours. Drain and rinse.
- In a blender combine cashews with 1 cup water. Blend for 30 seconds to 1 minute, then stop to scrape down the sides, if needed. Blend for another minute or until completely smooth. Add remaining 2 ½ cups water (alter for Greek-style; see Notes), and blend to combine.
- If using arrowroot or tapioca, add it to the blender, and blend for a few seconds to incorporate.
- Pour the cashew milk into a non-reactive sauce pan (stainless steel is fine), and bring it just to a low boil. Whisk frequently as the milk is coming to temperature. Be sure to scrape the bottom and corners of the pan where the cashew milk will thicken first. Once it's simmering, reduce the heat to maintain a simmer and cook until thickened and creamy, about 2 minutes. Remove from heat. NOTE: If not using a thickener, the cashew milk will still thicken slightly due to the starch in the cashews.
- Allow the milk to cool for about 30 minutes or until it reaches 100 to 110 degrees F. If you don't have a thermometer, use a clean spoon and taste the mixture, or drop a bit onto your wrist to test the temperature. If it feels barely warm (similar to body temperature) but not hot, it's safe to add the probiotic. If the mixture is too hot it will destroy the probiotics.
- Open the probiotic capsule(s), and sprinkle the powdered contents onto the cashew milk. Discard the capsule(s). Whisk the probiotic powder into the milk. Immediately pour into clean jar(s), but don't fill all the way to the rim. It's best to leave a bit of space so that the yogurt is not in contact with the lid. Cover with clean lid(s).
- *If not using an Instant Pot use one of the methods described in the Notes section below.* Otherwise, place the jars in the Instant Pot (no need to add water) and close the lid. You don't need to turn the vent knob to sealing. Press the Yogurt button, and use the +/- buttons to adjust the time. For less tangy yogurt, try 10 hours (this is the default time for some IP models). For extra tangy yogurt choose 12 to 14 hours of incubation. Don't disturb the yogurt during this time.
- When the timer beeps, remove the jars from the Instant Pot. Place on the countertop to cool for a few minutes, then refrigerate. The yogurt will thicken more once chilled. Always use clean utensils when scooping out individual portions. Keep the yogurt refrigerated, and enjoy within 7 to 10 days.
Notes
- Fill an insulated cooler with warm water (110 degrees) up to the necks of the jars.
- Place the jars in a draft-free spot in the house. Wrap them with a towel, and wrap a heating pad around the towel. Set it on low, cycling it on and off if needed so that it doesn't get too warm.
- Pre-heat a slow cooker, then turn it off. Line it with a towel, and set the jars on the towel. Cover with the lid and another towel for added insulation. Occasionally turn on the "warm" function if needed.
- Find a warm, sunny spot in the house. Wrap the jars with a towel, and place in the sun.
Estimated Nutrition (per serving)
Nutrition information is an estimate and will vary depending on the exact amounts and specific products and ingredients used.



PJ
Ok. Newbie to making yogurt and to healthy eating in general but I am determined to succeed in my new health journey. Please forgive me as I feel this question is probably very stupid: can I use store bought, organic cashew milk vs making my own?
Lori Rasmussen
Hi PJ - Not a silly question at all. In fact, I need to update the post and recipe to address common questions like that. The only reason you may want to avoid store-bought milk is that they often contain gums. There's a chance the gums can cause issues with the consistency of the yogurt. But if you have access to a cashew milk that doesn't contain gums it should be fine. Best of luck on your healthy journey!
MamaP
Help! I got the the jarring step before realizing there’s no yogurt option on my Instant Pot. What should I set it to?
Lori Rasmussen
In that case it will be better to use one of the other methods described in the Notes and in the post above. Another option would be to periodically cycle the Instant Pot's "warm" setting on and off. I think it would probably be too warm to leave it on, but you could turn it on for a few minutes to let the inside of the IP warm up, then turn it off, place jar inside, and with the lid on it should retain heat inside fairly well. You could try cycling it on for a few minutes every hour - but that's just a guess.
Tone
This makes perfect cashew yogurt. It rivals Forager's yogurt and for much less, with less plastic waste. I double and sometimes triple the recipe. The thickening on the stovetop is key. I don't use any other thickening agents. After letting it cool I put into glass jars and place outside wrapped in towels for 6-8 hours (checking it a couple times to make its not too hot). I'm so happy to have found this recipe!
Maggie
Thank you, Lori! Followed your recipe exactly and voila...perfect Greek yogurt! My previous attempts with other instant pot recipes were such failures. Success! Yay ! Awesome!
Tangy. Beautiful. Thick. Delicious. Yummy Yogurt! Thank you for great detail for a healthy recipe. 😊
April Amiel
I’m so sad, my yogurt has mold spots on top :(. Any idea why this happened?? I followed the directions exactly for instant pot, took the jars out after 11 hours and popped them in the refrigerator. Let them chill overnight, and when I went to try it in the morning, they were pink and yellow mold spots on top. Any thoughts? I’ve never used the yogurt setting on my instant pot before. Maybe I did something wrong there? Pretty sure all my equipment was clean.
Lori Rasmussen
Hi April - I would encourage you to review the "Troubleshooting" section above, and definitely try again! It's not necessarily something you *did* - most likely the mold spores came from the air or a surface that contacted the cashew mixture. It's a common problem in yogurt making, including dairy yogurt. It happened to me once, but I haven't encountered it again. So don't give up! Review the instructions and pay extra attention to cleanliness next time.
John
We make this receipe every week,thank you, very delicious,and very economical versus purchasing at the store
Jen
This is fantastic and easy! Any luck with using a bit of it for a starter for the next batch, or do you think it’s much better to use a new capsule every time?
Noreen Norton
I also make soy milk yogurt and I love it! I culture it in my dehydrator. You have me thinking...I wonder if I could add some cashew milk to the soy milk (which I also heat) to thicken it to a greek yogurt consistency?
Lori Rasmussen
Hi Noreen - I've only tried that combination once, and it didn't thicken as much as expected. It might be that my ratio just needed tweaking. It could have been a fluke, or it might be that the cashews interfere with the proteins in the soy milk enough to mess with the way it normally sets. I'm not really sure, but I do think it's worth a try!
Jennifer
OMG!! I got my first Instant Pot a few months ago and love it. I didn't even notice the yogurt option! I'm really excited to try this. I just started making my own cashew milk and it's delicious, yogurt will be fabulous. I just got some of the vegan yogurt starter. Thanks for the article, it's bookmarked!
Thea G
I just bought my first pressure cooker just for yogurt. The recipe turned out perfect. Tangy and creamy - and so easy! Many, many thanks!
Irena
Hi, this was my first time. I think perhaps I made a few mistakes. I used a milk bag for removing the pulp since I don’t have a high power blender (was concerned it would be too grainy). Also, I added vanilla and maple syrup before heating up. I put 8 capsules to reach 50 billion of the probiotics ( same brand you use, maybe too much?). I also tasted a few times when it was cooling down maybe it got contaminated?). I don’t have an instant pot yet, used yogurt maker for 10 hours. The yogurt ended up sour/acidy, almost spoiled, and completely runny; had to throw it away:(. Thank you so much for any advice!
Lori
Hi Irena,
My first piece of advice is to NOT give up! Definitely try again. For some reason, making yogurt seems to be an activity that takes many people 2 or 3 tries. That's why I try to give very specific instructions, but anytime we're fermenting/culturing something, there can be other factors at play that we just don't think of.
Regarding the consistency, that would either be caused by straining away too much of the cashews and/or not heating the mixture enough to activate the starches. Did you include the optional starch? If not, I would definitely do that next time since you might be straining away some of the natural cashew starch.
And with the extra sugar you added from the maple syrup, I do think you could reduce the amount of probiotics added - because the sugars act as a booster. So that might be why it was very sour.
And yes, it's always a good idea to be extra cautious about contamination. I hope these tips help and that your 2nd attempt turns out perfectly!
Irena Cafasso
Hi Lori ,
Thank you so much for the advice and encouragement! I will try again:). I also ordered instant pot, so hopefully that will help too. I did add the arrowroot powder, but I think not enough, and makes sense about the straining and decreasing the amount of the probiotics tablets . Thanks again:)
Cathy
Store bought vegan yogurt is so expensive. This was super easy and so tasty. Thank you, Dee, for the hint to put it in the microwave to ferment. This is amazing!