
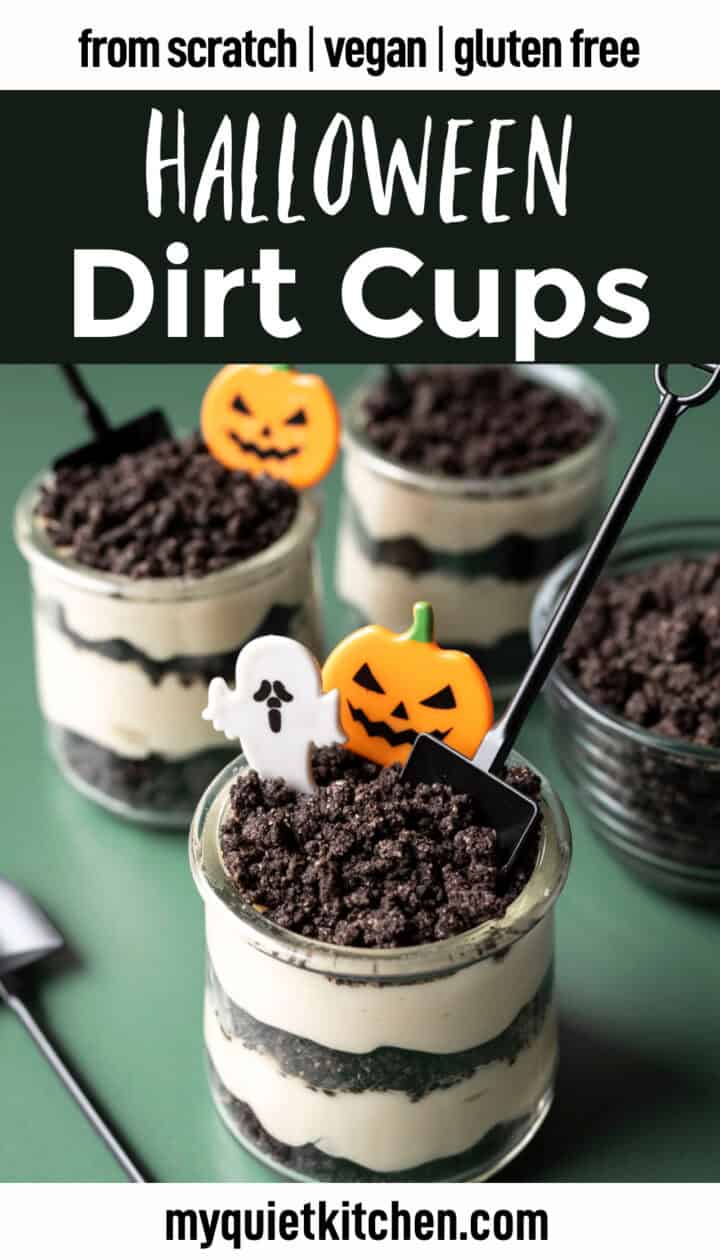
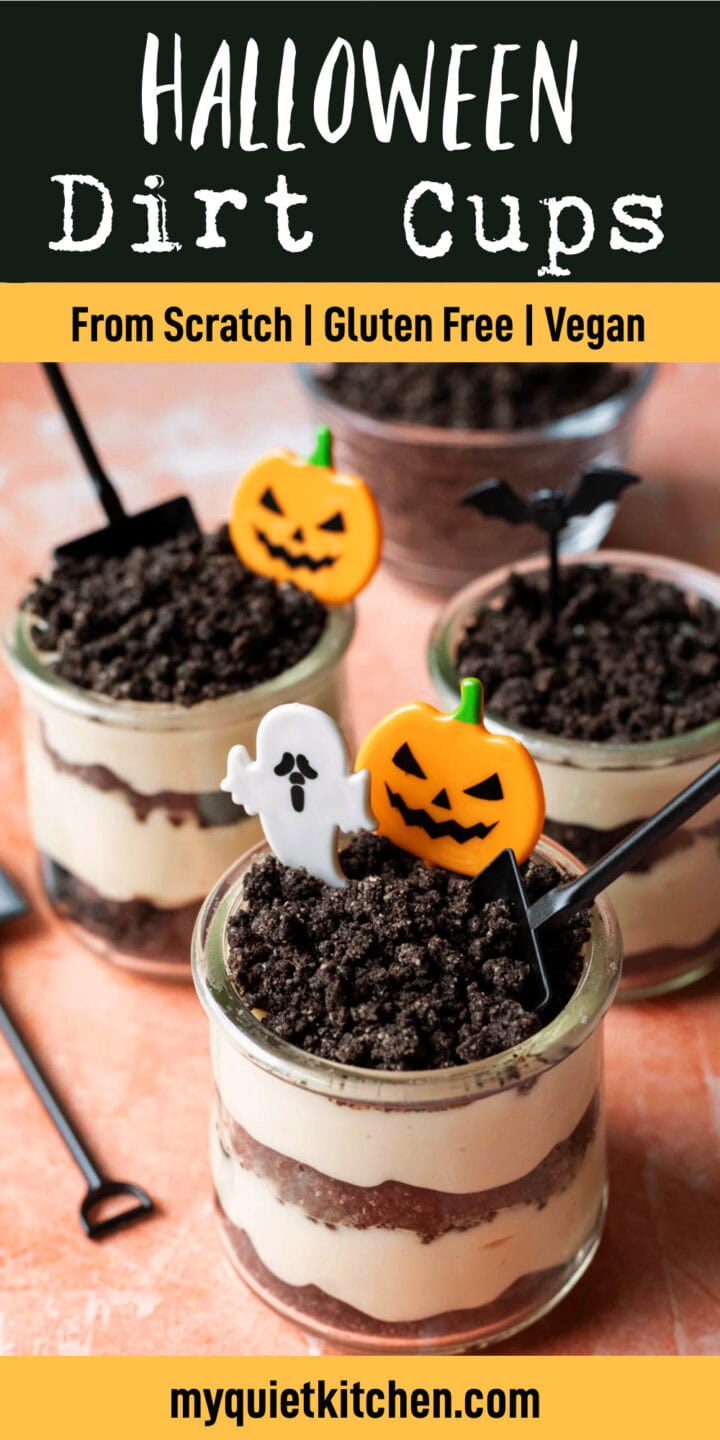
These dirt cups are a fun throwback dessert, but with a completely homemade, vegan, and gluten-free twist! No Oreos, pudding mix, or whipped topping needed. Dirt pudding cups are perfect for Halloween parties or decorated for other holidays and themes throughout the year.
Oh, and don't worry...even though we're making the dirt and pudding from scratch, prep is still easy!

After sharing my 5-ingredient black cocoa cookies a couple of weeks ago, I couldn't stop thinking about other fun ways to use the deep, Oreo-like flavor of black cocoa. With Halloween just around the corner, dirt cups were a no brainer!
Like a lot of us, I grew up on the version made with pudding mix, Cool Whip, and crushed Oreos.
These days, I enjoy creating vegan desserts from scratch, usually with a healthier (or at least somewhat-more-wholesome) twist. So when I decided to make dirt cups, I knew I wasn't going to just crumble some Oreos on top and call it a day.
Then I thought, why not skip the cookie step altogether and go straight to the crumbly dirt?!
A couple of test batches later, I had a crispy, crunchy, Oreo-like mixture made with almond flour, black cocoa powder, and a touch of sweetener. Ta-daaaa! Take that, cookies.
Why You'll Love It
Layered with a silky and rich vanilla pudding, these healthier dirt cups taste remarkably like the original! Plus, the recipe is just as versatile.
Want to keep things simple or mix it up? You can pair the homemade pudding with store-bought cookies like Oreos or Newman's O's, or use your favorite instant pudding mix with my black cocoa "dirt."
See the Flavor Variations section below for more ideas and ways to make it your own.
Jump to:
What You'll Need
For the "dirt" mixture:
- black cocoa powder - this is basically an extra-alkalized cocoa, and it's the key to making the dirt taste like Oreos. Sub Dutch-processed if needed.
- almond flour - this is the main ingredient in our dirt, and important for the crispy texture since it's replacing both the flour and fat found in cookies. I can't recommend any substitutions.
- oat flour - my first test batch was all almond flour, but I wanted to reduce the amount needed since it is kind of pricey. Oat flour seemed like a good choice that would also crisp up, and it did. Feel free to replace it with additional almond flour, or try another flour, at your own risk. Mwahahaha.
- maple syrup - this binds and sweetens, but we can't use too much or the dirt is too moist.
- granulated sugar - an extra bit of sugar makes the mix taste more like Oreos and keeps it nice and crisp.
And for the pudding:
Want to save this recipe? 📩
Keep an eye out for more delicious recipes. Unsubscribe anytime.
- non-dairy milk - any unsweetened variety will work. For the richest consistency and a neutral flavor, I like to use a blend of soy milk and oat milk.
- raw cashews or blanched almond flour - if you're avoiding nuts or want to reduce the fat, a basic vegan vanilla pudding works, too. I wanted the dirt cups to be richer, since the classic version is quite rich! Cashews are the creamiest and naturally help thicken the pudding.
- lemon - as a nod to the cream cheese found in classic dirt cake, a little bit of lemon juice brightens up the vanilla flavor without making the pudding taste too tart or lemon-y.
- sugar - choose regular granulated sugar for the most neutral flavor. I use this organic cane sugar. Feel free to use another type of sweetener, as long as you don't mind a change in the color and flavor of the pudding.
- cornstarch - this thickens the pudding and helps it set. Arrowroot starch is a good substitute if you need a grain-free option.
See the recipe card below for quantities and full step by step instructions.
Recommended Equipment
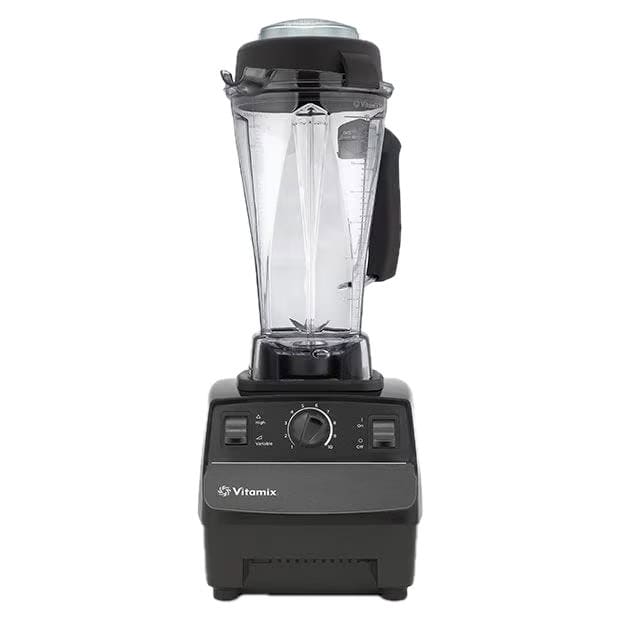
High Speed Blender
I've been using this Vitamix for 12 years, and mine is still going strong! It's perfect for making extra creamy vegan desserts, dressings, sauces, and smoothies.
How to Make Dirt Cups From Scratch
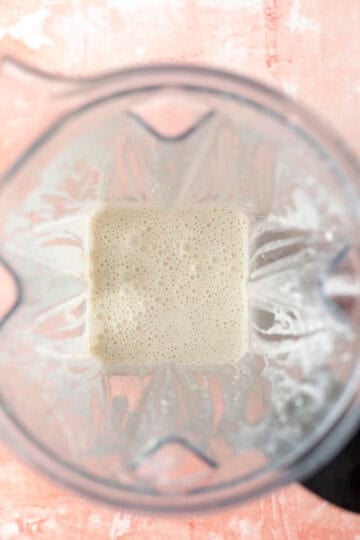
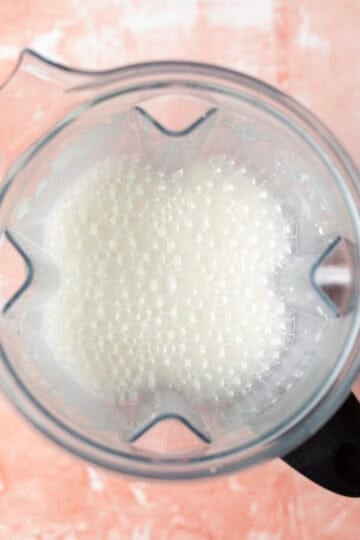
- Blend 1 cup of the milk with the cashews (or almond flour) until smooth.
- Add everything else except the starch and blend again. Taste for sweetness, then add the cornstarch and pulse to combine.
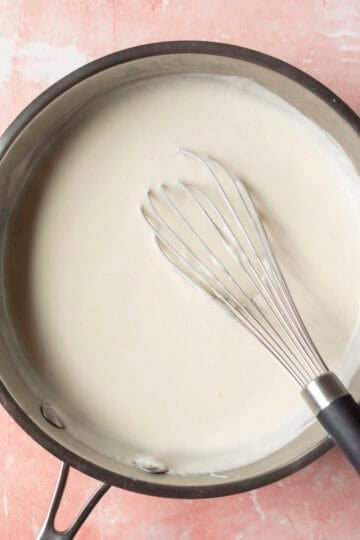
- Pour into a large heavy-bottomed pot. Over medium-low heat, and whisking frequently, heat the mixture until thickened, about 12-15 minutes. Pour into a container, and press a piece of plastic wrap on top to prevent a skin from forming. Refrigerate until cold, at least 4 hours.
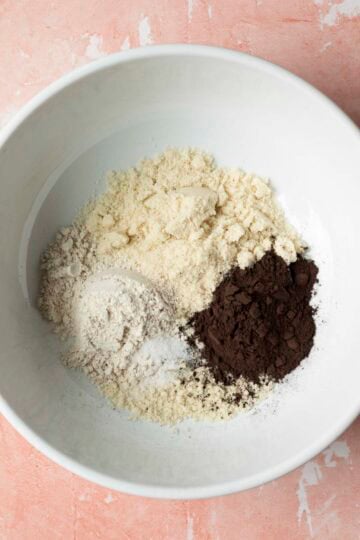
- Now, it's time to make the dirt. Combine the dry ingredients in a large mixing bowl and whisk well.
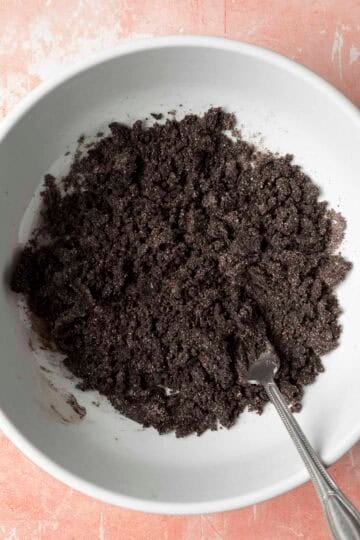
- Add the maple syrup and use a fork to cut it into the dry mixture. It will seem dry at first, but just keep mixing until it resembles crumbled Oreo cookies.
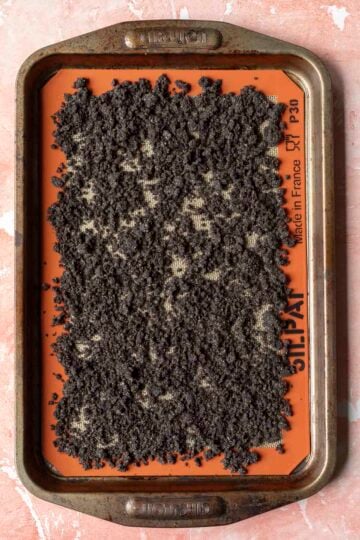
- Spread on a baking sheet lined with parchment paper or a silicone mat. Bake in a 350°F oven for about 7 minutes or until just starting to get crisp. It will continue to crisp up as it cools.
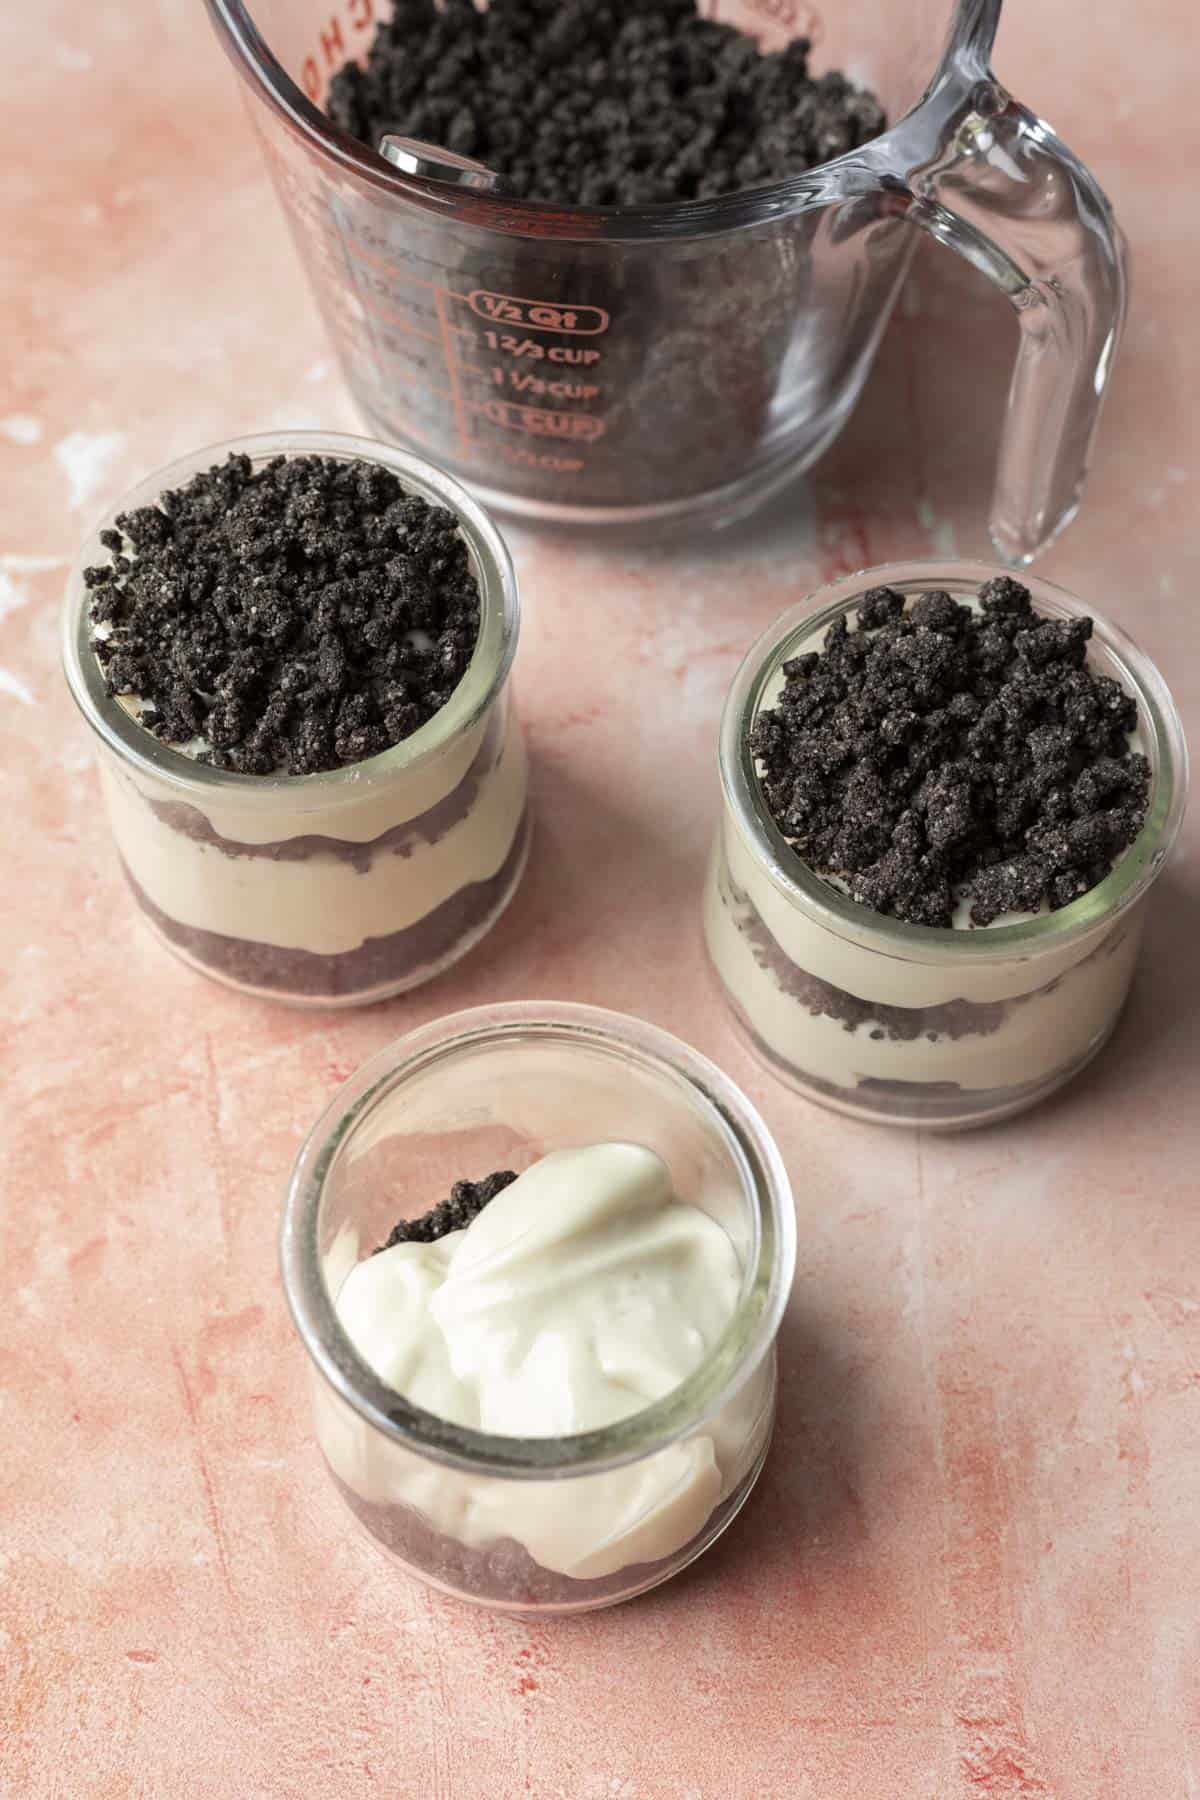
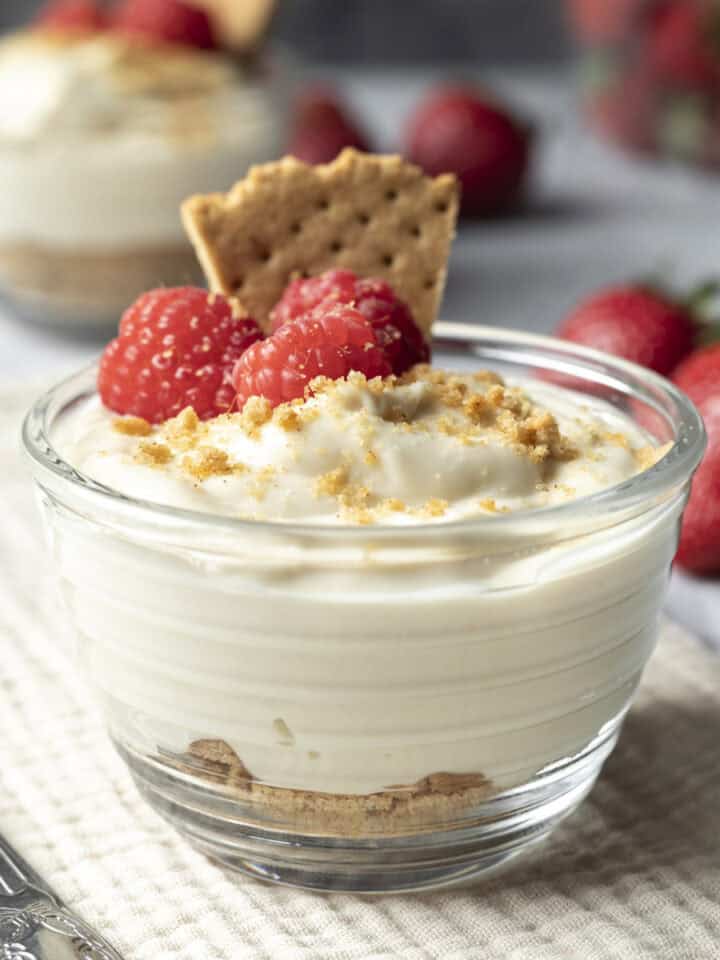
- Once the pudding is cold, you're ready to assemble your dirt cups! I like to add a layer of dirt on the bottom, followed by pudding, more dirt, more pudding, and dirt on top. Decorate as desired and serve now, or keep refrigerated until ready to serve.
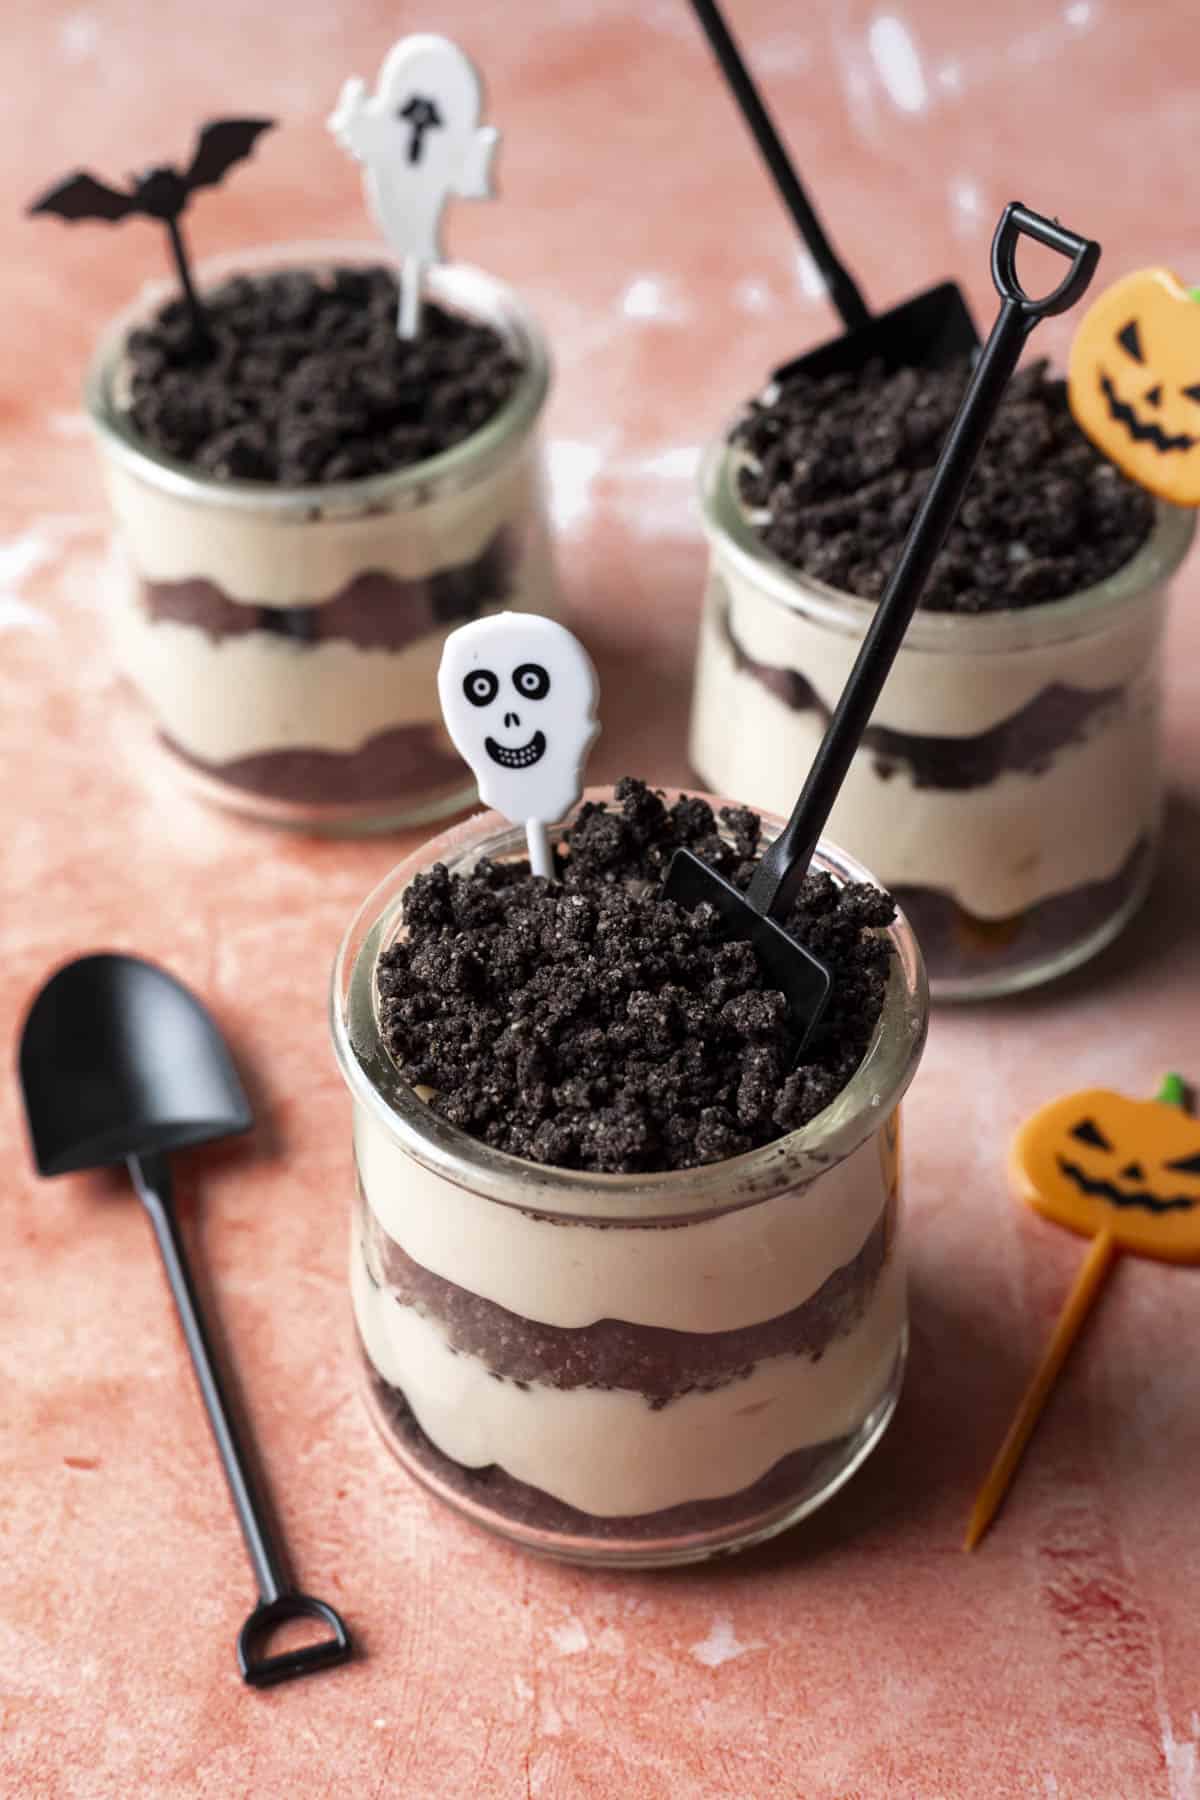
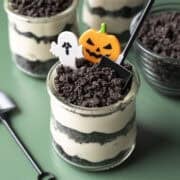
Serving & Decorating Ideas
Dirt pudding cups are all about fun presentation! Spoon the layers into small glass jars, ramekins, or clear cups so everyone can see the contrasting layers. Top with extra "dirt," a sprig of mint, or go full Halloween mode with gummy worms, candy pumpkins, plastic tombstones and other spooky graveyard decorations.
I found the shovels and tombstones and plastic picks/cupcake toppers on Amazon.
If you're looking for a fun Halloween dinner idea, don't miss these delicious (and adorable) Jack O'Lantern stuffed peppers!
Flavor Variations
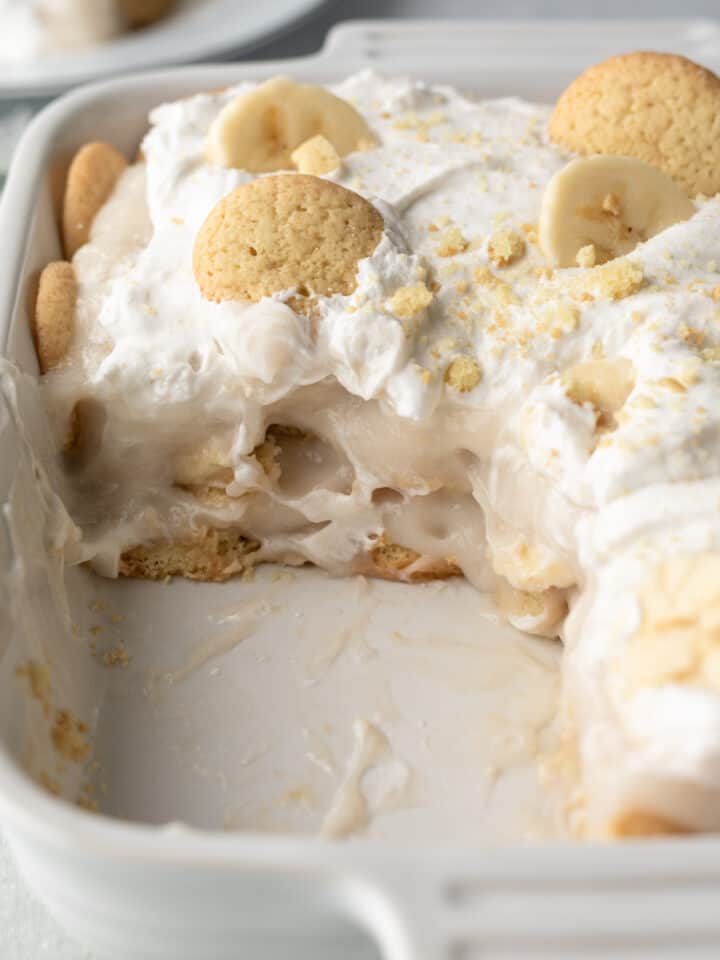
Different puddings: Try peanut butter, mocha, or chocolate pudding for a twist, or add thinly sliced banana between the layers. I love this combo because it's basically like vegan banana pudding meets Oreos!
Vanilla sand cups: For a "sand cup" look similar to recipes that use golden Oreos, omit the cocoa and add a generous pinch of vanilla powder to the almond flour mixture. It's perfect for beach themes, summer parties, or baby showers.
Other additions: Add crushed freeze-dried fruit to the sand or pudding for color. Sprinkle in chopped nuts or mini chocolate chips for extra texture. Around the holidays, peppermint extract and crushed candy canes make them feel festive!
Make Ahead & Storage
The pudding and "dirt" layers can both be made a day in advance, which makes these great for parties. Keep the pudding covered in the fridge and store the crumb mixture at room temp in an airtight container.
Assemble the dessert cups just before serving so the "dirt" stays crisp. Although, honestly it's still good even a little softer. Leftovers will keep in the fridge for up to 3 days
Can I make it in a 13x9 dish?
This recipe makes enough pudding and "dirt" for about 6 individual cups, or you can layer it all in an 8- or 9-inch square dish. Because these components are made from scratch (no Cool Whip or pudding mix), they don't have as much bulk as the classic version.
So if you're thinking about using a 13x9 casserole dish, just know you'll need to make 2 to 2.5 times the amount. The dirt is easy to double - just use two baking sheets. For the pudding, that volume will require blending and heating in batches.
I hope you enjoy this homemade take on vegan dirt cups! If you make the recipe or try any fun variations, be sure to comment below and let us know!
Recipe
Vegan Dirt Cups From Scratch (Gluten-Free)
Equipment
Ingredients
For the vanilla pudding:
- 2¾ cups unsweetened non-dairy milk - I like a combination of soy and oat milk
- 1 cup raw cashews - or blanched almonds or almond flour
- ½ cup sugar - see Notes for subs
- 2 Tablespoons fresh lemon juice
- 2 teaspoons vanilla extract
- ½ teaspoon fine sea salt
- ¼ cup cornstarch - or arrowroot
For the dirt:
- ½ cup blanched almond flour - packed
- ¼ cup oat flour - or additional almond flour
- 3 Tablespoons black cocoa powder
- 4 teaspoons sugar
- ¼ teaspoon fine sea salt
- 3 Tablespoons maple syrup
Instructions
Make the pudding:
- Tip: For easier blending, cover the cashews with boiling water and soak 1 hour, then drain. If using a high speed bender, soaking isn't necessary.
- Combine 1 cup of milk and the cashews in a high speed blender. Blend for about 1 minute or until smooth. Add the remaining 1¾ cups milk, sugar, lemon juice, vanilla, and salt. Blend again until completely smooth. Taste for sweetness and acidity and adjust as desired. Add the cornstarch and blend for a few seconds.
- Pour the mixture into a heavy-bottomed pot. Over medium-low heat and whisking frequently, slowly heat the pudding until thick and creamy. This should take about 12-15 minutes. Heating it too quickly can scald the milk and cause lumps. Once thickened, remove from heat and transfer to a large bowl or glass container. Press a piece of plastic wrap on the surface of the pudding to prevent a skin from forming. Refrigerate until chilled, 4 hours to overnight.
Make the "dirt:"
- Preheat the oven to 350 degrees F (175°C), and line a baking sheet with a silicone baking mat or parchment paper.
- In a mixing bowl whisk together the almond flour, oat flour, black cocoa powder, sugar, and salt. Add the maple syrup, and use a fork to thoroughly mix it into the dry ingredients. It will look dry at first, but just keep mixing until it resembles crumbled Oreo cookies.
- Spread evenly on the baking sheet, making sure it's not crowded. Bake for about 7 minutes or until it's just starting to seem crisp. It won't be fully crisp until it cools. Allow to cool completely before assembling the dirt cups or storing.
Assemble dirt cups:
- There are no hard rules about how to layer dirt cups, other than finishing with dirt on top! I like to start with a layer of dirt on the bottom, followed by pudding, more dirt, more pudding, and dirt on top. Decorate as desired and serve now, or keep refrigerated until ready to serve.
Notes
Estimated Nutrition (per serving)
Nutrition information is an estimate and will vary depending on the exact amounts and specific products and ingredients used.

Alicia F says
The recipe is confusing regrading how much milk. In the ingredients it states 2 3/4 cups of milk but in the instructions it says 1 cup. Can you please clarify?
Lori Rasmussen says
So sorry about that omission. The remaining amount of milk should be added along with the sugar, etc, before being heated.
Rebecca says
I actually had all of the ingredients on hand and made a test batch of this for my kids, THEY LOVED IT!!! I am definitely going to make this again for a Halloween party. I haven't decided if I will do them individually or in one pan. Thanks, the pudding is DELICIOUS!
Kathy says
I can't wait to make this. Finally a healthy version. Thanks for your design of the recipe.