
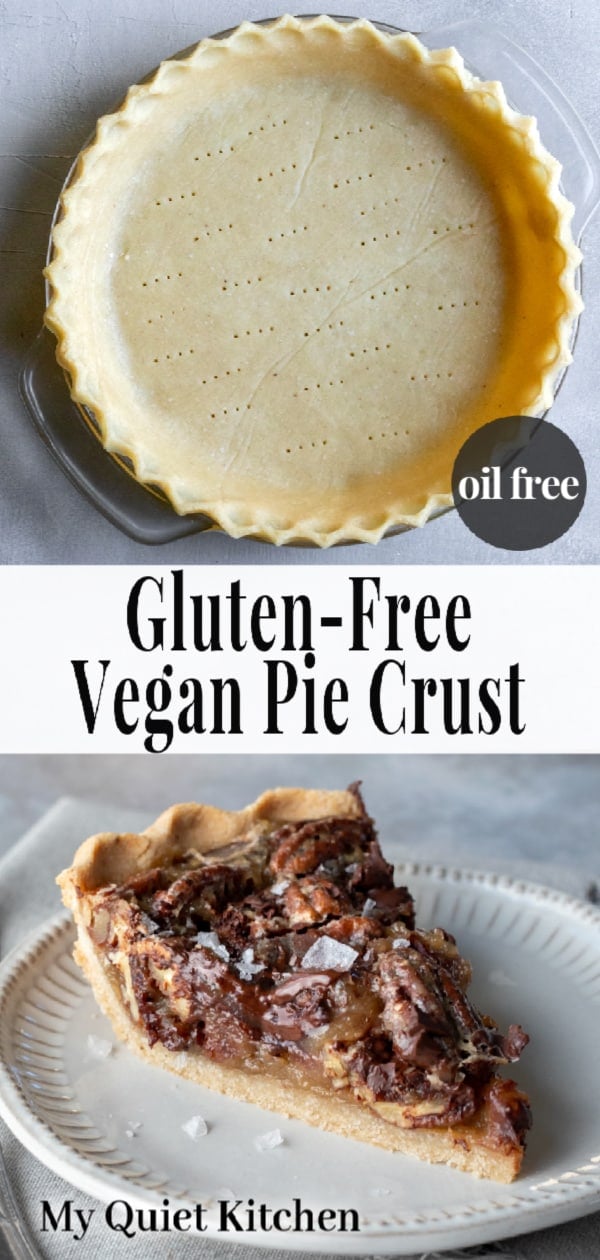
This healthy pie crust is so good no one will believe it's gluten-free, dairy-free, AND oil-free! Even if you don't *need* a pie crust with these characteristics, you'll fall in love with this one because it's the perfect combination of easy and delicious! One bowl, no fancy equipment, and no need to keep everything cold. Perfect for both sweet and savory recipes.
Why You'll LOVE It
This almond flour pie crust has me SO excited about pies! Can you tell?
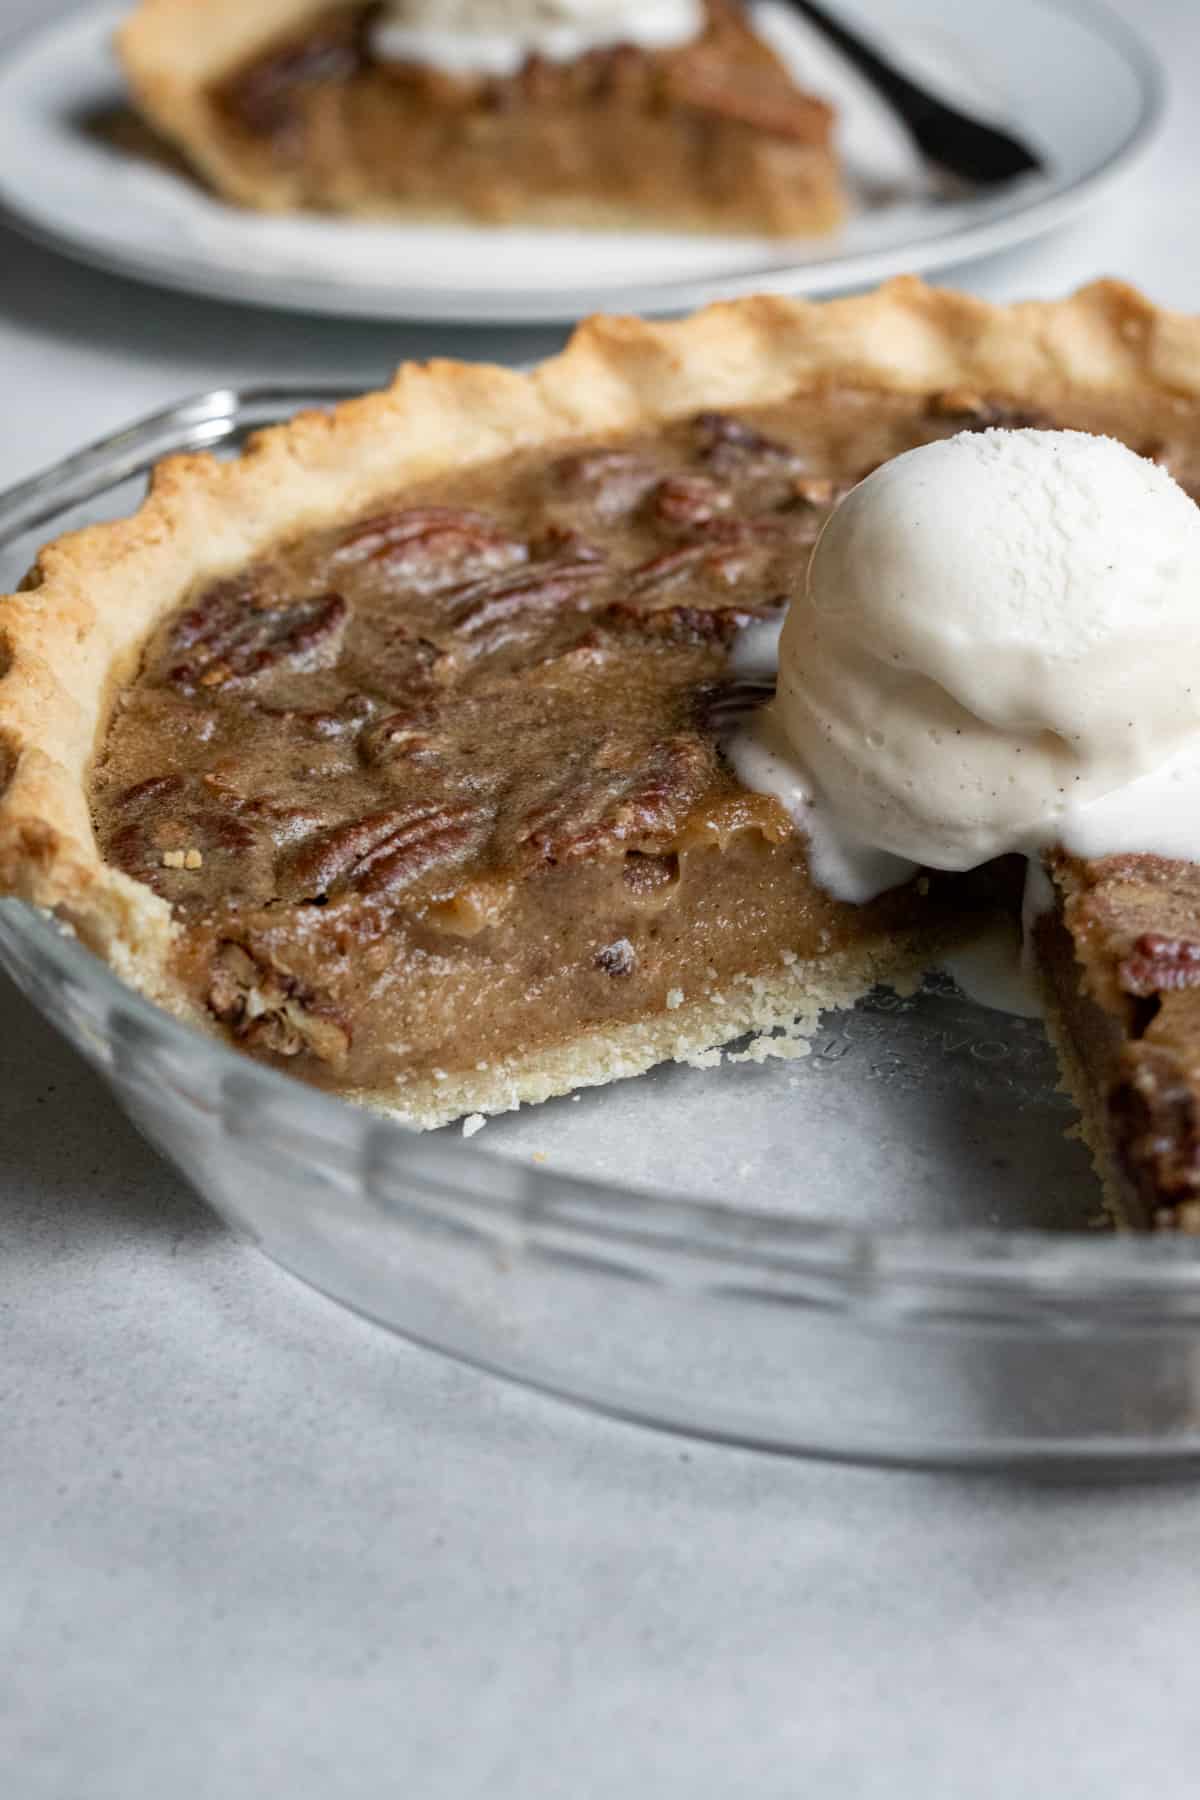
My mind is swimming with possibilities, like lemon, coconut, chocolate, pumpkin, pear, salted chocolate pecan, and even healthy pecan pie!
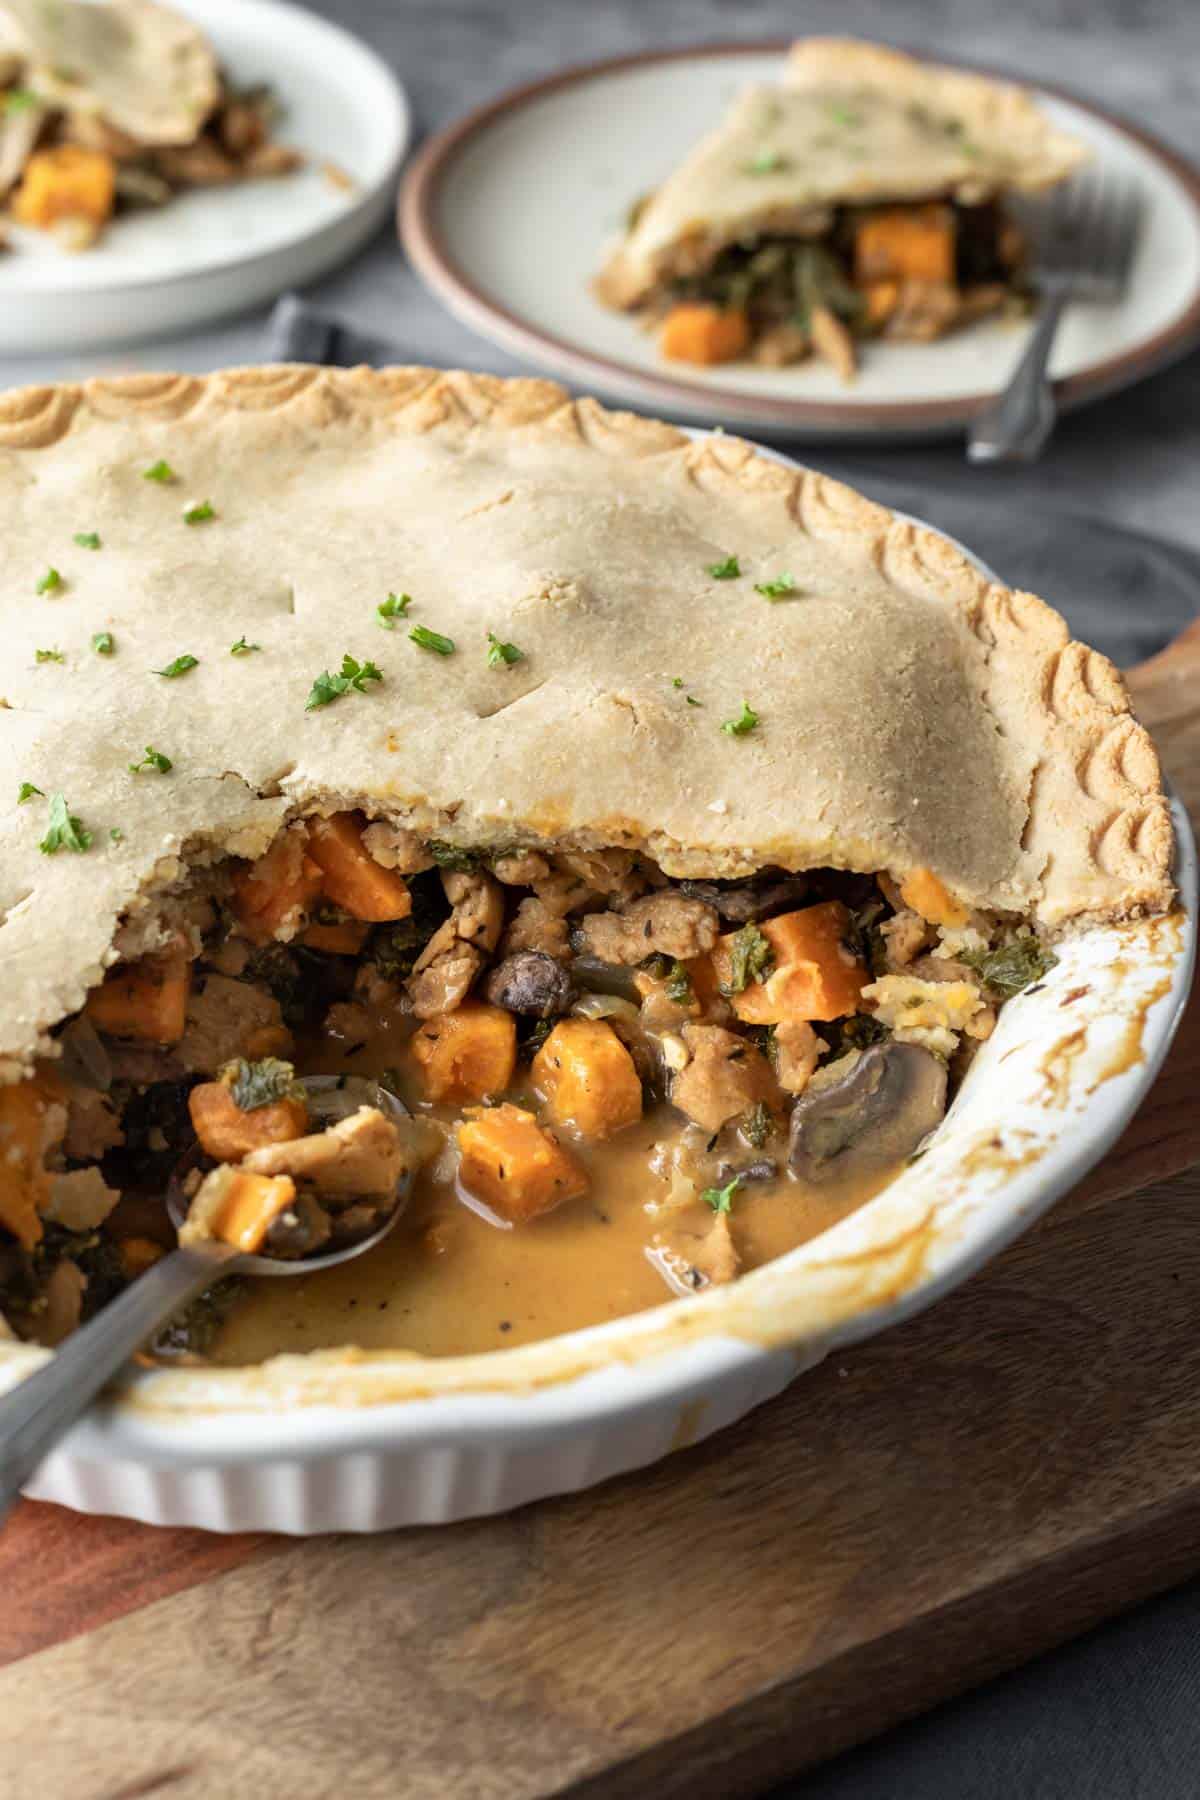
And then there are the savory goals - tomato, kale, pot pie, and quiche.
Before we get into the easy step by step process, let me summarize for you exactly why I love this pie crust recipe and think you will, too!
- It contains no butter, oil or shortening yet still tastes buttery and rich.
- It looks just like traditional, white flour pie crust. If you're serving skeptical family and friends, you can imagine why this is important. The rice flour and tapioca starch combine with the almond flour to create the lovely, soft white color everyone is used to. And the natural fat in the almond flour creates a flaky, irresistible, almost shortbread-like texture.
- When I say this pie crust is easy, I'm not exaggerating. Even some experienced bakers find pie crusts intimidating, but this one will be your new best friend. There's no need to pre-chill the ingredients or equipment, and you don't have to rush or worry about your hands warming up the dough. You also don't have to worry about overworking the dough since we're not dealing with gluten.
- No need for pie weights! While traditional pie crusts tend to slump and slide down the sides of the pie plate during prebaking, this one stays exactly where you put it.
- The dough is very forgiving. You can literally just tear off pieces of dough to patch holes or imperfections.
- Use your favorite granulated sweetener, such as coconut, date, or organic cane sugar. Omit the sugar if using this crust with a savory recipe.
- Other gluten-free pie crusts made with 1:1 flour blends can be bland and gummy (and they require added fat), but the texture provided by almond flour is spot on.
- There's no need to oil the pie plate thanks to the natural fat content in almond flour.
- And if you're okay with gluten and follow a whole-food plant-based diet, you can replace the rice flour with a whole grain flour like spelt or whole wheat.
Can't do almond flour? Check out this nut-free vegan pie crust (made with sunflower seeds) or this gluten-free oatmeal pie crust.
Jump to:
How to Measure Almond Flour
Even though this crust is seriously easy, we are still baking. For a successful pie crust, it's important to measure accurately and pay attention as you move through the steps.
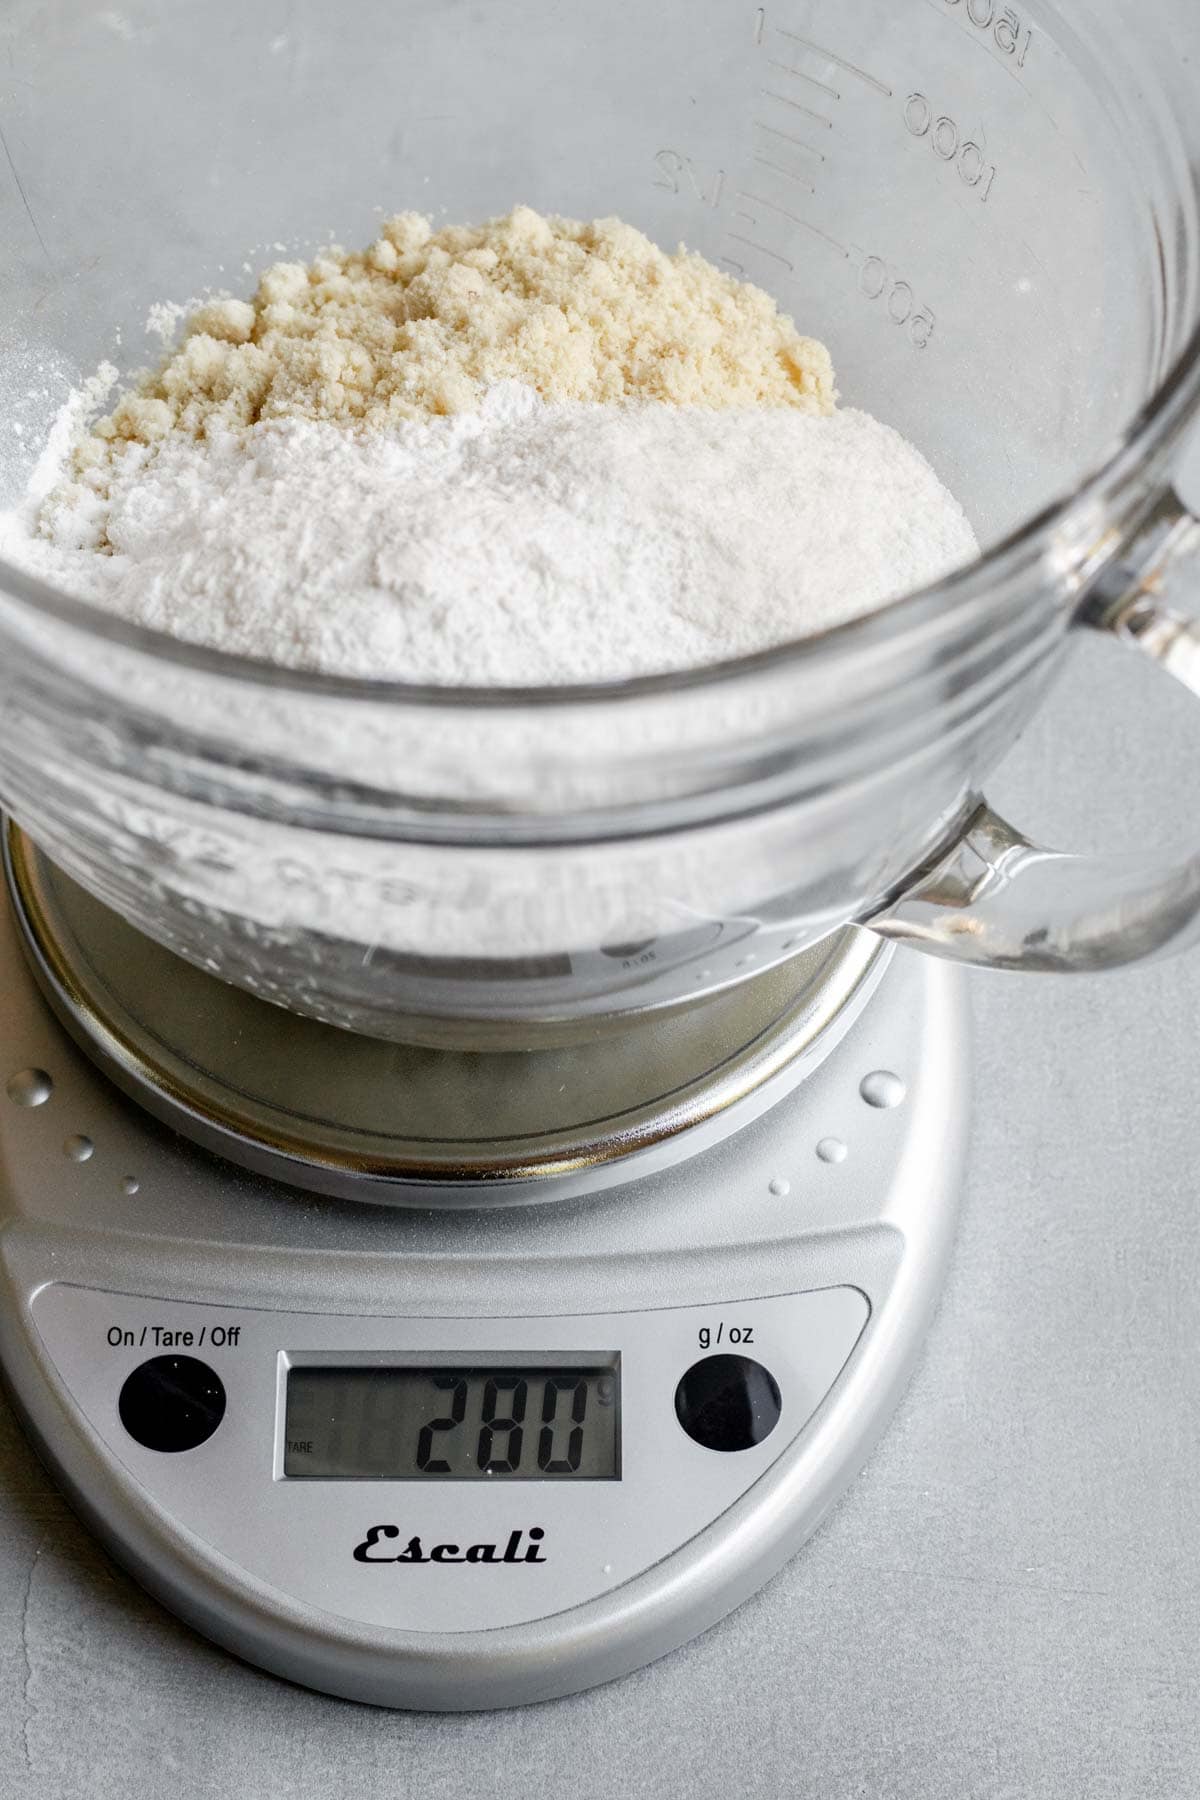
For the easiest prep and most consistent results every time, I highly recommend using a kitchen scale.
I use this affordable Escali digital scale. It's usually around $25 on Amazon, and there are plenty of other inexpensive options out there, too.
If you don't have a scale, thankfully, measuring almond flour is different than measuring other flours. So it's pretty easy to get an accurate amount even without a scale.
Instead of whisking the flour and then spooning it into the measuring cup, like you would with all-purpose flour, measure almond flour more like you would brown sugar. Scoop it up, and then lightly pack it into the measuring cup.
Step By Step Tutorial
If you're a visual person, be sure to watch the video (just before the recipe) to see the whole process in action.
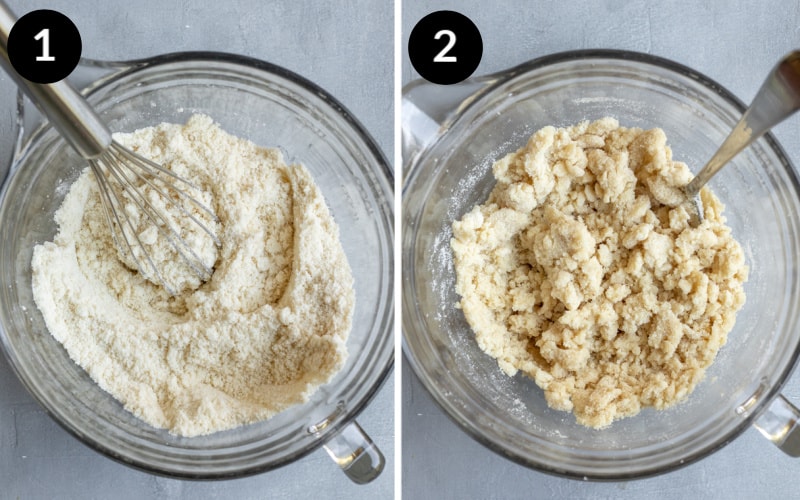
Step 1: Whisk together the dry ingredients - almond flour, white rice flour (or substitute), tapioca starch, salt, and sugar, if using.
Step 2: Add 4 tablespoon of water, and mix well with a large spoon. Then add 1 or 2 more tablespoons of water, and stir again. The dough should look crumbly and moist, but when squeezed together with your hand, it won't completely hold together just yet.
Step 3: If needed, add just 1 more tablespoon of water and stir again. For me, it always takes 6 or 7 tablespoons of water to reach the proper consistency.
At this point the dough might remind you of sugar cookie dough (or maybe even Play-Doh), and when you squeeze a handful of it, it should look smooth and completely hold together.
If the dough still seems a bit crumbly, add half a tablespoon of water, and mix again. If you accidentally add too much water, mix in more almond flour.
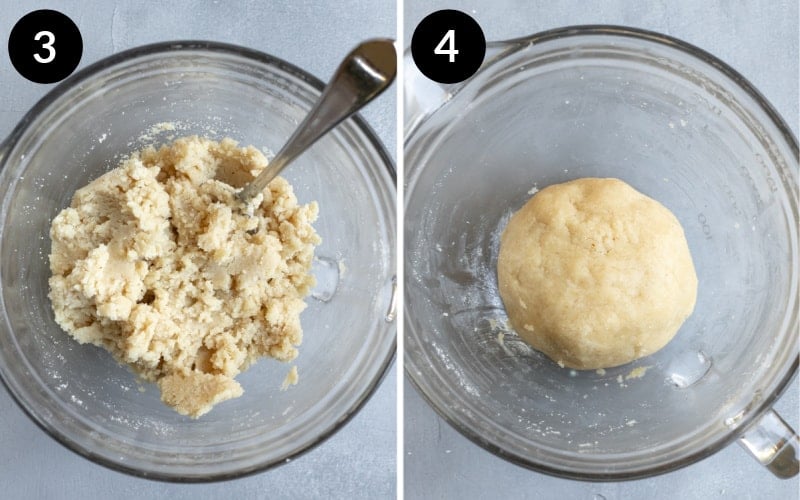
Step 4: Form the dough into a ball.
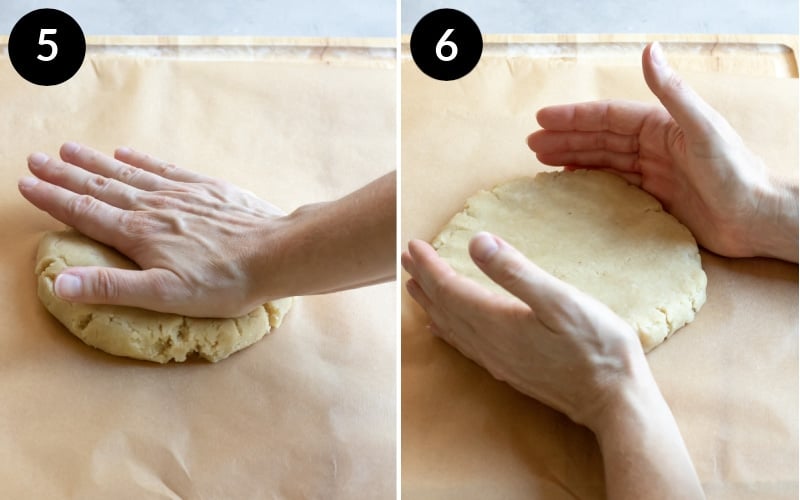
Step 5: Place a piece of parchment paper (about 14 inches long) on the countertop. Place the dough ball on the parchment and use your palm to flatten it into a thick disc.
Step 6: As the outer edges crack, use your hands to gently smooth the cracks and reinforce the edges. Now you're ready for the rolling pin!
Want to save this recipe? 📩
Keep an eye out for more delicious recipes. Unsubscribe anytime.
Step 7 & Troubleshooting:
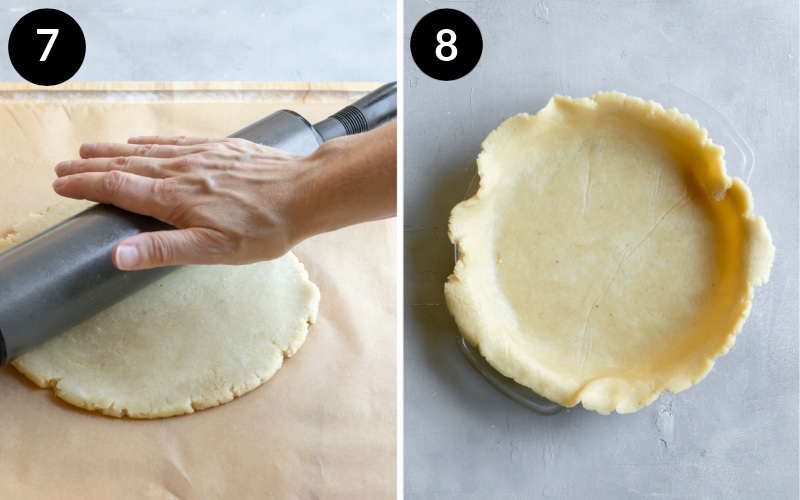
Slowly roll the dough with firm and steady pressure, from the inside toward the outer edges. Keep rolling, inside to out, moving around the dough until you have a circle about 12 inches in diameter (this is large enough for a 9-inch deep dish pie plate).
- If the dough sticks to the rolling pin, sprinkle a little almond flour on top of the dough, and spread it around with your hand.
- If you realize the dough is too crumbly once you start working with it, return it to the bowl and mix in 1 more tablespoon of water. *Remember, you don't have to worry about over-mixing it because we're not dealing with gluten. So really get in there with your hand, and distribute the water!
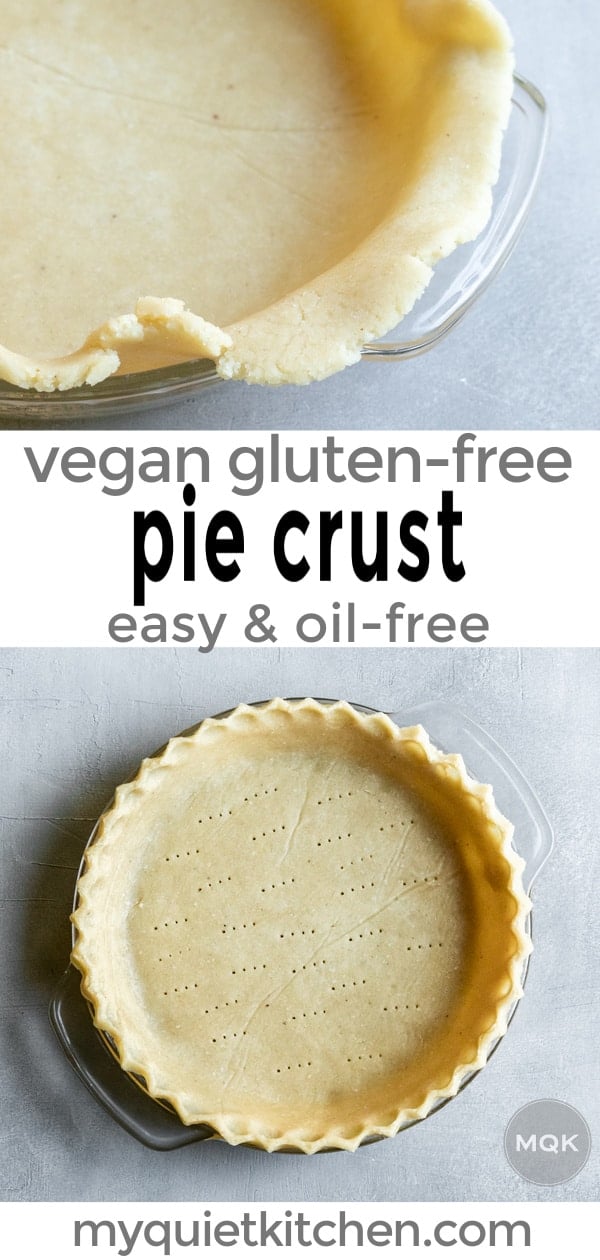
Step 8: Pick up the parchment paper and flip the dough onto the pie plate (no need to grease the pan).
Slowly peel away the parchment. Don't worry if there are a few holes, tears or imperfections. They can easily be patched with scrap pieces of dough.

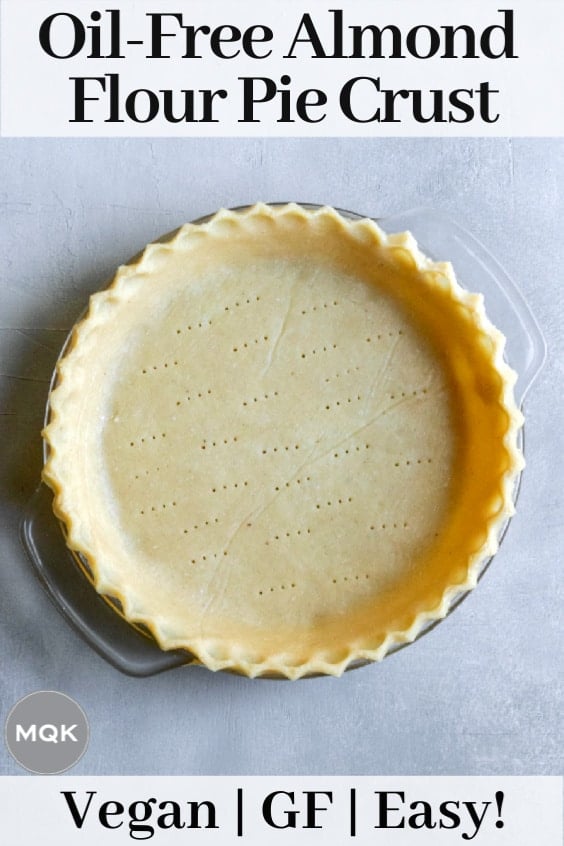
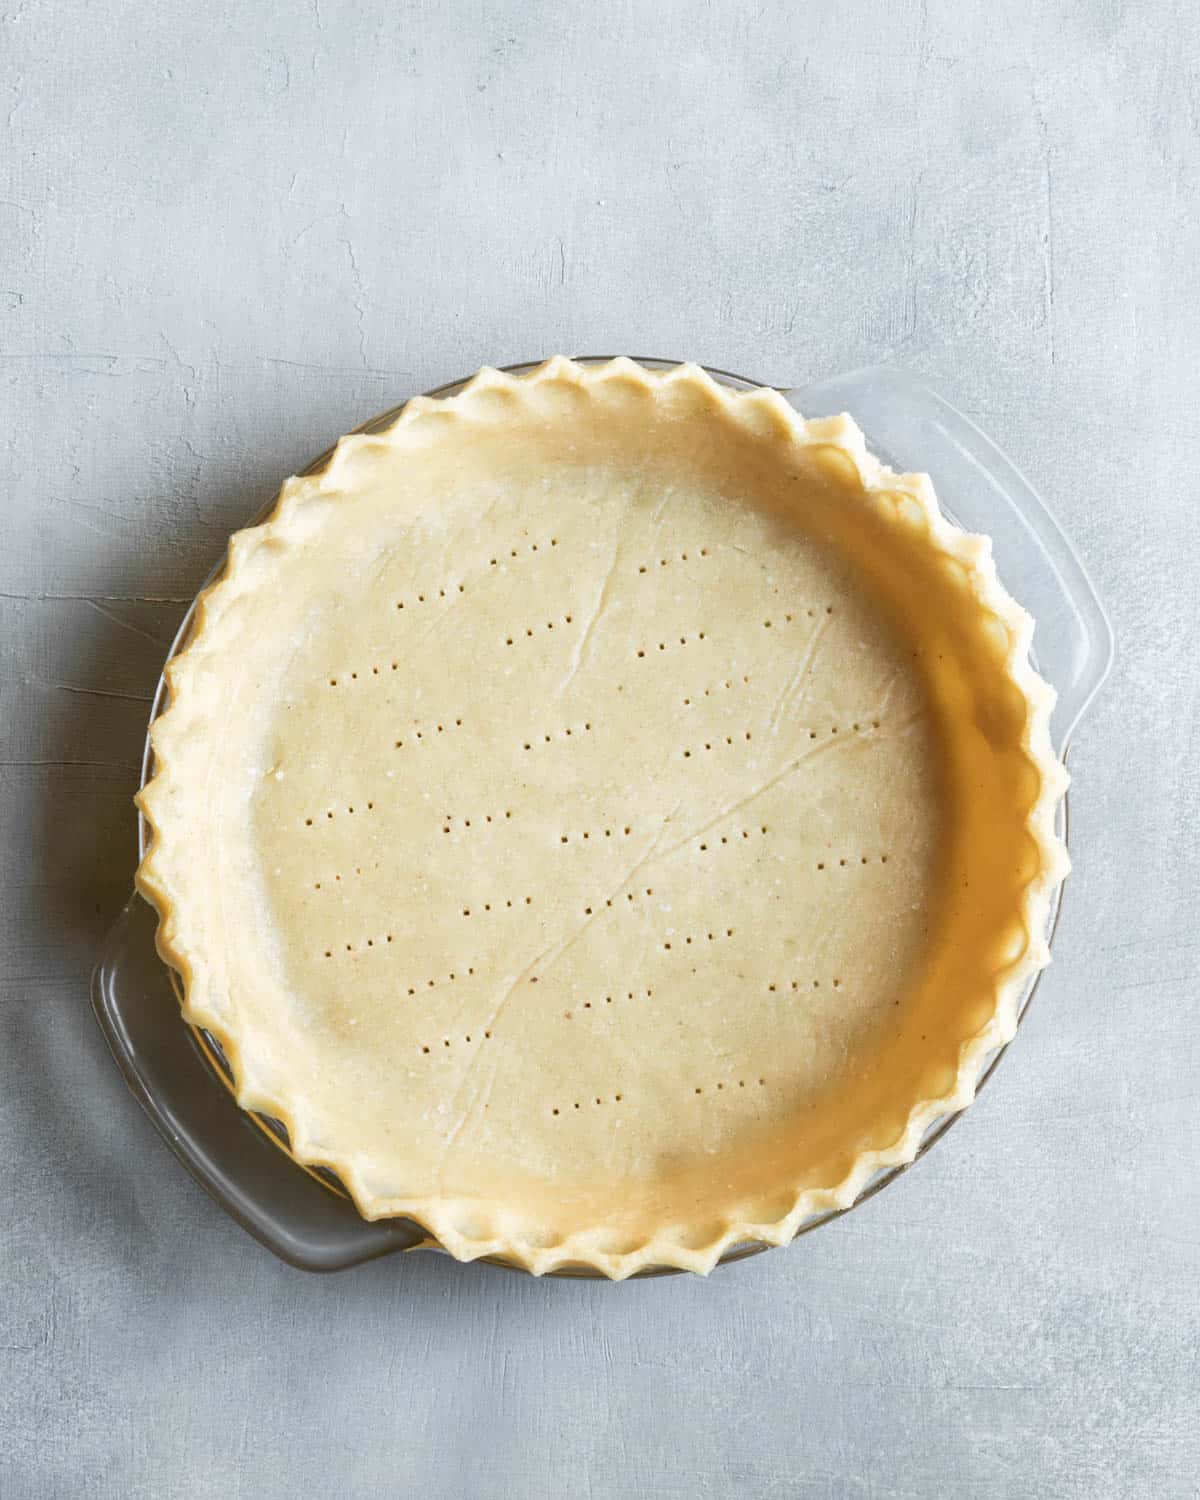
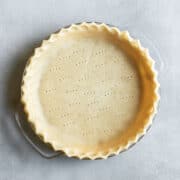
Step 9: Without stretching or tearing the dough, use your fingers to gently press it all the way into the corners of the pie plate. Use a knife to trim off excess dough around the edges.
Step 10: Make it pretty! Decorate the edges of your pie crust any way you like. I typically use the knuckle-crimp method because it's so easy.
Rotate the pie plate as you work your way around. The dough is very soft and forgiving, so you can use your fingers to smooth the tops and edges of the crimp as much as you need to.
Here's a great tutorial for various pie crust decorating methods: How to Crimp Pie Crust from Food52
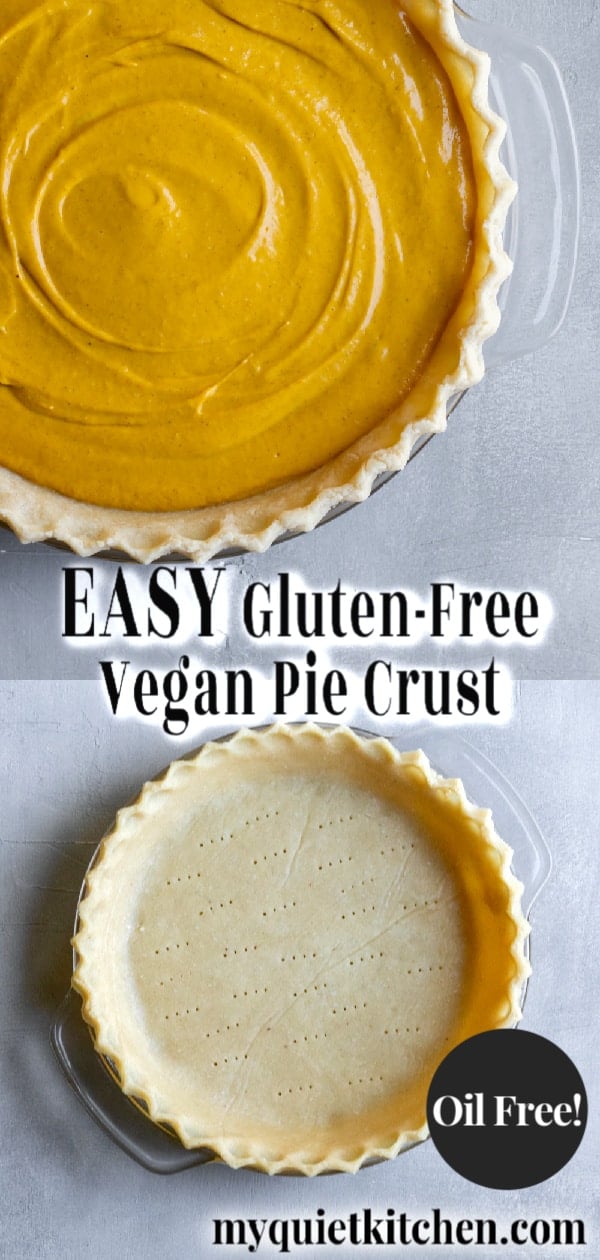
And now you have a beautiful, oil-free, healthy vegan pie crust! Use a fork to poke holes in the bottom of the crust before baking.
Baking Instructions
- To pair with a no-bake filling - bake in a 350°F oven for about 32 minutes or until crisp and golden. Cool completely before filling.
- For baked pies like pumpkin or pecan, pre-bake the crust for just 5 to 10 minutes before adding the filling, depending on the recipe.
- For pies with longer bake times (around 1 hour), a 5 minute pre-bake will suffice. Or skip it altogether, like I do in my vegan apple pie recipe. Cover the edges with foil or a pie shield if it starts to look too brown.
Can the dough be frozen or made in advance?
Absolutely! The vegan gluten-free pie dough can be made up to 3 days in advance and stored in the refrigerator. Wrap well with plastic wrap to maintain moisture.
It's also freezer-friendly. Thaw overnight in the refrigerator, then roll out and use as desired.
Ways to Use It
Use this healthy pie crust for:
- Vegan Key Lime Pie (GF, oil-free)
- Healthier Vegan Pecan Pie (GF, WFPB/oil-free)
- Vegan Chocolate Pecan Pie (GF)
- Cranberry Cream Pie (GF)
- Healthy Pumpkin Pie (GF, WFPB/oil-free)
- Fudgy Vegan Chocolate Pie (GF)
- Sweet Potato Pie (GF, WFPB/oil-free)
You can even create hand pies with it, and use it as a top crust for vegan pot pie (pictured above).
Find even more amazing vegan pie recipes here: 25 Pies for Thanksgiving!
More Ways to Use Almond Flour & Tapioca:
- Amazing Vegan Quesadillas
- Easy Oil-Free Vegan Queso
- Fudgy Almond Flour Brownies
- 3-Ingredient Almond Flour Cookies!
- Vegan Stuffed Crust Pizza
- Cauliflower Gratin
I hope I've inspired you to make your own vegan, gluten-free, healthy pie crust. If you try the recipe I would love to hear from you!
Leave a comment below and give it a star rating to let everyone know how your pie turned out. And if you're feeling social, tag a photo on Instagram with @myquietkitchen.
Recipe Video
Tap to play the video and see how easily the pie crust comes together!
Recipe
Vegan Gluten-Free Pie Crust (Easy & Oil-Free)
Ingredients
- 1 ½ cups fine blanched almond flour (168 g) - This is critical to the recipe. See Note 1 for tips on measuring. For nut-free, see this pie crust recipe.
- ½ cup white or brown rice flour (70 g) - Can also use a wheat flour here, if you don't need gluten-free.
- ⅓ cup tapioca starch (40 g) - See Note 2.
- ¼ teaspoon fine sea salt (use ½ teaspoon for savory pies)
- 2 tablespoons organic cane sugar (omit for savory pies) - Can use another granulated sugar such as date, coconut, or brown sugar.
- 5 to 7 tablespoons water
Instructions
- NOTE: the color of the pie crust is affected by the flour you choose. White rice flour creates a more pale-colored crust. Brown rice flour, whole-wheat, or spelt give the crust a slightly darker color.
- In a large bowl whisk together the almond flour, rice flour, tapioca starch, salt, and sugar.
- Add 4 tablespoons of water, and use a large spoon to thoroughly combine. Drizzle in 1 more tablespoons of water, and mix again. Refer to Notes section below and/or photos and video for help determining proper consistency. Be judicious with the water at this point. Add another 1 to 2 tablespoons of water (1 tablespoon at a time), if needed. When the dough is thoroughly moist and holds together when squeezed with your hand, form it into a ball.
- Place the dough on a large piece of parchment paper, about 13 inches long. Use your palm to gently flatten the dough into a disc. If the dough is too sticky, sprinkle with almond flour.
- With a rolling pin, use firm and steady pressure and slowly roll the dough until it's 12- to 13-inches in diameter. NOTE: It's important that the dough not be too thick, especially around the edges. After flipping onto the pie plate in the next step, you should have excess to trim away.
- Pick up the parchment paper and quickly flip the dough onto a 9-inch glass pie plate. Peel away the parchment. Without stretching the dough, use your fingers to gently press it into the bottom of the pie plate. Patch any holes or tears with excess dough from the edges.
- Use a knife to trim away the excess, and decorate the edges of the pie crust as desired (refer to post above for tips). Use a fork to poke vent holes in the bottom of the crust.
Baking Instructions:
- IMPORTANT: This crust doesn't brown exactly like traditional pastry. If you use white rice flour, the crust will still look somewhat pale even when it's done. Attempting to brown it further may result in an overbaked, hard crust. For pies with a no-bake filling, bake the pie crust in a preheated 350 degree F oven for 28 to 33 minutes or until crisp. Cool before filling.For pies that will be baked, like pumpkin or pecan, prebake the crust for 5 minutes before adding the filling. Cover the edges of the crust with foil or a pie shield if it begins to look too dry or crisp.
Notes
- If the dough sticks to the rolling pin, sprinkle a little almond flour on top of the dough, and spread it around with your hand. Another option is to place a second piece of parchment paper on top.
- If you realize the dough is too crumbly once you start rolling it out, return it to the bowl and mix in 1 more tablespoon of water. *Remember, you don't have to worry about over-mixing it because we're not dealing with gluten. So really get in there with your hand, and distribute the water throughout.
Estimated Nutrition (per serving)
Nutrition is an estimate and will vary depending on the exact amounts and ingredients used.
Sandy says
I made this again for a 4th of July party and needed to share how happy with this recipe! This is my go to pie crust. So easy and reliable!