
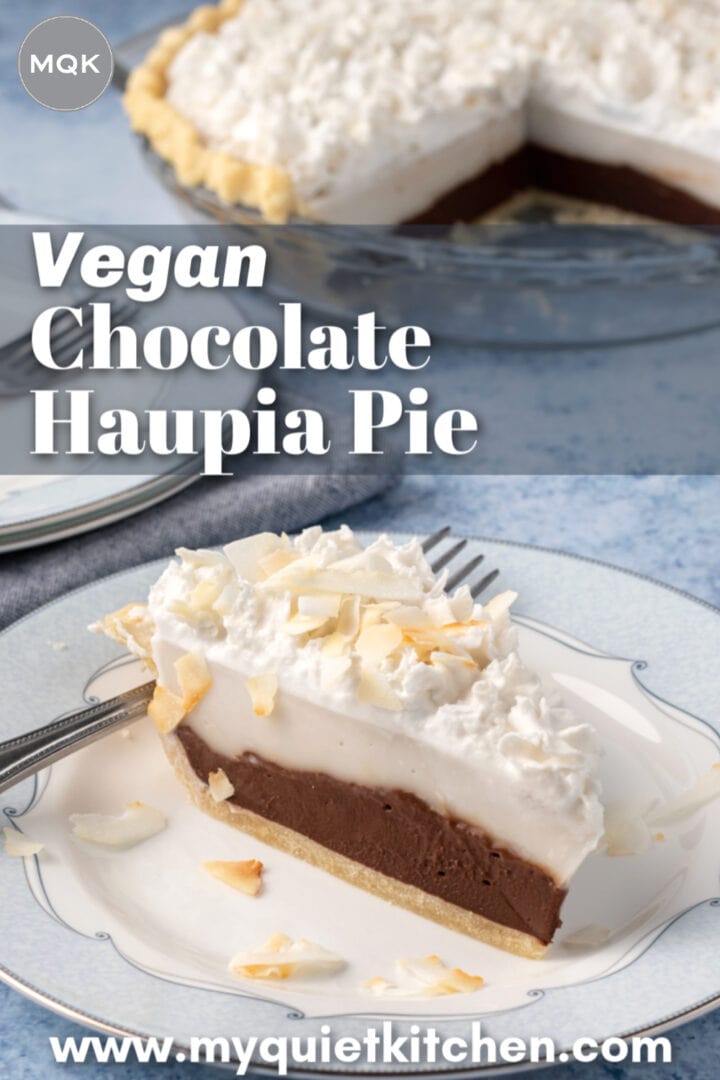
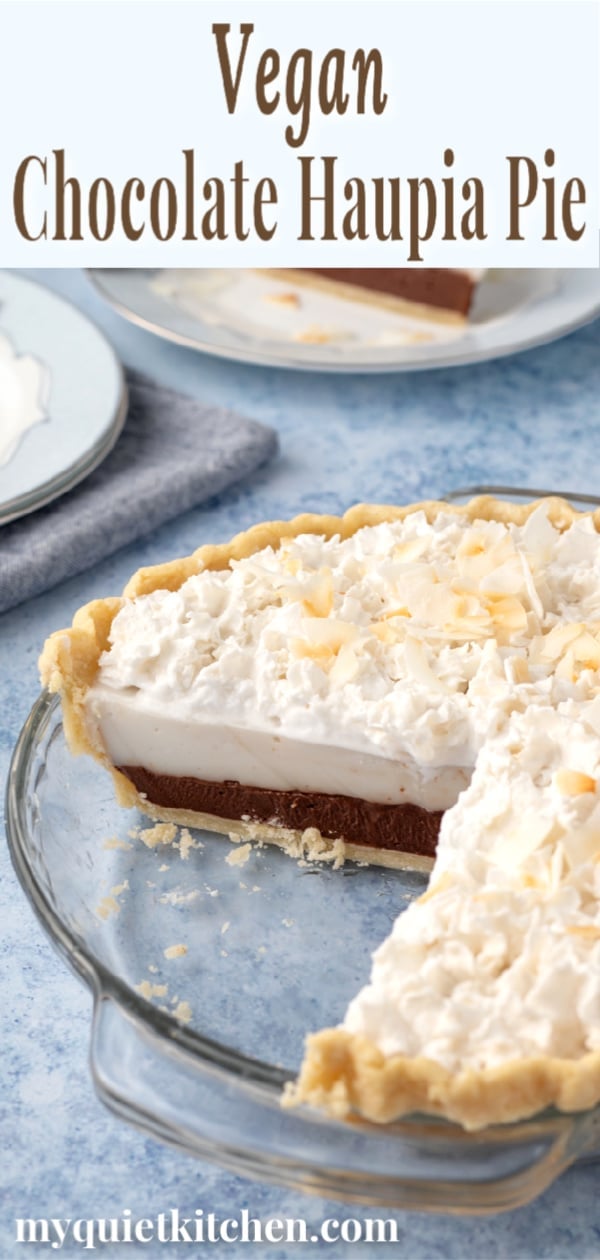
This Vegan Chocolate Haupia Pie is a non-dairy version of the famous Hawaiian dessert. With a flaky vegan crust and a perfect balance of coconut and rich dark chocolate, this haupia pie is a crowd pleaser! Pair it with my favorite pie crust for a gluten-free vegan dessert.
Pronounced how-PEE-uh, if you're a fan of both coconut and chocolate, dessert doesn't get much better than this. And though the original version calls for cow's milk, since coconut milk is the true star of this gorgeous pie, it's surprisingly easy to make it vegan.
What is haupia?
Have you heard of the popular Hawaiian dessert haupia? Before joining forces with chocolate and finding its way into pies, there was simply plain, traditional coconut haupia.
In Hawaii, squares of this coconut milk-based pudding are often served at luaus and other gatherings. It's firm enough to pick up with your hands, more like a lemon bar than the pudding most of us are familiar with.
I don't know much about the history of haupia recipes on the islands or how far back it goes, but I have read that arrowroot starch was originally used to thicken the blocks of pudding. As arrowroot became more difficult to find, people began to use corn starch instead.
I used corn starch in my test batches for this pie because I wanted to stick as closely as possible to the traditional pie recipes I've seen in cookbooks and online, but you can use arrowroot if you like.
Though the blocks of haupia pudding don't usually contain dairy, all of the modern recipes I've seen for the pie call for one cup of milk. So in addition to using a vegan pie crust, replacing that cup of milk is the part we're veganizing today.
How to Make Vegan Chocolate Haupia Pie
I chose almond milk as a replacement for the dairy because I wanted to maintain the pure white color of the coconut layer.
During my first test batch I used soy milk, which is more of a creamy, off-white color, so it darkened the white layer a bit. But another great option is to use more coconut milk. This will obviously give you a richer pie with even more delicious coconut flavor. But that also means using more than one can of full-fat coconut milk, and since I was trying to stick to the classic pie recipe, I decided to just go with almond. But you do what feels right! As long as the total amount of liquid stays the same, you'll end up with great results.
To keep this pie vegan, another thing to consider is the type of chocolate used for the chocolate layer. Some brands have the vegan "V" on the label, but if you don't see that, be sure to review the ingredient list. With chocolates that are at least 60-65% cacao solids, it's usually pretty easy to find non-dairy options.
*To learn more about which chocolate brands are ethically sourced and vegan, I highly recommend Food Empowerment Project's list.
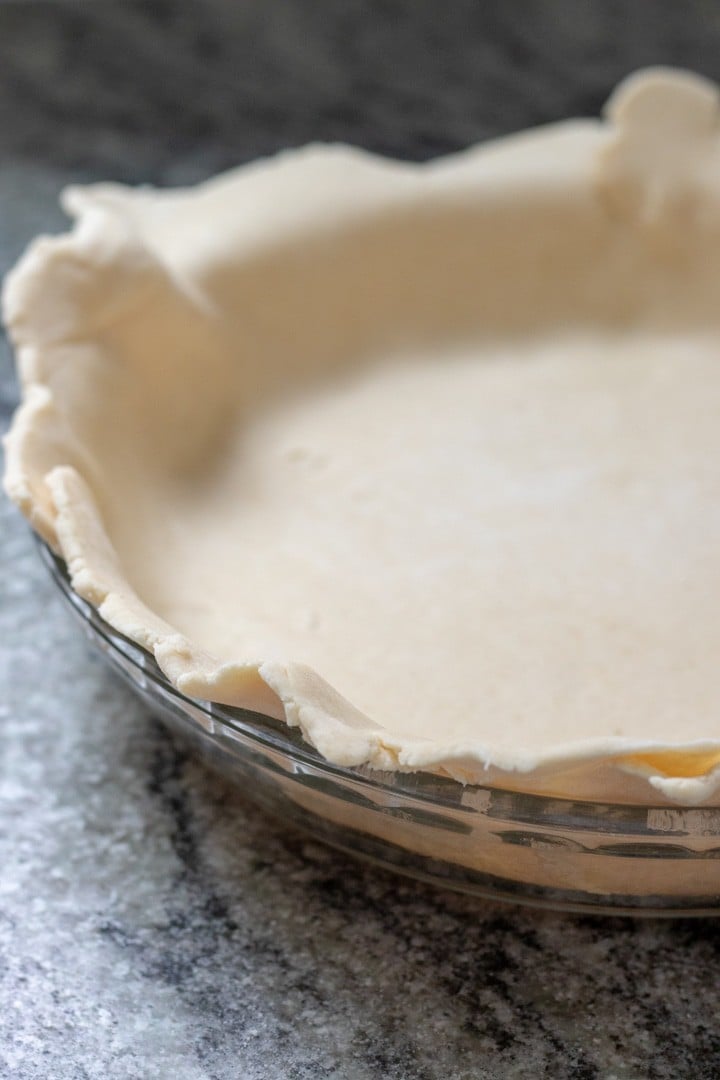
As far as pie crust goes, I opted for homemade this time around. I had a store-bought crust in the freezer, but it was whole-wheat. And this just isn't a whole-wheat crust kind of pie.
But even though I was in the mood to take the easier route, as soon as I saw the dough coming together, I was SO glad I opted for homemade. As someone who considers herself a fairly inexperienced pie baker, there's nothing quite as satisfying as rolling out a successful pie dough.
What is it about pie crust that's so beautifully rustic and romantic? I hadn't made a pie since Thanksgiving (you can read more about that here), so I was keeping my fingers crossed that everything I'd learned last fall had stuck with me. I think it did!
I don't have a pie crust recipe on the blog just yet (UPDATE: now I do! Check out this super easy Healthy Vegan Pie Crust).
There's no shortage of tutorials and recipes online. Sam's Easy Vegan Pie Crust recipe over at It Doesn't Taste Like Chicken is a great place to start. Most pie crust recipes are very similar, with small variations here and there. For example, I follow pretty much the same process as Sam, with these exceptions:
- I use a chilled food processor instead of a pastry cutter (just place the bowl and S-blade in the freezer for about 10 minutes).
- I use half vegetable shortening and half Earth Balance (since Earth Balance is salted I omit the salt).
- I use ¼ cup ice water instead of non-dairy milk.
- I increase the sugar to 2 teaspoons.
- Before rolling out the dough I wrap it and let it chill in the fridge for 30 minutes.
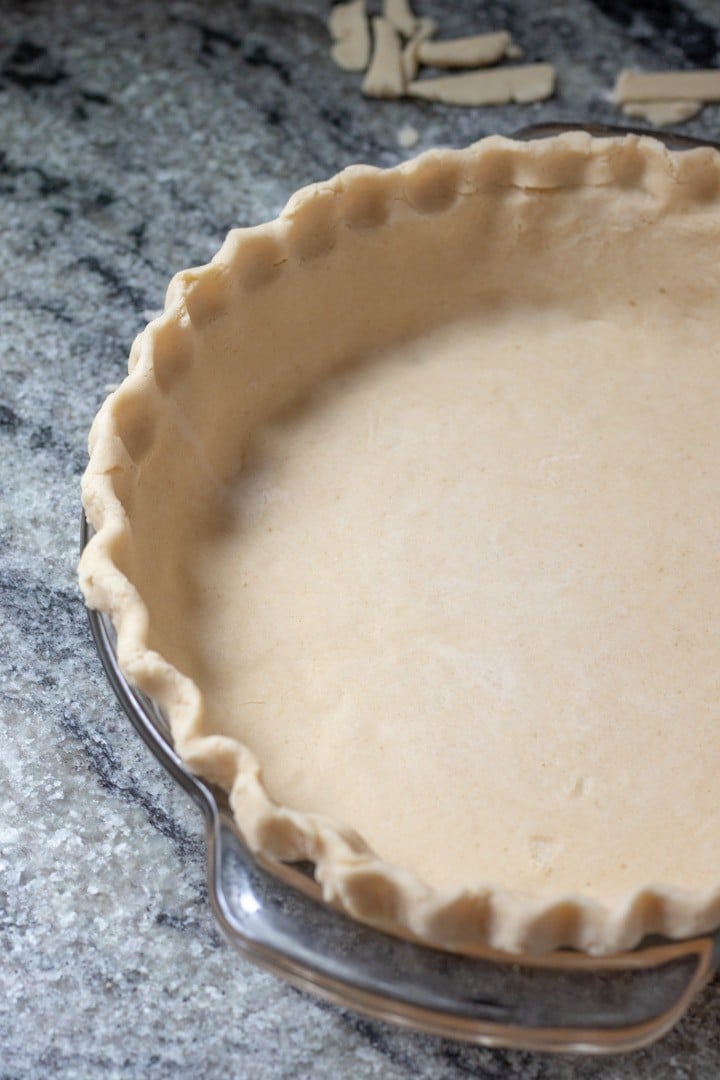
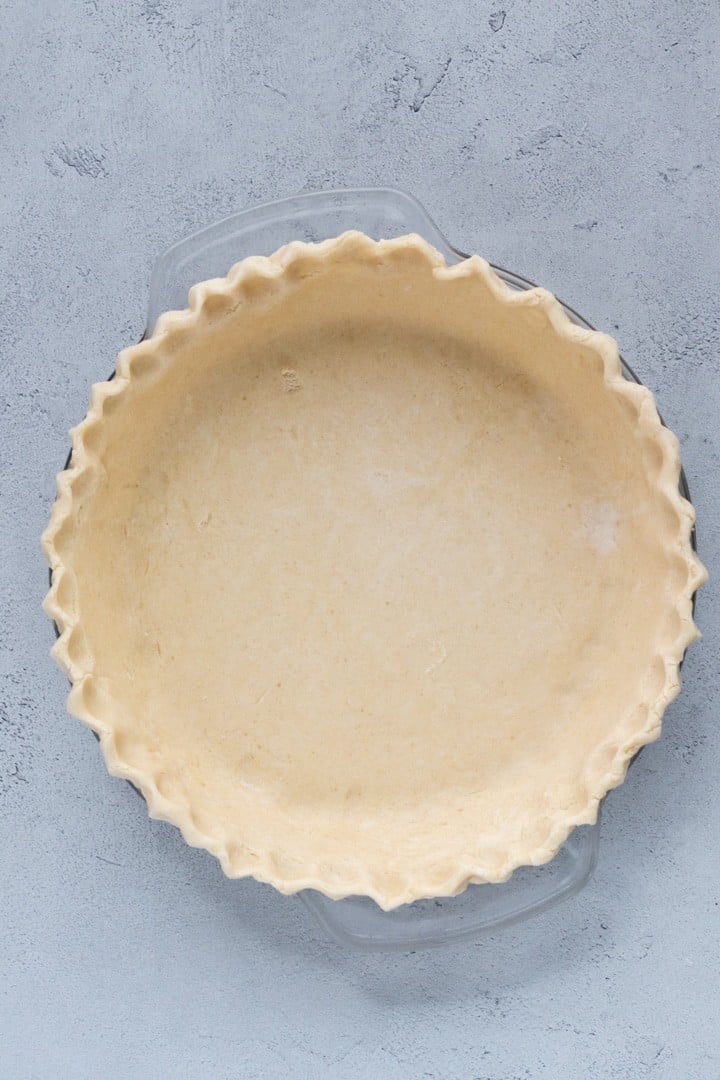
Whether you go with a store-bought crust or make your own, you can have fun with decorative edges!
For some inspiration I recommend this post over at Food52, 9 Ways to Make Fancy Pie Edges. I went with a large crimp, using my knuckle to press against the inside edge, instead of a fingertip as recommended in their classic finger crimp method.
It came out a bit messy, but I'm okay with that. I don't necessarily want my pie to look like a machine made it. Imperfections are lovely!
Want to save this recipe? 📩
Keep an eye out for more delicious recipes. Unsubscribe anytime.
Fully Bake the Pie Crust
Since the filling for haupia pie is made on the stove-top, you'll need to bake the crust before filling it. I don't have pie weights so I used dried beans. Here's how to do it...
Preheat the oven to 350 degrees F. Once you've rolled out your dough, place it in the pie plate, and trim and crimp the edges.
Place a piece of parchment paper over the crust. Fill it with dried beans, rice, or pie weights. This keeps the bottom of the crust from bubbling up when you bake it. It also provides support for the sides of the pie crust so they stay in place instead of sliding down the sloped edges of the plate.
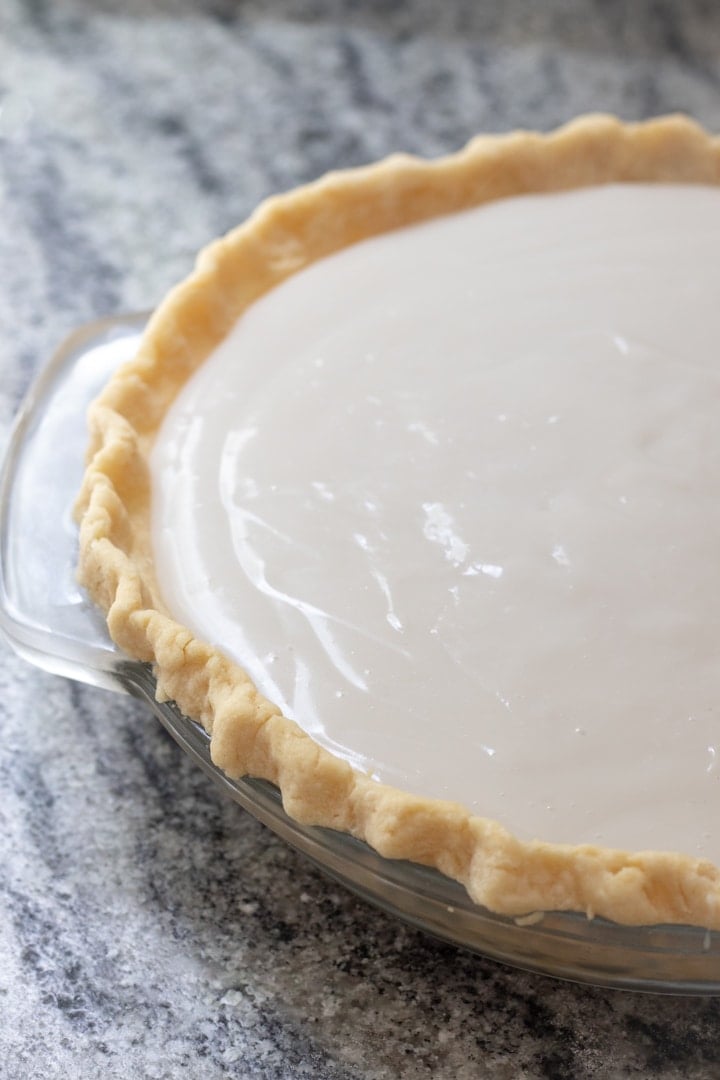
Bake the crust for about 20 minutes. Then chill it completely before filling with the layers of chocolate and coconut pudding.
Tips
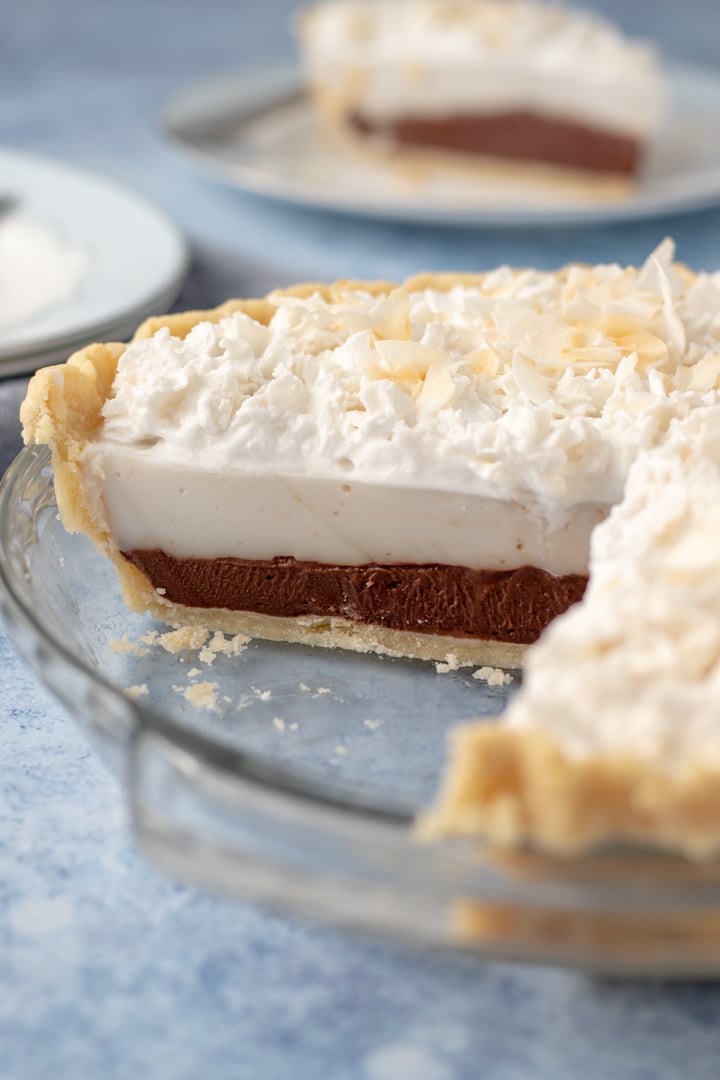
Once you've got the crust made, you're golden (ha! pun intended). Seriously, making the coconut pudding is so incredibly easy. In fact, there's really only one part of making the pie filling that's even the tiniest bit tricky.
To make the chocolate layer you'll pour a portion of the coconut pudding over some chocolate in a bowl. You can pre-melt the chocolate in the microwave to make this step go faster.
You need to work quickly to whisk the chocolate layer because as you're doing this, the remainder of the coconut pudding is still in the pot beginning to set and form pudding skin!
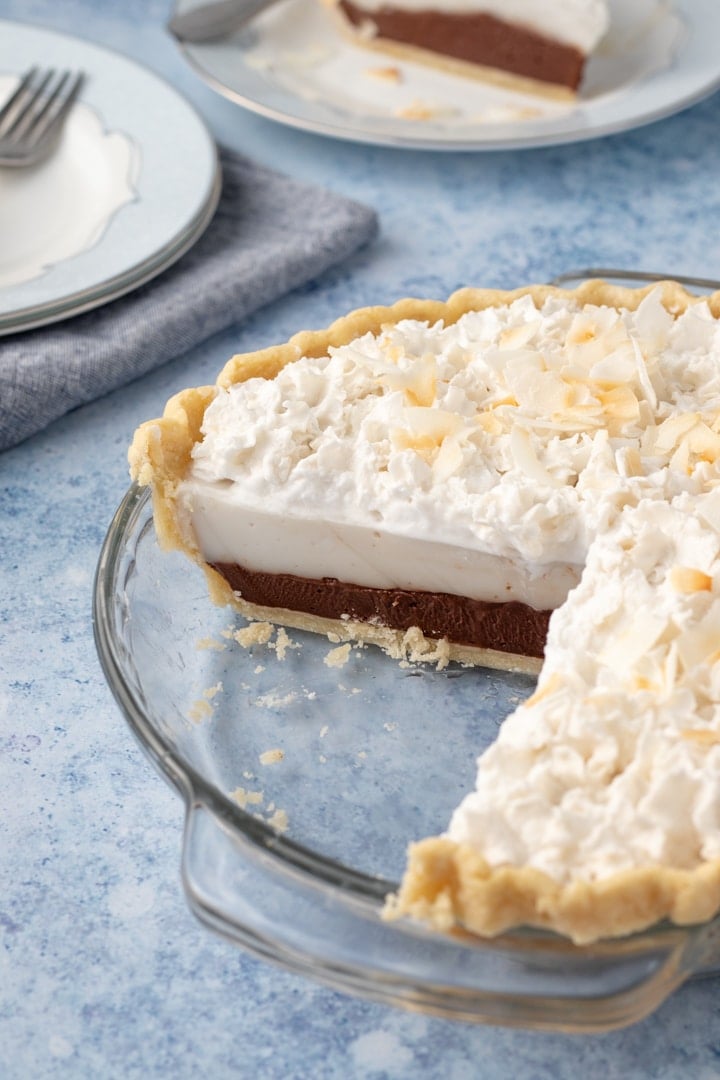
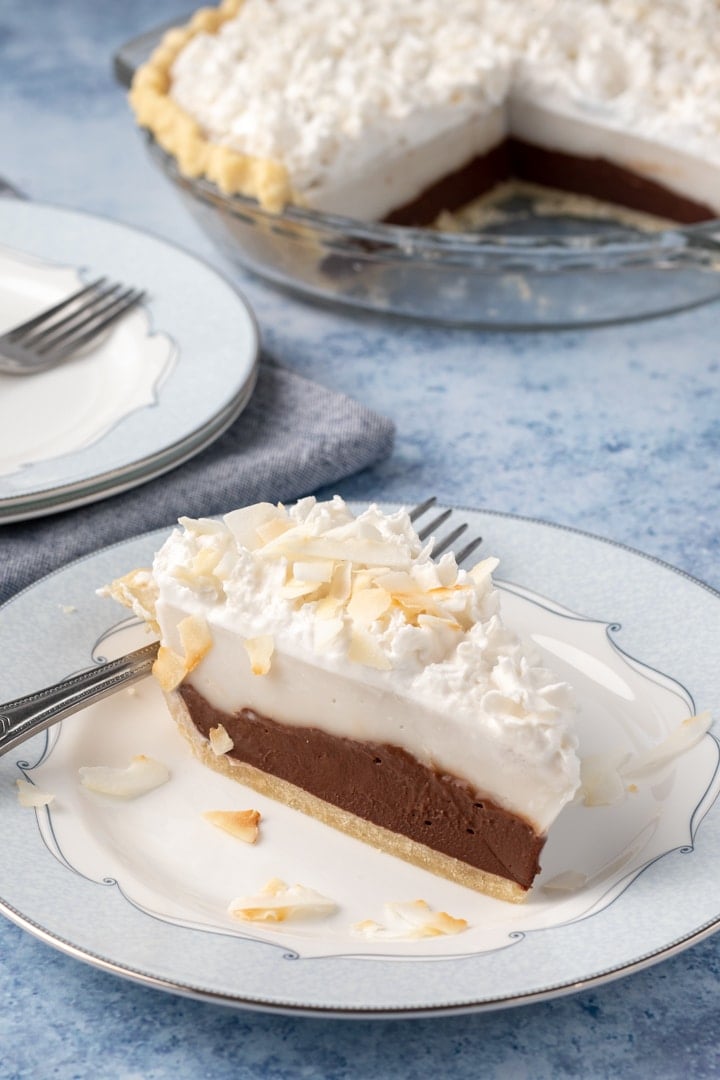
So as soon as the chocolate is fully melted and whisked into the hot pudding, pour the chocolate layer into the baked, chilled pie crust and smooth the top. Then vigorously re-whisk the coconut pudding in the sauce pan so that it's completely smooth again. Pour the coconut layer over the chocolate layer and smooth the top.
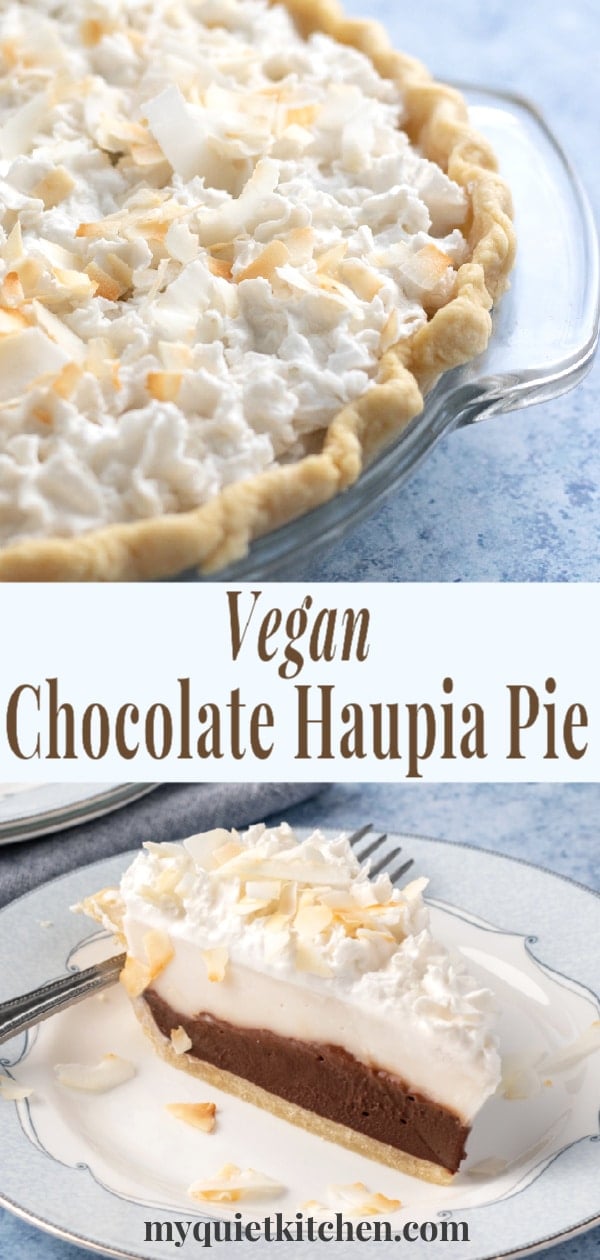
Now, all that's left is the difficult part of waiting while your pie chills in the refrigerator, followed by decorating it with sweet, fluffy, dairy-free whipped topping.
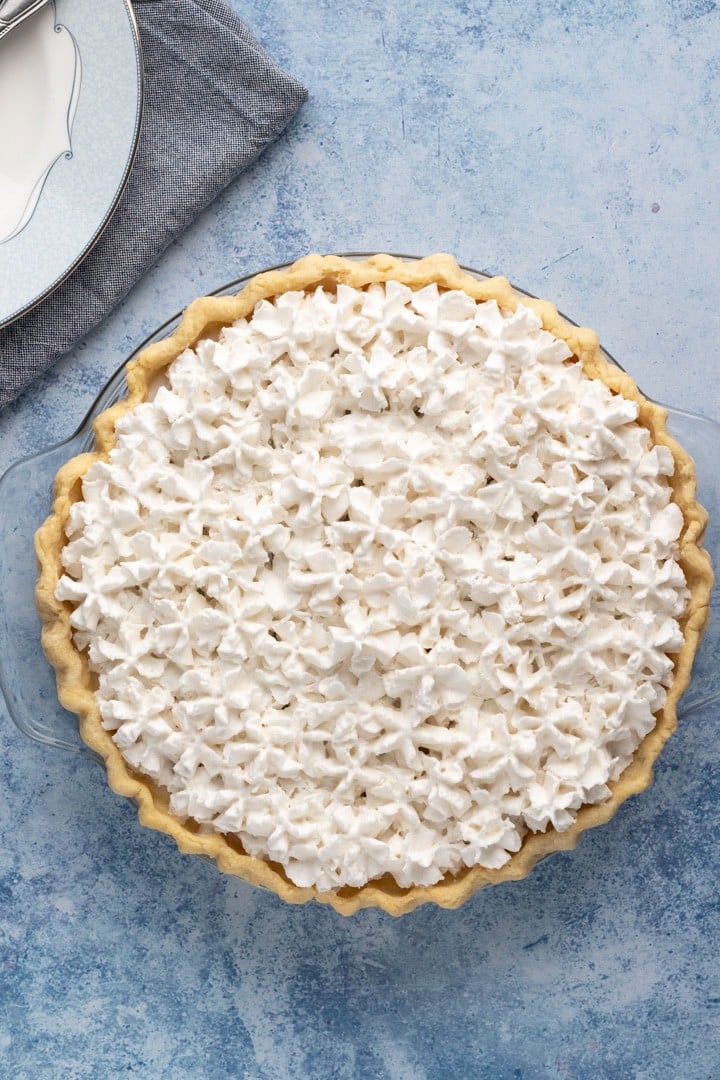
I went with coconut Reddi-wip for the photos, but whipped coconut cream is obviously a great choice, as long as you remember to put a can of full-fat coconut milk in the fridge the day before.
SoDelicious also makes an amazing vegan whipped topping. Look for it in the freezer section.
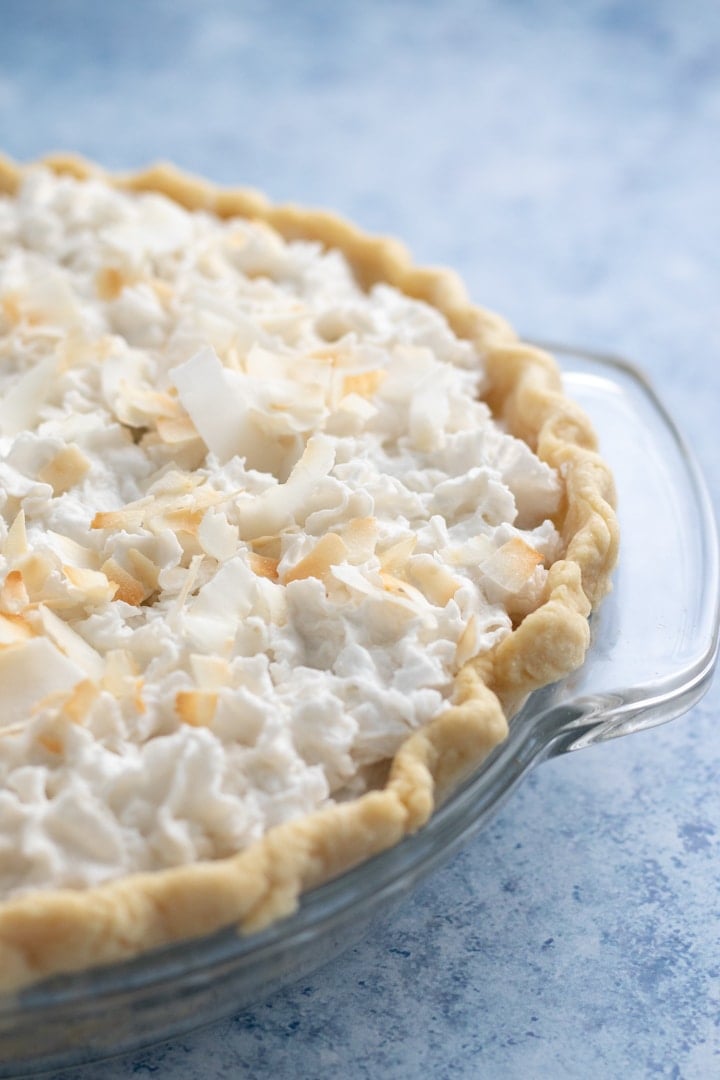
Sprinkle with freshly toasted coconut, and dig in!
If you try this recipe for Vegan Chocolate Haupia Pie I would love to hear from you! Let me know how it goes in the comments below. You can also tag a photo of your gorgeous pie on instagram with @myquietkitchen to make sure I see it.
Enjoy!
Equipment Needed:
- Cuisinart 14-Cup Food Processor
- Pyrex Glass 9-inch pie plates
- Marble rolling pin
- Cuisinart electric mixer (for whipping coconut cream)
You might also like:
- Vegan Salted Chocolate Pecan Pie
- Healthy Gluten-Free Vegan Pie Crust (oil-free)
- Vegan Gluten-Free Pumpkin Pie (oil-free)
- Cranberry Cream Pie (gluten-free)
Recipe
Vegan Chocolate Haupia Pie
Ingredients
- 1 9-inch unbaked pie crust - Try my favorite V & GF pie crust recipe.
- 1 (14 ounce) can full-fat coconut milk
- 1 ¾ cups unsweetened almond milk
- ⅔ cup sugar
- 1 teaspoon coconut extract, optional
- ½ cup water
- ½ cup corn starch
- 5 ounces dairy-free chocolate, chopped
- whipped coconut cream or non-dairy Reddi-wip
- ¼ cup toasted coconut flakes
Instructions
- Preheat oven to 350 degrees. Line the unbaked pie crust with parchment and fill with pie weights or dried beans. Bake 15 to 18 minutes or until golden. Lift parchment from crust. Place pie crust in refrigerator to cool while you prepare the filling.
- In a medium sauce pan whisk together the coconut milk, almond milk, sugar and extract. In a separate bowl whisk together the corn starch and water until fully dissolved. Place the chopped chocolate in a separate medium-sized bowl.
- Bring the milk mixture to a boil, reduce to a simmer, and slowly whisk in the corn starch slurry. Continue whisking and cook 2 to 3 minutes or until thickened.
- Working quickly, pour about 1 ¾ to 2 cups of the coconut pudding over the chocolate. Using a separate whisk, whisk until the chocolate is melted and fully incorporated. Pour the chocolate mixture into the pie crust and smooth the top. Vigorously whisk the remaining coconut pudding (to break up any skin that may have formed on top of the pudding) and pour coconut pudding on top of the chocolate layer.
- Place uncovered pie in refrigerator until completely chilled, 3 to 4 hours. When ready to serve, top with non-dairy whipped cream, and sprinkle with toasted coconut flakes.
Notes
Estimated Nutrition (per serving)
Nutrition is an estimate and will vary depending on the exact amounts and ingredients used.
Susan Smeltzer says
I'm oil free too, would your oil-free vegan crust be a good alternative to this crust?
Lori says
Oh, absolutely!
jams says
Easy recipe! So good! Pie was a hit!
Lori says
Thanks, Jams! Glad everyone enjoyed it!