
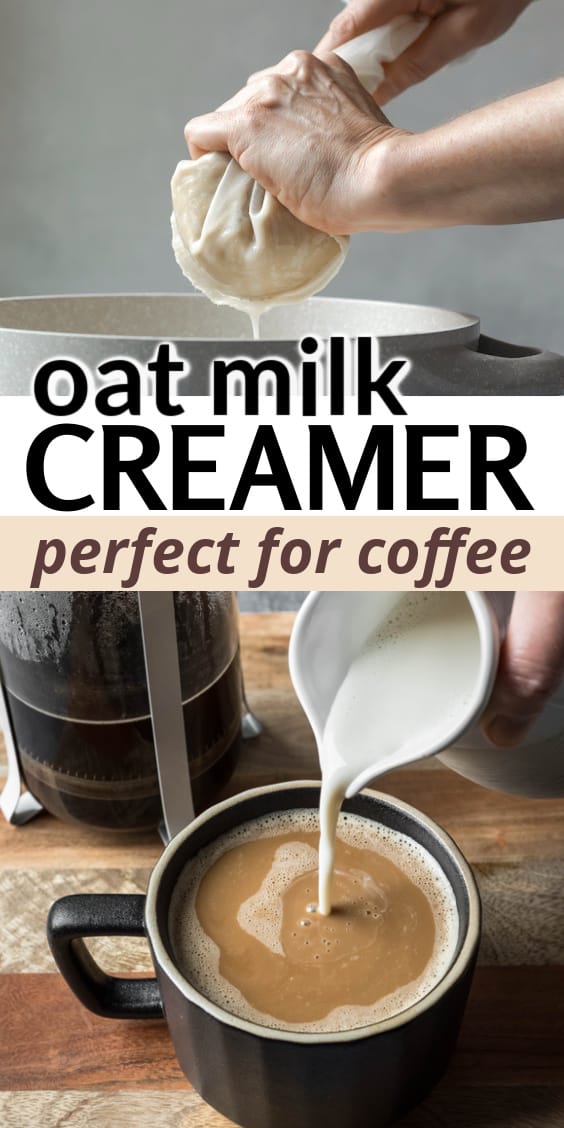
This is the homemade oat milk creamer you've been looking for-lightly sweet, not slimy, and the perfect base for creating all of your favorite flavors! What sets it apart? A clever enzyme technique that mimics the smooth, rich texture of store-bought brands-without the additives. Whether you're looking for a healthier dairy-free alternative or just want to save money and DIY it, this homemade creamer has you covered!

What Makes This Recipe Different
While testing my oat milk recipe, I couldn't resist making a creamer version, too. Oat-based creamers are just so YUM. They're naturally sweet, creamy, and perfect in coffee or tea.
But when it comes to homemade, we have a problem to address-that pesky oat starch! It's why other oat milk recipes you've tried were nothing like store-bought.
Commercial oat milks and coffee creamers (like Oatly or Califia) get their sweetness and smooth texture from a process called enzymatic hydrolysis. But don't let the science-y bit scare you away!
I figured out an easy way to replicate it at home, and I'll walk you through it step by step. 👍
Jump to:
How to Make Oat Creamer That's Not Slimy
Alright, fellow coffee geeks-let's talk enzyme action.
First, an enzyme (amylase) helps thin out the oat-and-water mixture by breaking down starches, which makes it smoother and less gummy. Let's call this the "liquefy it" stage (liquefaction if you want to be proper).
Then in the second stage, those broken-down bits get converted into natural sugars. This step is called saccharification, and it's why your oat creamer tastes subtly sweet, even with zero added sugar. Ahhh, mystery solved, right?!
So yeah, it's science, but it's totally doable at home! ☕✨ You just need a digestive enzyme blend that contains amylase and glucoamylase. Plenty of vegan options are available online (I've linked two below).
Ingredients
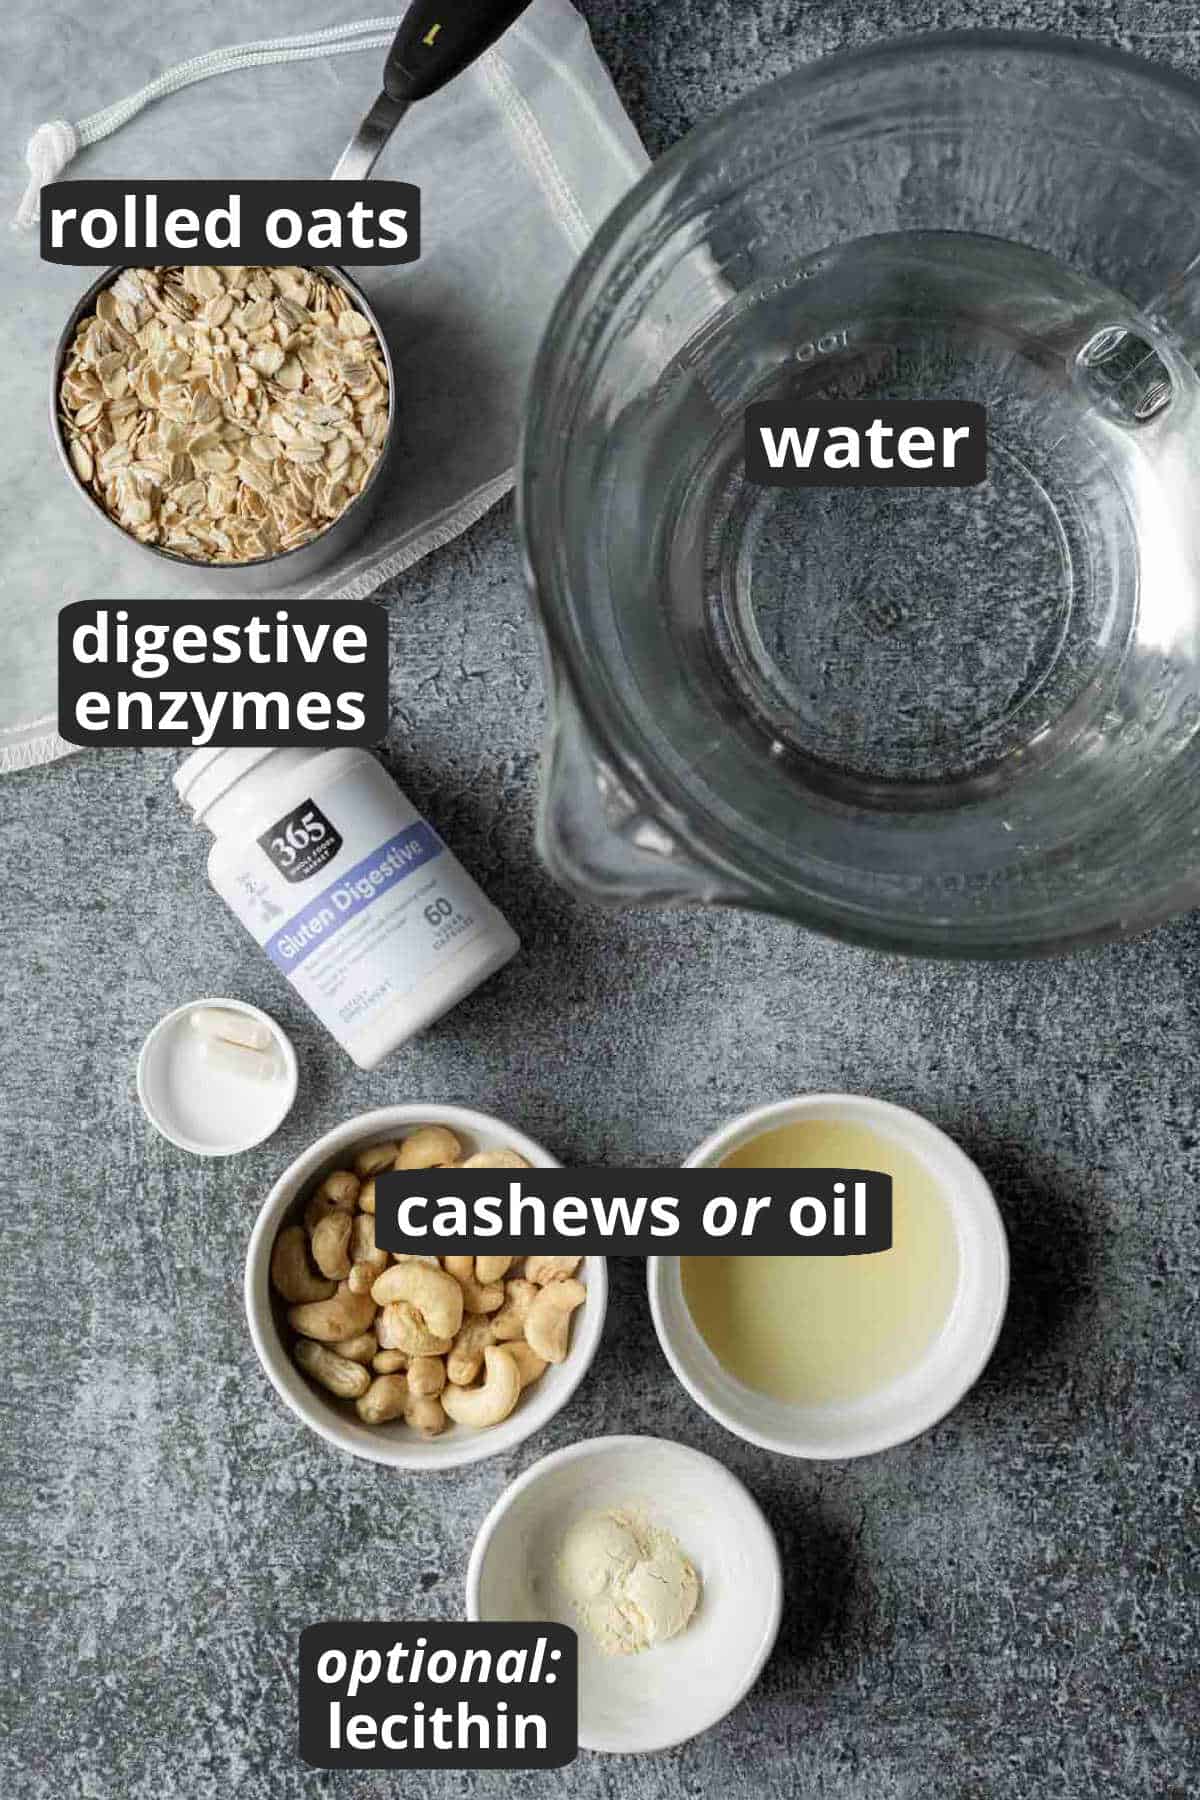
- rolled oats: According to this article, some oat beverage manufacturers use oat flour. Originally, I used whole rolled oats, and it worked great until only thick-cut rolled oats were available. Last year I noticed that the oats available at our local grocery stores, whether pre-packaged or from the bulk bins, were much thicker than the oats we used to buy. I realized they are TOO thick for the enzymes to work properly. So after more testing, I now recommend blending the oats into oat flour as step 1.
- digestive enzymes: As mentioned above, to break down the starch and prevent our creamer from getting slimy in hot coffee, we're going to soak the oats with enzymes.
The most cost effective way to accomplish this is to use a digestive enzyme supplement that has both amylase and glucoamylase, like the two linked below. If you're shopping other brands, just make sure the product is vegan, has a similar amount of these two enzymes, and comes in capsules. - vanilla extract: For a flavor more similar to store-bought milks, I like to clear vanilla instead of pure vanilla extract, but either is fine.
- fat: To make this oat creamer more like store-bought options (and dairy half-and-half) we need to add fat.
- For a nut-free option, go with a flavorless oil like avocado or grapeseed.
- For oil-free, raw cashews are the best option.
- optional sunflower lecithin: If you decide to include oil, adding a teaspoon of lecithin helps with emulsification and keeps the oil and water from separating during storage. Did you know you can also use lecithin as a replacement for egg yolks in ice cream? Try it in this coconut ice cream recipe.
See the recipe card below for quantities and full step-by-step instructions.
How to Make Oatmilk Creamer
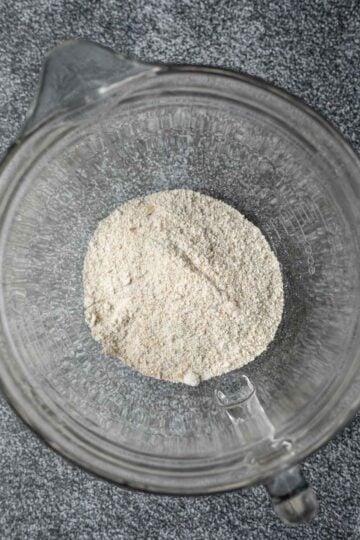
First, blend the rolled oats for a few seconds on high speed until they are the texture of coarse flour. Pour into a large bowl, open one capsule of digestive enzymes, and dump the powder into the bowl.
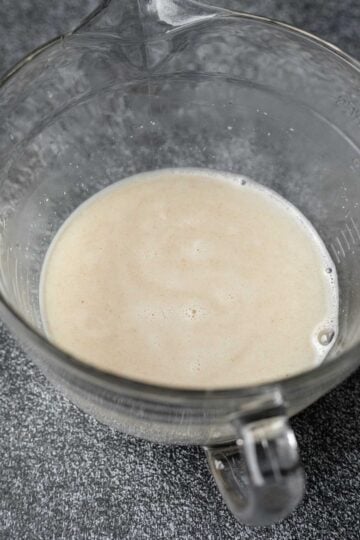
Heat the water to about 150 degrees. A thermometer is really helpful here, but not required. Pour over the oat flour and enzymes, and stir well. Let soak for 30 minutes. During this time the water will develop a sweet flavor as the enzymes do their work.
Want to save this recipe? 📩
Keep an eye out for more delicious recipes. Unsubscribe anytime.
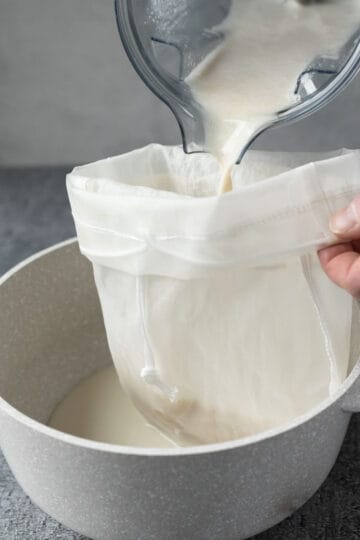
Rinse out the blender, and blend the oat/water mixture for another 10-15 seconds. You don't need to blend long since the oats were already broken down into flour. Use a nut milk bag to strain the oat milk directly into a large pot. I recommend placing one bag inside another for a double layer.
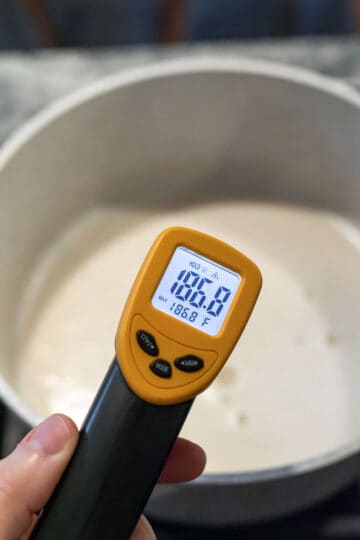
Over medium heat and whisking occasionally, bring the oat creamer just to a simmer, about 190 degrees F. Remove from heat, and stir in the salt and vanilla.
Let cool for about 20 minutes, then return the creamer to the blender and add your choice of cashews or oil.
- oil - while blending the oat creamer on high, remove the cap from the pour spout, and slowly drizzle in the oil. Stop and add the sunflower lecithin, and blend again to incorporate.
- cashews - if you don't own a high-speed blender, getting the cashews completely smooth and creamy may be challenging.
Tip! Most oat milk recipes tell you not to squeeze the bag because they're trying to avoid making the milk/creamer slimy. But since the enzymes have already fixed this issue, it's fine to give it a squeeze.
Helpful Equipment
A few key items make preparing the recipe much easier. The great news is that once you have everything, you'll be able to make endless batches of creamer, reduce waste, and save money!
- large mixing bowl - to soak the oats with the enzymes
- blender - I use a Vitamix, but a standard blender is fine since the oats are very soft. It is a large volume, though, so you may want to blend it in two batches.
- nut milk bag(s) - any type of fine mesh nut milk bag should be fine. I like to double-strain the milk by placing one bag inside another.
- thermometer - this is helpful for measuring the temperature of the water for the initial soak and while simmering the creamer during the final step.
- large saucepan - During recipe testing, I found that heating the creamer in this final step improves the mouthfeel and helps prevent separation during storage. It's possible it also helps deactivate the enzymes, though I'm not positive. I do suspect this step helps the creamer last longer in the fridge.
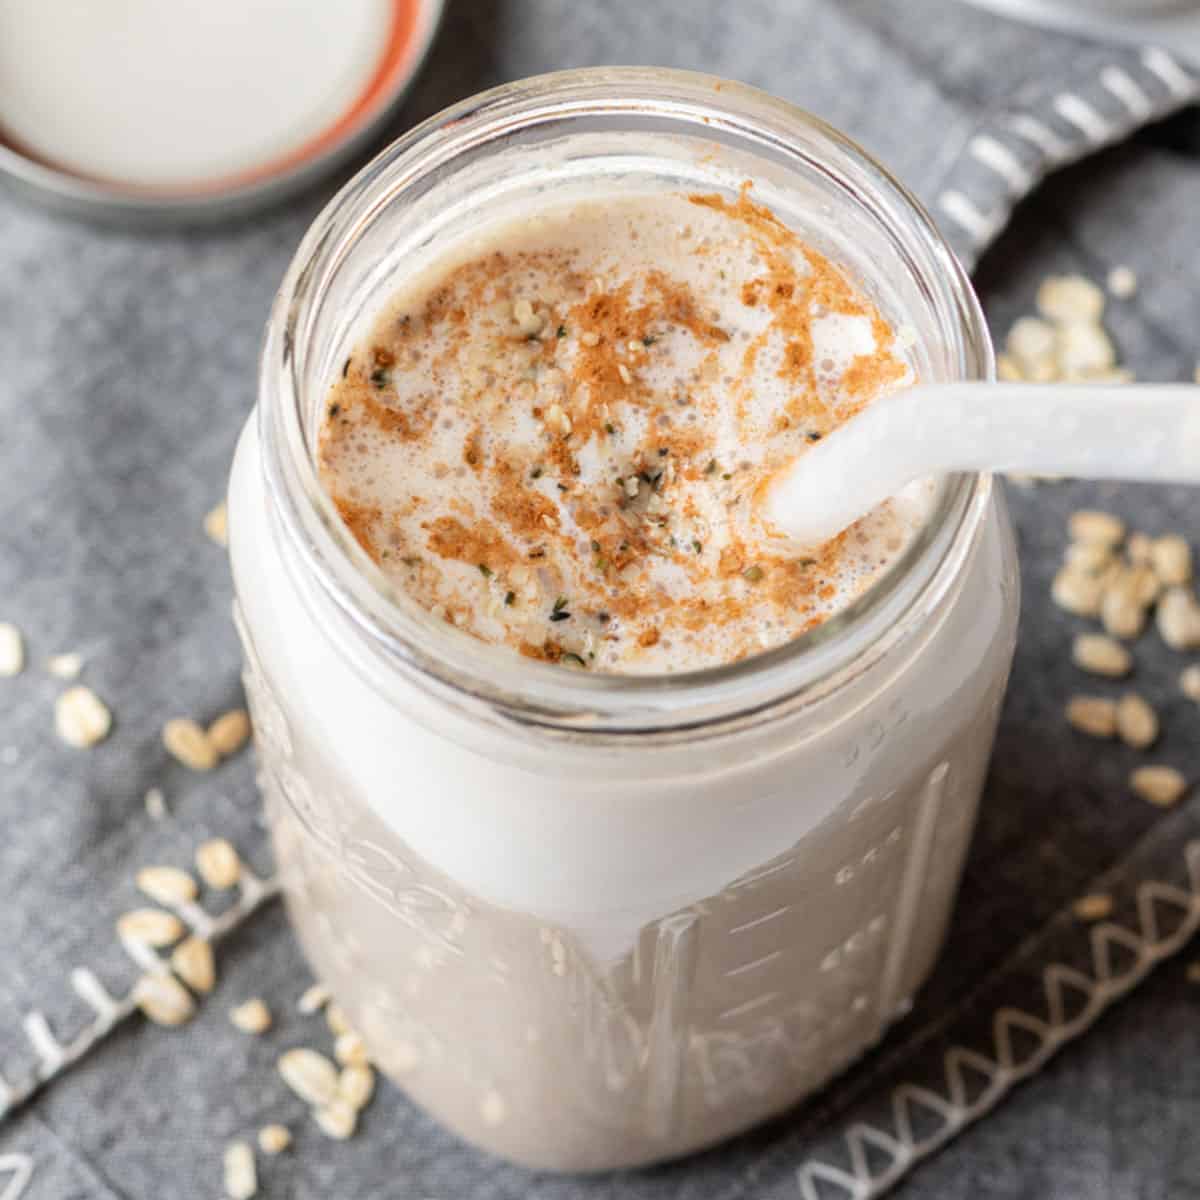
Flavor Variations
Do you have a favorite flavor of coffee creamer? Pretty much any flavor you can imagine, you can create with this oat milk base!
Add spices, extracts, and sweeteners, or simply use vegan-friendly syrups. Check out Mel's vegan coffee syrup recipes over at A Virtual Vegan for more ideas.
After preparing the basic oat creamer, I like to divide it among two or three small jars. I usually leave one plain and make one or two flavored creamers.
Here are a few flavors we've tried so far. Cinnamon roll is my favorite!
Per 1 cup (8 oz) of oat creamer, add:
- cinnamon roll: ½ teaspoon ground cinnamon + 2 to 4 teaspoon sweetener
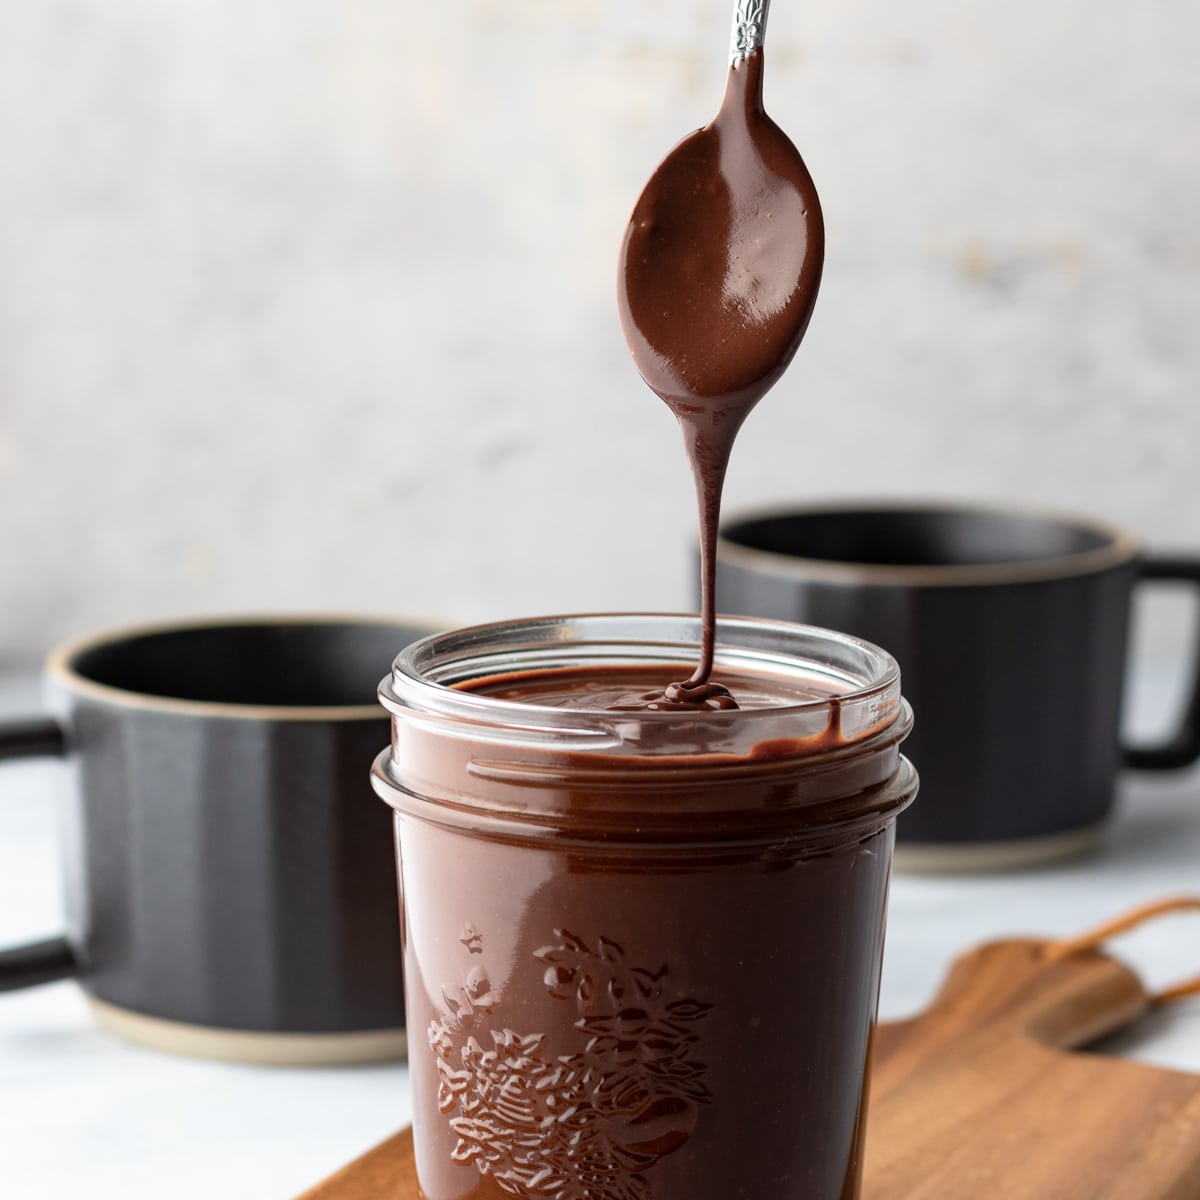
- mocha mint: 2 teaspoon cocoa powder + ⅛ teaspoon peppermint extract + sweetener
- toasted almond: scant ½ teaspoon almond extract + a few extra drops vanilla extract + sweetener
- pumpkin spice: 1 teaspoon pumpkin spice + 1 tablespoon maple syrup or sweetener of choice
For a lightly sweet cup of coffee, start with 2 teaspoons of sugar per 8 ounces of creamer.
If you prefer a sweet coffee creamer, you might like as much as 2 Tablespoons of sugar/sweetener per 8 ounces of creamer.
One cool thing about making your own flavored coffee creamer is that you can choose the type of sweetener AND decide how much to use!
If you're anything like me, the sweetened non-dairy creamers at the store are often too sweet. So it's really nice to be able to balance the flavors to suit your own palate.
FAQ
Store homemade oatmilk creamer in a covered jar in the refrigerator for up to 6 days.
Yes, I've also tested the recipe with oat flour I purchased online (Anthony's brand), and it worked great! You may need to take a bit more care when straining, since commercial oat flour may be a finer grind that what you would create yourself in the blender.
Yes! By my calculations, homemade oat milk creamer costs about 75% less than most specialty non-dairy coffee creamers.
Taking into account the cost of organic oats (approximately $0.70), one capsule of digestive enzymes ($0.17), water, vanilla, and oil, it costs a little over $1 to make this recipe. At 2.25 cups per batch, that's $0.11 per 4 Tbsp.
For comparison, Califia Farms Unsweetened Oat Creamer was around $5.80 for 25 fluid ounces the last time I checked. That comes out to $0.47 per 4 Tbsp.
I hope you love this oat milk creamer as much as we do! If you try the recipe and experiment with flavors, be sure to comment below and let us know!
Recipe Video
Recipe

Oat Milk Creamer Like Store-Bought
Ingredients
- 1¼ cups rolled oats - certified gluten-free, if needed
- 3 cups water
- 1 capsule vegan digestive enzyme - tap for example product; should contain amylase and glucoamylase
- pinch of sea salt
- ½ teaspoon vanilla extract - regular or clear imitation vanilla
- ½ cup raw cashews - or 2½ tablespoon flavorless oil
- 1 teaspoon sunflower lecithin, optional - an emulsifier
Instructions
Soak, blend & strain:
- Put the rolled oats in a blender. Blend for about 5 seconds or until they're the consistency of coarse flour. Pour into a large bowl.
- Open one digestive enzyme capsule and dump the powder into the bowl (discard the capsule).
- Heat the water to approximately 150°F (66°C). I find it easiest to use a microwave. At this temp the water will feel very hot but won't immediately scald you.
- Pour the hot water into the bowl with the oat flour and enzymes, and stir well. For reference, use a spoon to taste the oat water (it will be very bland). Set aside for 30-45 minutes. I like to stir occasionally during this time. After 30 minutes, taste the water again. It should now taste slightly sweet compared to the first taste. If it doesn't, either the enzymes aren't effective or the water wasn't the correct temperature. If you think the water was too cool, microwave the bowl for about 30 seconds to raise the temperature, and check again in 15 minutes.
- Rinse out the blender to remove any oat flour remnants, and pour the oat-water mixture into the blender. Starting on low, quickly increase to high speed, and blend for about 10 seconds. You don't need to blend long since the oats were already broken down to flour.
- Use a nut milk bag to strain the oat milk into a large saucepan. I like to place one nut milk bag inside another, for a double layer. Or you can strain it twice using the same bag (rinse it between uses). Since the starch has been broken down into sugars, it's fine to squeeze the bag. Note that if it feels slimy, this means the enzymes didn't work. Review the tips in the Notes section below before proceeding.Save the oat pulp for baking or smoothies.
Simmer:
- Over medium heat and whisking frequently, slowly bring the oatmilk creamer to a simmer. Aim for 195°F (90°C). If you don't have a thermometer, look for these visual clues: tiny bubbles around the edges and slight movement in the center, like it's just about to reach a full simmer. Whisking, maintain this low simmer for another 20 seconds, then remove from heat. Whisk in the salt and vanilla.
Add a fat for richness:
- Let cool for about 20 minutes or until barely warm (for safety since hot liquids expand in the blender). Rinse out the blender jar, and return the creamer to the blender. For the cashew option, add cashews to the blender, and blend on high until completely smooth. Don't worry about over-blending! It's better to blend too much than too little in this case.For the oil option, while blending the creamer on high, remove the cap from the lid and slowly drizzle the oil through the spout.
- Add the sunflower lecithin and blend for a few more seconds.
- Pour into a clean jar and place in the refrigerator uncovered. Cover once cool. Keep refrigerated and use within 5 to 6 days.
Notes
- For a lightly sweet cup of coffee, start with 2 teaspoons of sugar per 8 ounces of creamer.
- If you prefer a sweeter coffee creamer, you may want to use as much as 2 tablespoon sugar/sweetener per 8 ounces of creamer.
- RECIPE UPDATE: Since I first shared the recipe, I've heard from a few people who said their oat milk still thickened when heated. Initially, I thought the most likely issue was the type of enzymes used (which is still a possibility). But now I'm more convinced it's due to differences in rolled oats (thick cut). This is why I've changed the instructions to include blending the oats into flour. This solves the problem by giving the enzymes full access the starches.
- When you first stir the hot water and oat flour together, taste the water for reference. After soaking for 30 minutes, the water should taste lightly sweet. The difference should be obvious. If it doesn't taste sweeter than before, either the enzymes aren't working properly or the water wasn't the correct temperature. If you think the water was too cool, microwave the bowl for 20 to 30 seconds to raise the temperature, and check again in 15 minutes.
- That said, if you notice that the oat milk feels slimy while straining it, this means the enzymes did not work. There's no point in heating it in the next step, unless you want to turn it into oat "pudding." You can always salvage the batch by adding vanilla and a sweetener and enjoying it for dessert! Then review all of the steps to identify possible reasons why the enzymes didn't work.
Estimated Nutrition (per serving)
Nutrition is an estimate and will vary depending on the exact amounts and ingredients used.


Donna says
This sounds great and I will be trying soon. I just want to know if it will foam in my Nespresso? If not what would you suggest I add to make it do so.
Thank You
Lori Rasmussen says
Hi Donna. I'm not sure about the Nespresso, but I would think so. It does foam.
SteveA says
Wow, this is so, so good! Relatively simple to make, too. I know it's a creamer but wow, it tastes good enough to drink! Thank you for sharing.
Dana says
I’m really excited to try this recipe, but before I splash out on the expensive enzymes please could you clarify whether this recipe makes the UK equivalent to Oatly Single Creamy Oat? We use this constantly for a single cream replacement and my husband also puts it in his coffee. Thanks in advance x
Lori Rasmussen says
Hi Dana, I'd never heard of Oatly's single cream product. Based on some quick research comparing nutrition labels, the closest thing they sell here in the U.S. is the Oatly Half and Half. But even then, the ingredients are slightly different.
Single Creamy is around 80% fat (of total calories). So the oil you choose will be your biggest obstacle in achieving the right flavor. This recipe is lower in fat than the Single Creamy Oat, so you'd definitely have to do a little experimenting to get the richness you're looking for.
Sorry I don't have a more clear answer. Do let us know if you give it a try!
Dana says
Thank you Lori, I wonder if I could wiz’s up your recipe with some additional soaked cashews? I’ll keep you posted if I start experimenting 🤞🤞🤞
Lori Rasmussen says
Yes, that's definitely worth a try. Since the natural starch in cashews thickens when heated, it probably won't take much to achieve a really rich consistency.
Sophia says
This recipe is genius! I've tried every oat creamer recipe out there, but this is the only one that tastes like store-bought quality. (I used algae oil and sunflower lecithin in my batch.) This will forever be my go-to now. Thank you!!
TomS says
I'm noticing a slight bitterness after adding the enzymes. I used the NOW brand as I do not live near a Whole Foods. Wondering if others have noticed the same and/or if there is a way to counter
WENDY says
I'm going to try this recipe but soak the oats in my Vitamix container....is there any reason I shouldn't?
Lori Rasmussen says
Hi Wendy - Nope, that should be fine. The only issue you might run into is if you wanted to microwave it during the soak time to bring up the temp. You would just need to pour it into a bowl.
Wendy says
Thanks. I don't have a microwave so I'll have to warm on the stove if I don't get it right. I'm trying the recipe now...in the soaking stage!
Christine M Kelly Boyd says
I want stop using the "International Delight" creamer but finding it difficult to replicate the silky texture & thickness. Even other commercial creamers are thinner. Does this turn out relatively thick & creamy? I'm wondering about the texture of your recipe before I invest in enzymes😁. All other creamers do make my coffee sweet but sort of water it down.
Lori Rasmussen says
Hi Christine - As the recipe is written, it's not going to be as thick as what you're describing. The carageenan is one issue, but you'll need to increase the amount of fat. In looking at the International Delight website, the caloric makeup is around 42% fat, 58% sugars. So I'd say it depends on whether you feel up to experimenting a little bit! I would start by using both cashews and oil and definitely the lecithin to keep the oil emulsified.
Terri says
Hi Lori, will steel cut oats work in this recipe?
Lori Rasmussen says
Hi Terri - I haven't tried it with steel cut oats, but it should work since people use them to make oat milk. But my guess is that you'll need to blend them with water first to break them down, and then soak with the enzymes.
Rachel Strophair says
Hi
What size cup is this or what are measurements in grams/mls?
Lori Rasmussen says
Hi - Just above the ingredients, tap on “Metric.”
Rachel Strophair says
Great thank you. Look forward to trying it
Mickey says
I'm wondering if using unsalted freshly ground Cashew butter or Cashew powder would work.
Lori Rasmussen says
Haven't tried that but either one should blend into the creamer just fine.
Christine M Kelly Boyd says
Lori, Hope I'm not bugging you too much!
Both enzymes can be purchased in "high temp" liquid form from websites specializing in brewing/distilling. Any thoughts?? I forgot to say International Delight brand creamer uses carrageenan.
Thank you for help & what looks like a promising recipe!
JMan says
I just tried your recipe. It looked promising after trying ones without the enzyme, which makes sense and tastes comparable to the store bought oat creamer I usually buy. I used Organic Old Fashioned Rolled Oats and was amazed how the enzyme broke down the oats.
I used a small pot to heat up the oats with water and shut it off once the 150 degree temperature was reached, and whisked the mixture while it was heating up. A thermometer was also used when bringing the mixture to the 195 degree simmer.
Excellent recipe. This will make a big difference in my food budget. Thank you!
Rose says
I just tried it. I'm going to have to try it again because I used some of digestive enzymes that I had hanging around, and while they did list the two enzymes you mentioned, I don't think they worked. Slightly sweet is a subjective term but the oats didn't taste sweet to me at all and I added more enzymes and more time. Then I blended everything in the blender. And it just turned it into an oat slurry. I strained it twice and it was still very thick. In fact it was thick coming right out of the bag. Most other oat milk recipes have you soaking the oats and draining the soaking water. I assume it's not necessary for this recipe because of the enzymes. So in fact you really don't have to worry about blending it for only 30 seconds. But even so I kept to that. I also used guar gum as the emulsifier as I had it on hand. I only used a half of a teaspoon. Okay I'm going to try it one more time.
Lori Rasmussen says
Hi Rose - yes, it sounds like the enzymes aren't active/working. Funny enough, this and the oat milk recipe are turning out to be a great way to know whether an enzyme supplement is legit (and actually does what it says)! I received great feedback recently from a few people on the oat milk. So it really seems to come down to the product. If yours had worked you would have noticed the sweetness I refer to, and it wouldn't have been thick after blending and straining. I hope you're able to find success!
Kathy Allen says
This is so different than any other oat milk recipe. They use cold water and only blend briefly and then strain and no cooking. I’ll try this one.
Lori says
Hi Kathy,
You're right, the enzymes are the key! Otherwise, blending too long and heat will activate the starch. Hope you enjoy it!
Deanna Marcinski says
Hello Lori,
Thank you for making this recipe, I am new at this, long time vegan but new at making creamers. Trying to do it healthier now. I was curious if there is a substitute for the enzymes?
Lori Rasmussen says
Hi Deanna,
I don't know of a substitute. Without addressing the starch in the oats the creamer can't be heated (would thicken like oatmeal). You could possibly do could do a simple blended oat milk to use in cold beverages. Otherwise, you might want to try a different base, maybe a cashew creamer? Hope that helps clarify!
WENDY L GANTOS says
I've made oat mylk in the past without enzymes (currently trying this recipe) and the trick for reducing slime has been using cold water/ice cubes when blending in my vitamix. Making it into a flour first also reduces the heat which can make it slimy. I never used a nut mylk bag on it when made this uncooked way either and just shook the oat milk around first before using as it tends to separate.