
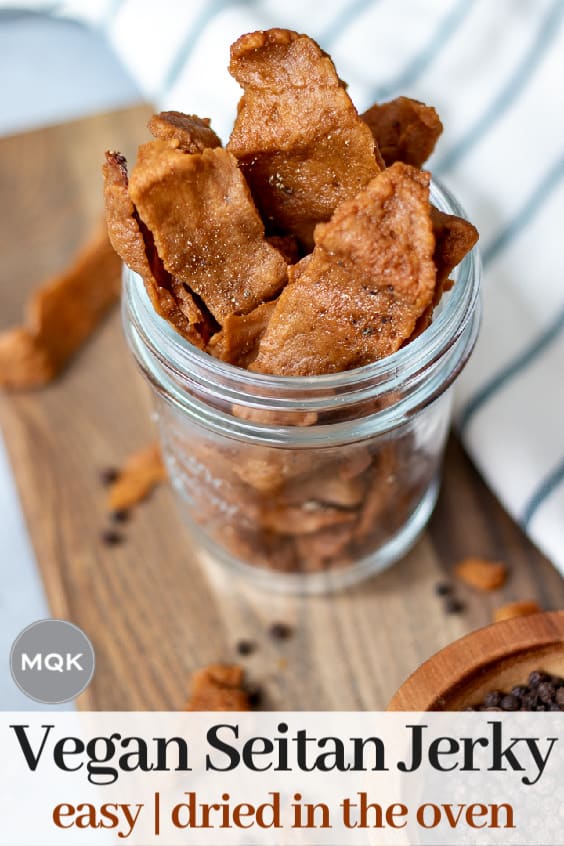
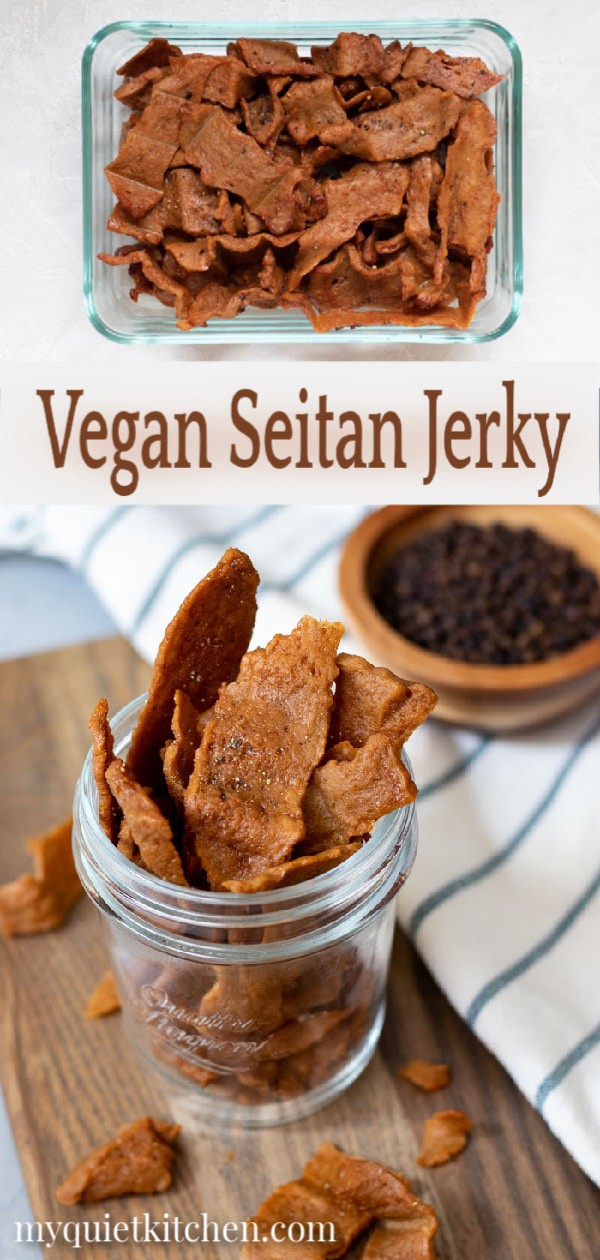
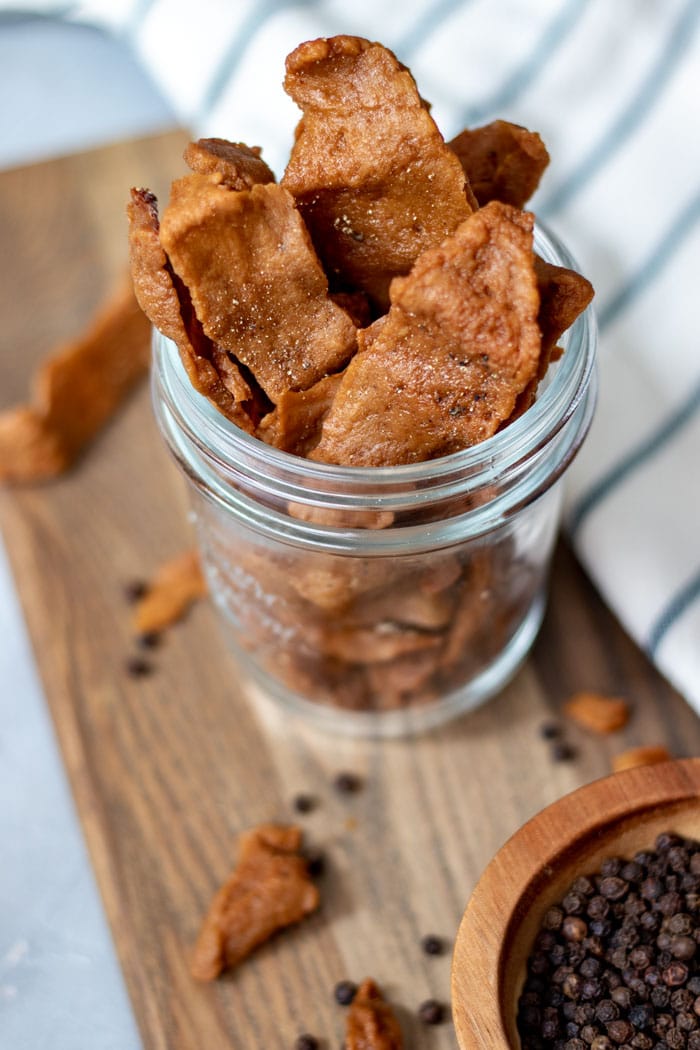
This vegan teriyaki seitan jerky is easy to prepare, low in fat, and high in both protein and flavor! It does require some time and a little prep work, but it's way more affordable than specialty jerky you find in stores and is so worth the effort.
Ever notice how difficult it is to find a healthy, savory, portable snack? While I love fruit and energy bars as much as the next person, sometimes you're just not in the mood for something sweet. Homemade vegan jerky to the rescue!
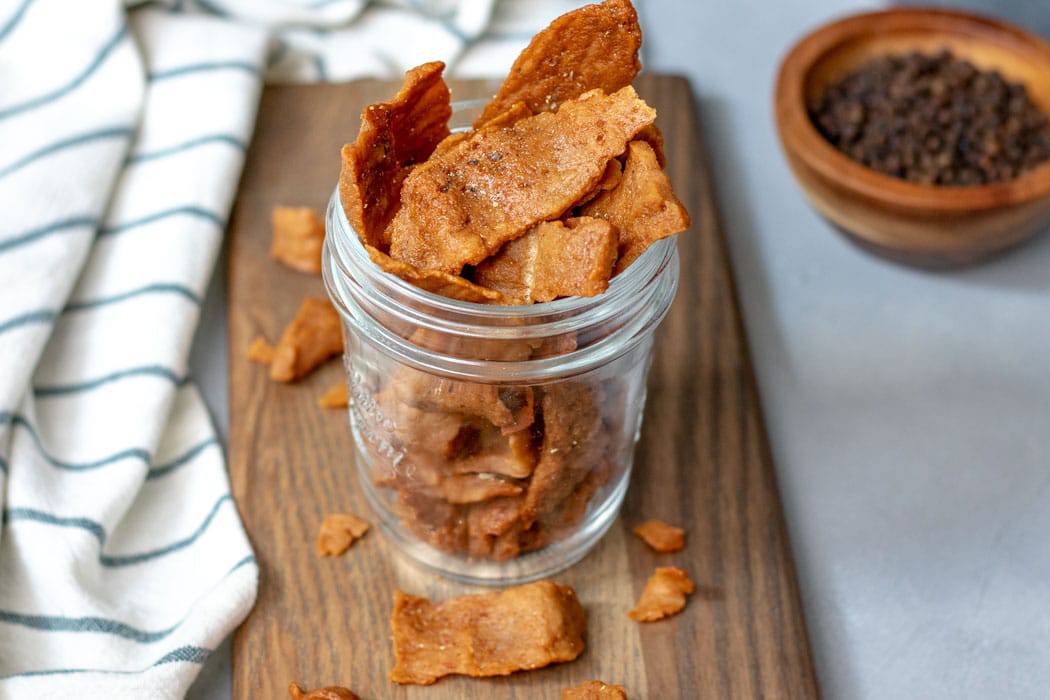
How to make vegan seitan jerky
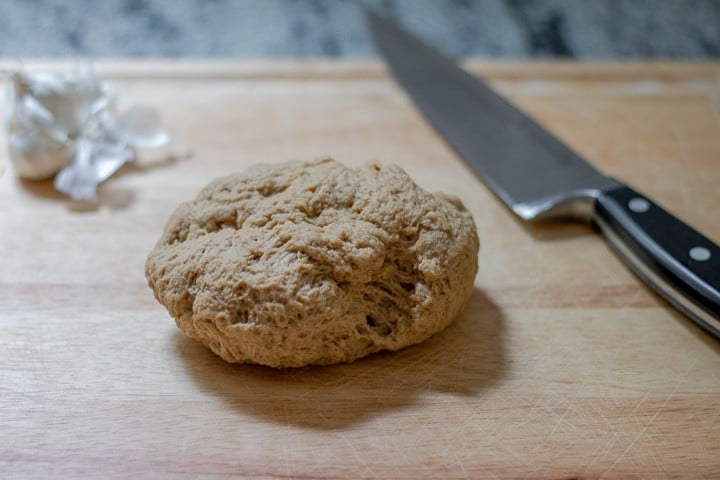
The process begins like traditional seitan, except we're actually going to build the teriyaki flavors into the dough.
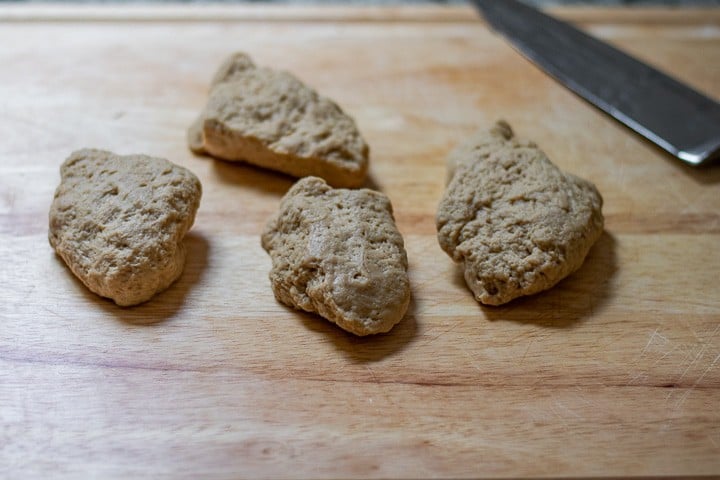
Once the dough comes together, you'll cut it into 3 or 4 pieces and freeze them for 30 minutes. This firms up the dough, and makes it easier to slice.
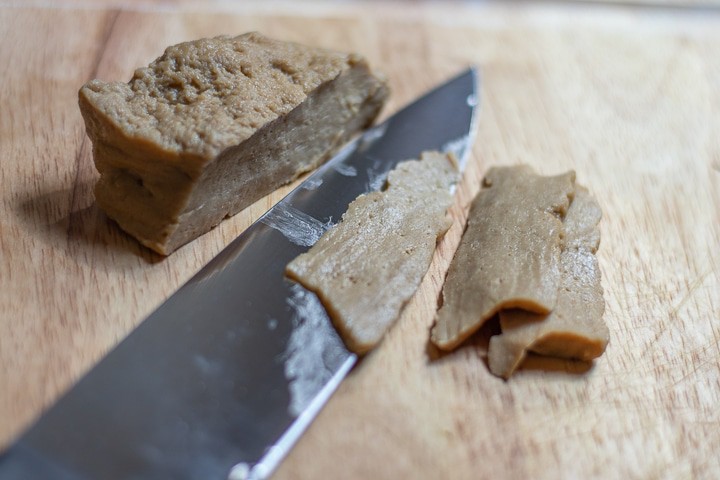
With a serrated knife or a very sharp chef's knife, slice the seitan as thinly as possible. This doesn't need to be perfect. Embrace the jagged edges and varied shapes.
A little bit of variance in thickness isn't a big deal either. The jerky will spend long enough in the oven that all of it will get nice and chewy and dry.
The slices then take a quick dip in teriyaki sauce and go into the oven. So while this isn't a super quick recipe, it isn't that difficult.
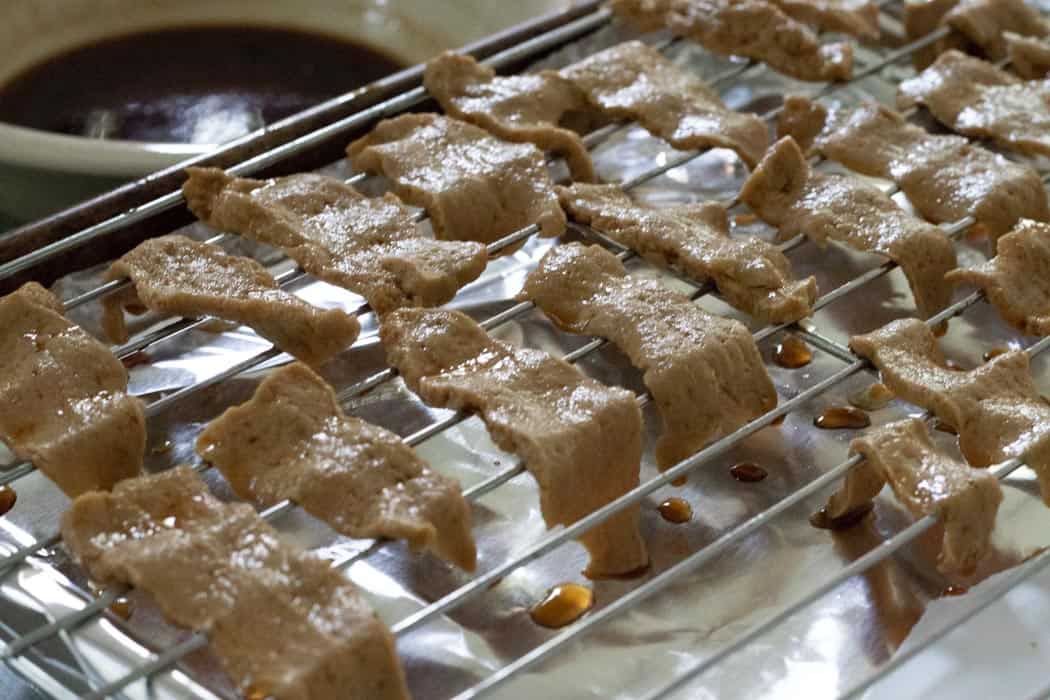
Placing the slices on racks helps the seitan dry more evenly but isn't required. I experimented with putting some directly on parchment paper, turning them midway during cooking, and they turned out fine.
Want to save this recipe? 📩
Keep an eye out for more delicious recipes. Unsubscribe anytime.
Also, I recommend saving yourself some headache by covering your baking pans with foil, parchment or silicone mat. Otherwise, any sauce that drips onto the pans during baking becomes SUPER baked on and difficult to remove. Thankfully, you can learn from my mistakes!
Top Tips
There is a bit of an art to knowing when the jerky is done. But if you read the tips below (also summarized in the Notes section of the recipe), you'll be ready to make jerky like a pro.
- Since we're working with a flour (vital wheat gluten), how you measure it is very important. The wet-to-dry ratio of the seitan directly affects how long it takes to cook. I recommend using a kitchen scale to weigh the vital wheat gluten, but if you don't have a scale, use the following method:
Pour vital wheat gluten into a large bowl and gently whisk it (like other flours, it will be more compact in its original package, causing you to scoop up more than is needed; whisking fluffs it up). Then gently scoop it up with a measuring cup, and level off the excess using the flat edge of a knife.
Side note: if you enjoy baking and don't yet have a kitchen scale, I highly recommend getting one. It makes measuring so much easier and leads to consistent results! I've been using and enjoying this affordable one from Escali.
- Also, ovens can vary quite a bit. When you're cooking something for well over an hour, even just a 5 degree difference in oven temperature can impact the cook time significantly.
- Finally, the thickness of your slices will determine whether the jerky is ready in one-and-a-half hours or closer to two hours! This is where the "art" of knowing doneness comes into play.
But before you start thinking, "Ugh, this sounds too hard!" rest assured that there isn't ONE specific level of doneness, where anything outside of that means failure. Nope! There is actually a somewhat forgiving window. Here are my best tips:
- Check the consistency a few times, and you'll start to get a feel for the progression of doneness. When the thickest pieces no longer show signs of that squishy raw seitan texture but are still a tad soft, you'll know they're done. At this point, the thinnest pieces will seem firm, almost crisp. For me this is usually around the 1 hour 45 minute mark.
- Right out of the oven the thinnest pieces of jerky might seem too crispy, but don't despair! Store the jerky in an air tight container for a few hours (or overnight), and you'll find that the remaining moisture magically redistributes, softening the crispier parts and making the thicker pieces firmer and more jerky-like.
I hope you love this Teriyaki Seitan Jerky as much as we do. If you try it I would love to hear from you! Leave a comment below, or tag a photo @myquietkitchen on instagram.
Happy snacking!
More jerky:
Seitan Jerky (Buffalo and Thai Peanut)
Recipe

Teriyaki Seitan Jerky
Ingredients
For the seitan:
- 2 ¼ cups vital wheat gluten (280 g) - Use a scale for the most accurate measurement; otherwise, whisk vital wheat gluten before gently scooping it up with a measuring cup. Level off excess with the flat edge of a knife.
- 1 cup water
- ¼ cup plus 1 tablespoon soy sauce or tamari
- 1 teaspoon liquid smoke
- 5-6 cloves garlic, zested or finely minced
- 2 tablespoon rice vinegar
- ¼ cup maple syrup
- 2 teaspoon toasted sesame oil
- 1 inch piece fresh ginger, zested or finely minced
For the teriyaki sauce:
- ¼ cup plus 1 tablespoon soy sauce or tamari
- 1 ½ tablespoon rice vinegar
- 1 ½ tablespoon maple syrup
- 1 ½ teaspoon toasted sesame oil
- 1 teaspoon ground ginger
- black pepper, to taste - optional
Instructions
- Line two baking sheets with foil. Place racks on top, if using, or cover the foil with a layer of parchment paper.
- Put the vital wheat gluten in a large bowl and set aside.
- Put the remaining seitan ingredients (water, soy sauce, liquid smoke, garlic, rice vinegar, maple syrup, toasted sesame oil and ginger) in a blender and blend until smooth.
- Pour the wet mixture into the wheat gluten, stirring to combine. Move the dough to a flat surface and knead for 2 to 3 minutes. Cut the dough ball into 3 or 4 pieces and freeze for 30 minutes.
- Preheat oven to 250 degrees F. In a small bowl whisk together the ingredients for the teriyaki sauce.
- After the dough has chilled, slice it thinly, dip each piece into the sauce, and place on the rack/pan. Sprinkle with freshly cracked black pepper, if desired.
*If jerky is directly on a parchment-lined pan, flip every 30 to 45 minutes to ensure even drying. - Bake the seitan for 1 ½ hours to 1 hour 45 minutes (as mentioned in the post, this is affected by several factors; it may even take closer to 2 hours). Check doneness a few times during the second half of cooking (see notes).
Notes
- Because the jerky cooks at such a low temperature, the cook time is somewhat forgiving. Depending on the thickness of your slices, as well as the exact moisture content of the seitan (this is why the method used to measure the vital wheat gluten is very important), you may need to experiment a bit to find your favorite level of chewiness. It's better to err on the side of slightly underdone than over.
- When the thickest pieces no longer show signs of that gelatinous, raw seitan texture, you'll know they're done. They may still be a bit soft while the thinnest pieces seem almost crisp.
- Thin pieces of jerky might seem too crisp right out of the oven but will take on a more uniform chewiness once stored in an airtight container.
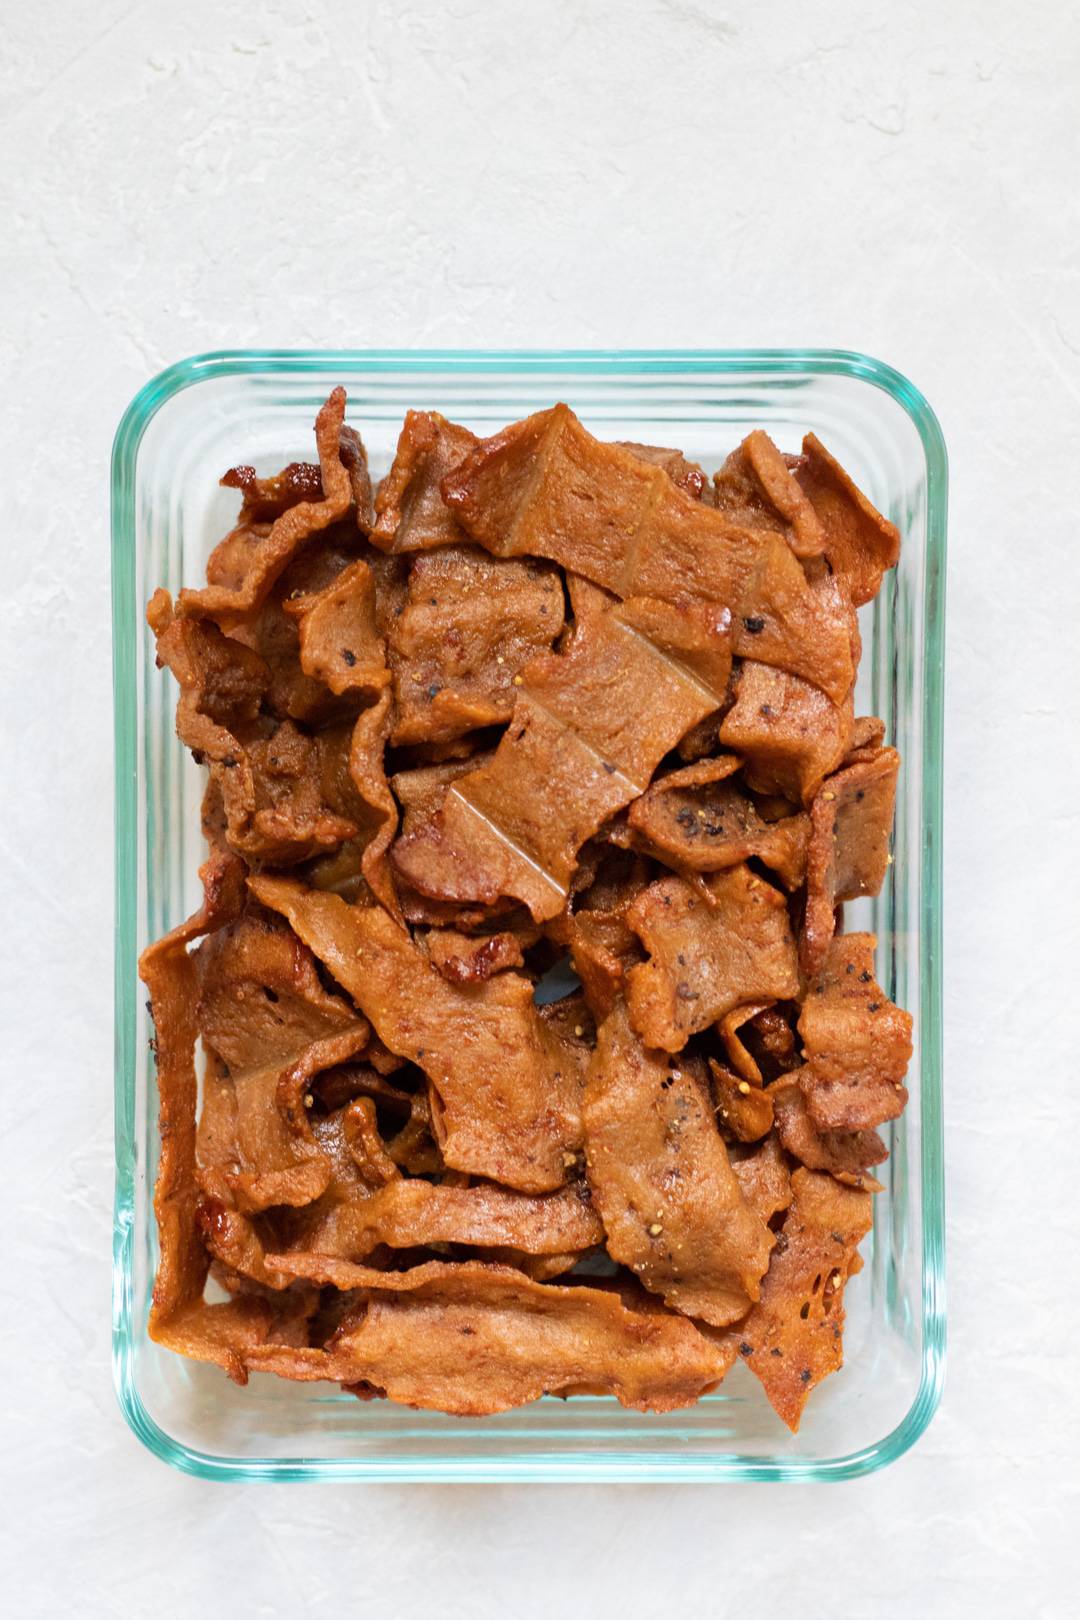
- Store jerky at room temperature for several days or in the refrigerator for up to a week (possibly more if very dry).
Estimated Nutrition (per serving)
Nutrition information is an estimate and will vary depending on the exact amounts and specific products and ingredients used.
Rob LaBarbera says
While prepping this, I was so excited - the smells, the texture, the process all brought me back to making home made jerky for years. The end result was pretty disappointing however.. while the flavor was pretty good, the texture was mixed - like the recipe states, if the thickness isn't 100% uniform, the pieces will have varying textures. The thicker pieces in my case had a chewy texture, but not an enjoyable one - a very gelatinous, hard-chewy texture, like a stale laffy taffy. The thinner pieces snapped in half like Hard jolly rancher strips. Followed the directions without any straying.
When I made Beef jerky years ago, I remember using a much lower temperature - 165.. could this be a better solution for seitan as well? 165 at 3 hours instead of 200 at 2? Will continue modifying this recipe to see what works better. Thanks for posting this still - gave me hope that a different yet familiar jerky could be achievable.
Lori says
I'm glad you enjoyed the flavor, Rob. Yes, there's definitely a bit of an art to slicing the dough and knowing when to pull the jerky from the oven. I have a feeling you'll find it much easier to get the results you want the second time around. I'm always pondering ways to try to make the recipe more foolproof/consistent. Did you try storing the jerky in a container for a few hours? As mentioned, that always helps even out the moisture for me. And to address your Q about the temperature, I'm concerned a temp as low as 165 wouldn't actually *cook* the seitan.
Angela says
BEST jerky I’ve had since becoming vegan. Thank you SO SO MUCH for this easy, delicious recipe!
Lori says
You're so welcome, Angela! Thanks for the awesome feedback. 😀
Kara says
Hi, do you know if this would freeze well? It looks fantastic, but I'm not sure I could eat 8 servings to myself in a week!
Lori says
Hi Kara,
I haven’t tried freezing it yet, but yes, I do think it will freeze well, similar to regular seitan. There are just two of us and the whole batch is usually gone in 2 to 3 days! 😀
Tamara says
Hi, could I replace liquid smoke with smoked paprika? I am not comfortable using the liquid smoke.
Lori says
Yes, absolutely!
elizabeth says
Hi Lori, have u had a chance to use your dehydrator with this recipe yet? I just purchased a Cuisinart DHR-20 and I want to make your recipe but I don't know what to do! The temps read for low-110, med.-140 and 175 for high. And as far as how much time it will take:I'm at a loss. Please help me if u have the time Thank you
Lori says
Hi Elizabeth,
That's a great question, thanks for asking. Yes, back in January another reader asked about using a dehydrator so I tested it (see my reply to Victoria below). Unfortunately, the seitan doesn't have the opportunity to *cook* at the lower temperatures of a dehydrator, so to use one for the drying process, you have to cook the seitan first. In other words, it adds another step and ends up increasing the overall cooking/drying time. Hopefully, that makes sense!
So I would recommend either making this recipe as written using the oven, or starting with pre-cooked seitan and using the dehydrator to dry it. You could use this recipe (so that the teriyaki seasonings are built into the dough), then steam it similar to the instructions in my Homemade Seasoned Seitan recipe. Then, slice it and dehydrate it.
Let me know if you have other questions! 🙂
Cris says
I am so happy to have jerky again!! I used my home dehydrator instead of the oven (158 degrees for 7 hours) and it came out perfectly chewy and with a terrific flavor. Thank you so much for developing this recipe!!!
Lori says
Happy to hear that, Cris! Thanks so much for the report. It's on my to-do list to test the dehydrator method again and update the recipe accordingly.
So happy you love it!
Mark says
Great recipe! I’d never thought about making my own vegan jerky but this was delicious. Will be a regular snack in our house. Thanks-
Lori says
Excellent! Thanks so much, Mark!
Beth says
Hi Lori, thank you so much for this wonderful recipe! I'm trying hard to be an oil free vegan so omitted the sesame oil both in the seitan and in the sauce. The resulting jerky has a delicious taste but is very tough and gives my molars a good work out! I cooked it for the minimum amount of time (1 1/2 hours) so do you think the extra chewiness or toughness could be caused by my cutting the oil?
Lori says
Hi Beth,
Congrats on the no oil vegan eating! It's a wonderful way to live. Sorry to hear your jerky turned out too chewy on this first go 'round. Even though it's a small amount of oil, I do think the reduction in moisture could have affected the texture. It might also be due to oven differences. I would try reducing the cook time by 15 to 20 min and see if you can retain more of the moisture. That should lead to a slightly softer texture.
Thanks for being here!
Lydia says
Hi there! Thanks for your response 🙂
So I think my oven does run a little hot so i’m currently in the middle of making a new batch and i’ve reduced the temperature a little (by 20 degrees celcius or so). My slices looked very similar to yours just a little thicker as I couldn’t get them as thin! They were close together on the pan but not touching, and they stayed puffy! It was so strange but hoping this batch turns out more accurate 😀
Lori says
Okay, good! Keep me posted, and if you want to email a photo that might be helpful - myquietkitchen@gmail.com
Lydia says
Hi there! I just tried to make this and my jerky puffed up like bread! What did I do wrong?
Lori says
Hi Lydia,
Hmmm, that's a good question! I've never had them puff up during this method. Without more info it will be hard to figure out. It might be that your oven runs hot. Or possibly the dough had higher water content than mine. Do you think your slices looked similar to mine in the photos (the uncooked ones)? Were the pieces crowded on the pan or did they have space around them?
Sorry you had trouble with it! Oh, one more Q: did they deflate after cooling off?
Katelyn says
What do you mean by "water through fresh ginger" on step 3? I'm stuck..
Lori says
Hi Katelyn, oops, that's not very clear. I meant everything else in the seitan ingredient list, from water down to ginger. So that would be water, soy sauce, liquid smoke, garlic, vinegar, maple, sesame oil, and fresh ginger. I will update the wording to make it more clear. Thanks!
Lindsey says
Looks great! Does this need to be stored in the refrigerator? Also, how many days have you found it’s good for?
Lori says
Hi Lindsey,
I usually store it in a sealed container at room temperature, but storing it in the fridge would probably be fine, too. I don't think a batch has lasted more than 3 days in our house because we gobble it up. 🙂 If you feel like the jerky is thoroughly dried (you'll be able to tell), I would feel comfortable keeping it up to a week. It's possible that it would be fine much longer than that, but since I haven't tested it I'd rather keep my advice on the conservative side. If you're interested in more flavors, check out this post. https://myquietkitchen.com/seitan-jerky-buffalo-and-thai-peanut/
Lindsey says
Thanks! I made the buffalo jerky last night. Omg it’s SO good!! Can’t wait to try the other flavors!
Lori says
Hooray! So glad you like it. 🙂
Alexis says
Hi! Do u not have to simmer it in anything or steam it? You just freeze it and stick it in the oven after cutting into slices? If u use a oven?
Lori says
Hi Alexis,
Nope! You don't have to pre-cook it. The oven temp of 250 degrees F is hot enough to cook it while also drying it into jerky. 🙂
Victoria Schilling says
How would you adjust this if you wanted to use a dehydrator instead of the oven?
Lori says
Update:
Hi again, Victoria. After a couple of tests today, I found that in order to dehydrate the jerky at 155 degrees F, you first need to cut the seitan dough into 8 pieces and simmer it in water for approximately 45 minutes (as you normally would when cooking seitan). This allows the vital wheat gluten to cook. Then let it cool, slice it thinly, and dehydrate it anywhere from 3 to 4 hours. The timing depends 100% on the thickness of the slices. Slicing the seitan as thinly as possible is key to saving a LOT of time (whether you dehydrate or use the oven). 🙂 The nice thing about jerky is that at such a low temperature, nothing happens quickly. In other words, there's not a small window in which to get it right. Hopefully that helps!
Hi Victoria,
I haven't tested it in a dehydrator so I can't give an exact temperature and time, but since the temp will be considerably lower than 250 degrees, the drying time will be longer. I'm really glad you asked this question... I was planning to make another batch of jerky soon, so I'll get my dehydrator out and test it! I imagine it may take closer to 4 hours. If you give it a try, just check on the doneness after several hours and let that be your guide. I will update the recipe after I test it and let you know.