
This vegan chickpea ice cream is a dairy-free game changer! No coconut milk or cashews here. The base of this chocolate ice cream is made with chickpeas, sunflower seed butter, and dairy-free chocolate, and the result is SO good it just might become your new favorite vegan ice cream!
What Makes It Different
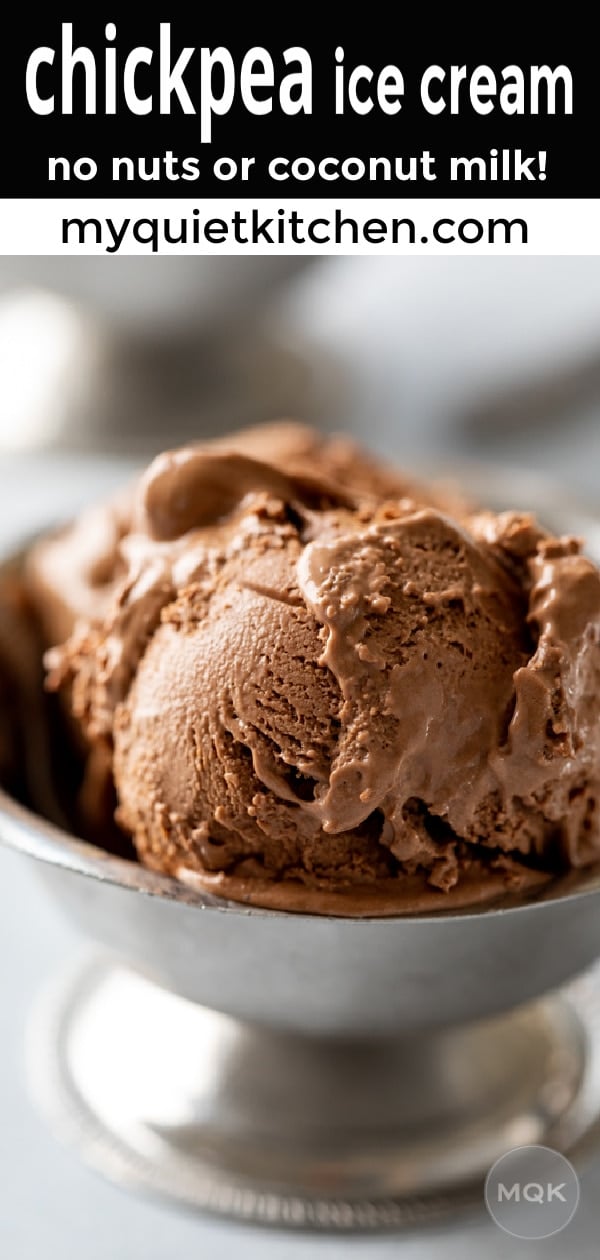
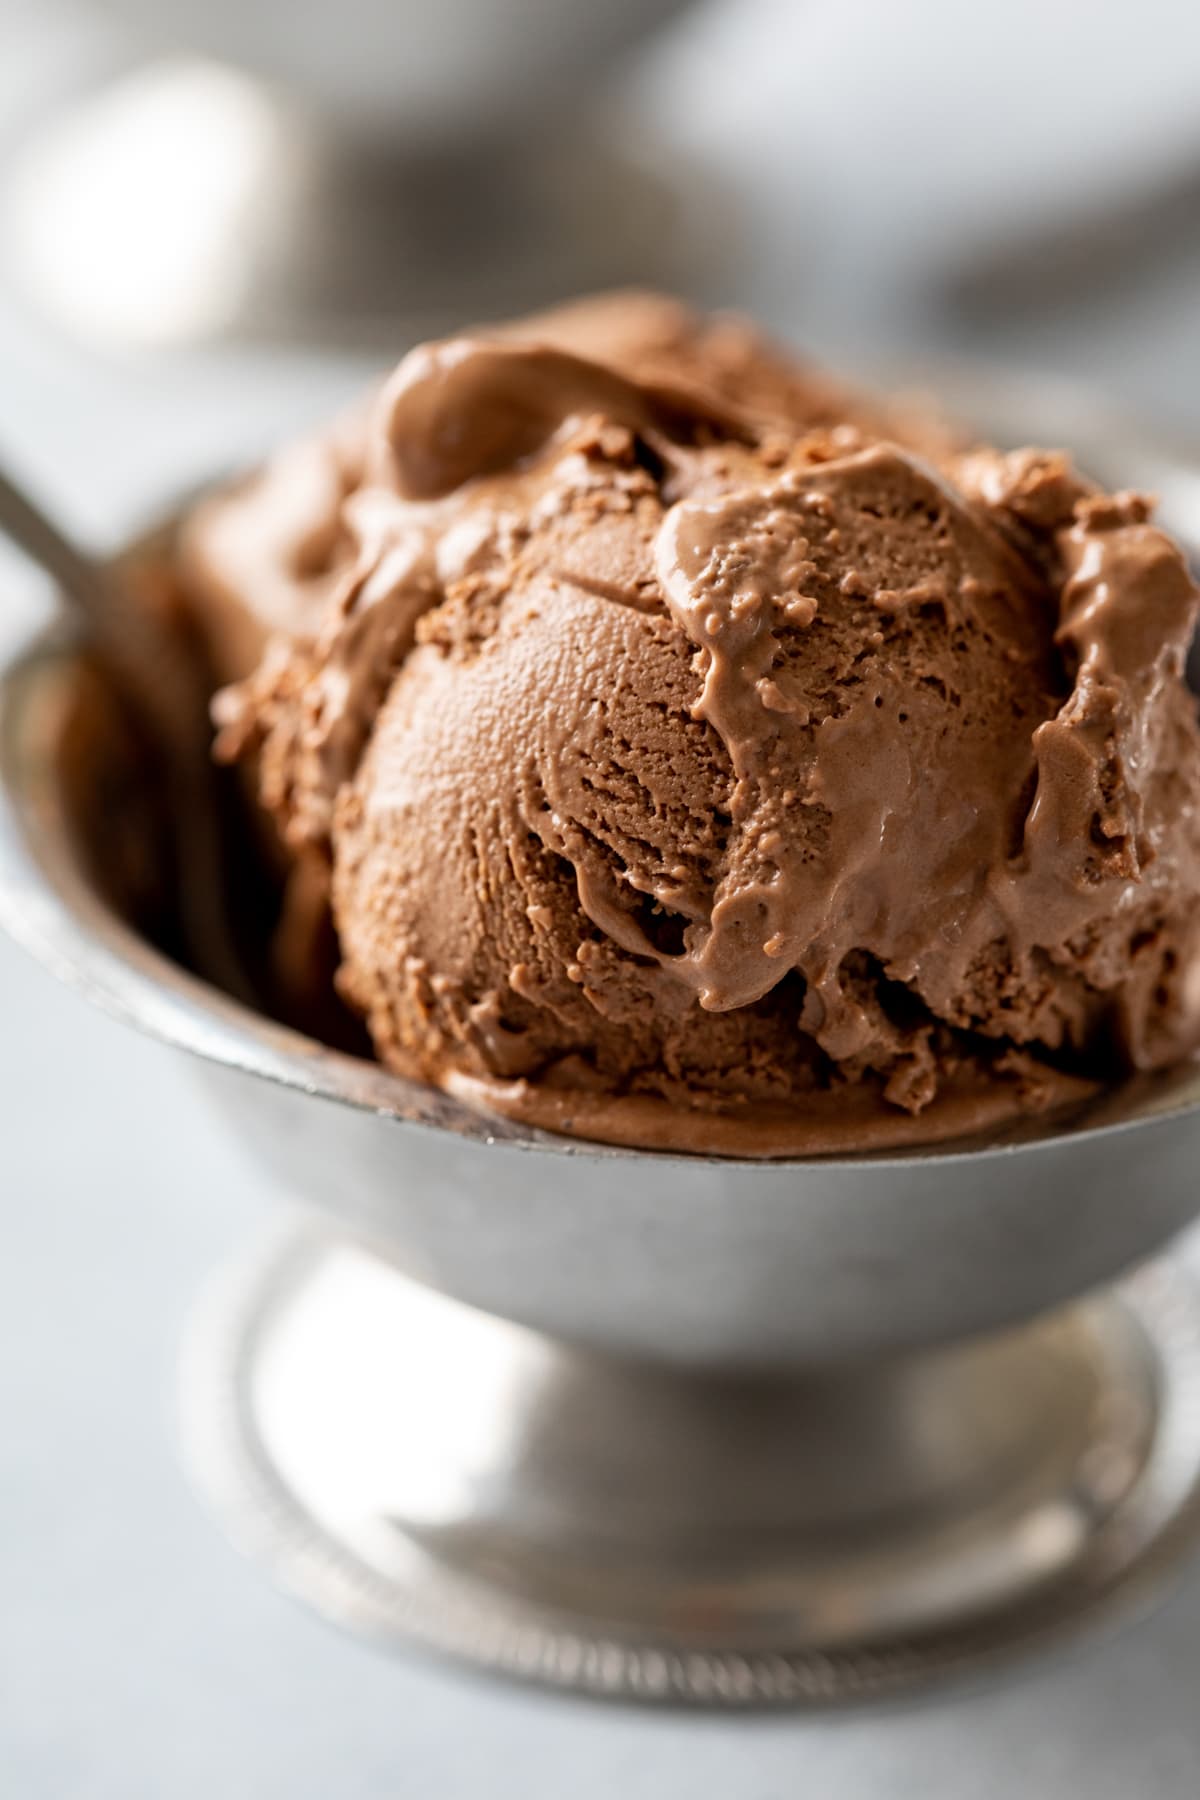
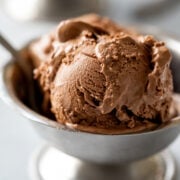
Friends, this chocolate dream tastes every bit as good as it looks! Not only will no one believe this chocolate ice cream is vegan, they'll never know there are protein-rich chickpeas hidden inside.
Over the past year I've had so much fun creating alternative vegan ice creams with a base of oats and nuts (no coconut milk in these either). Here are the flavors I've shared so far:
- Vanilla-Maple
- Lemon
- Butter Pecan
- Pistachio (no cashews)
- Cranberry
- Pumpkin
- and this new Eggnog Ice Cream
As much as I LOVE those oatmeal-based ice creams, I was craving a new challenge. I also wanted to share a nut-free vegan ice cream for all the folks out there with nut allergies.
For more vegan ice cream that is easily made nut-free, check out my protein tofu ice cream and date ice cream. Also, browse these 21 Vegan Ice Cream Recipes for ideas!
Related: Like the idea of chickpea desserts? Try these chickpea cookies.

Using Chickpeas and Corn Starch in Ice Cream
A couple of years ago I heard about an ice cream place in Portland, Oregon, called Little Chickpea that uses chickpeas in their vegan ice creams. It was pretty big news, so you may have heard of them, too.
I fully admit, initially the idea of adding chickpeas to my ice cream didn't sound all that great, which I guess is why it took me so long to get around to this experiment. Now I'm kicking myself!
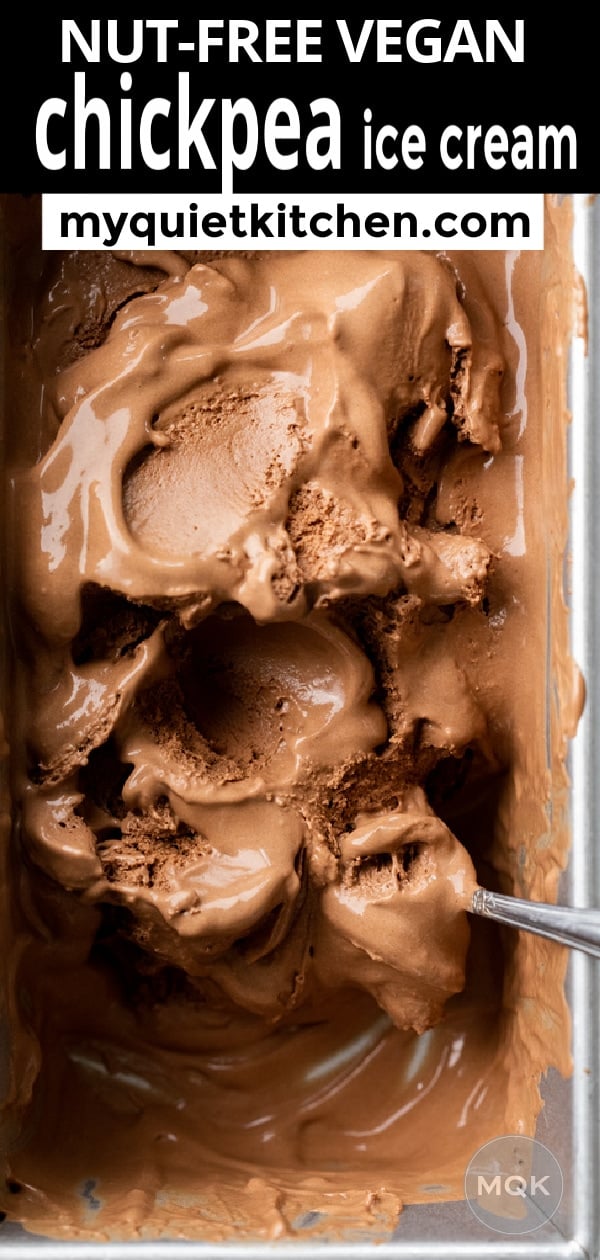
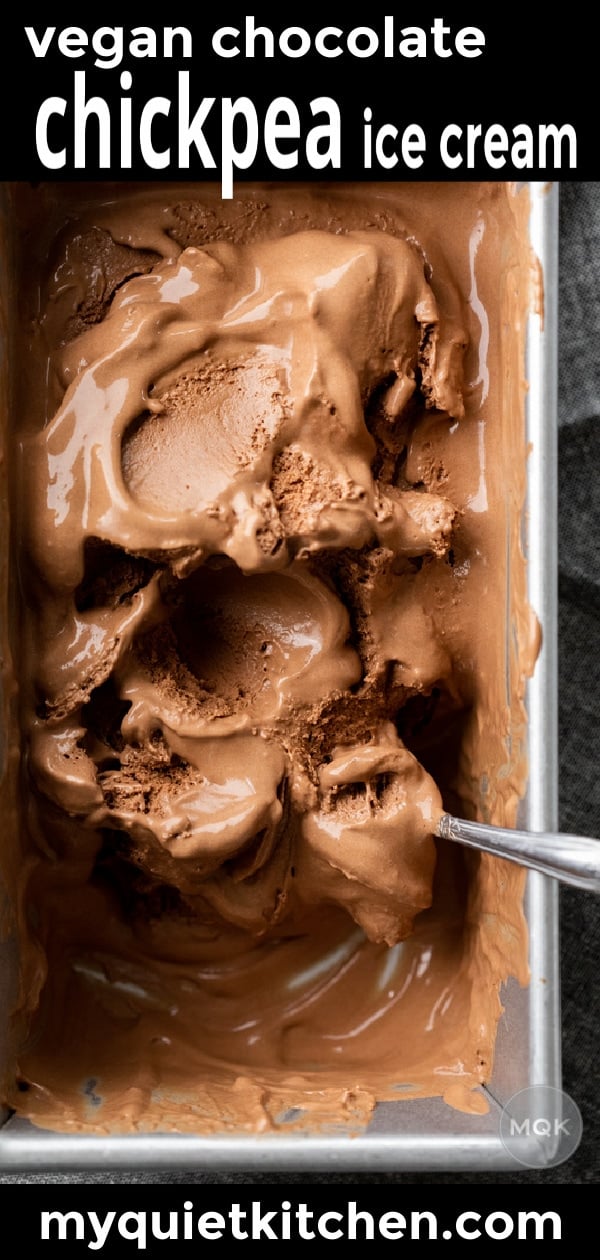
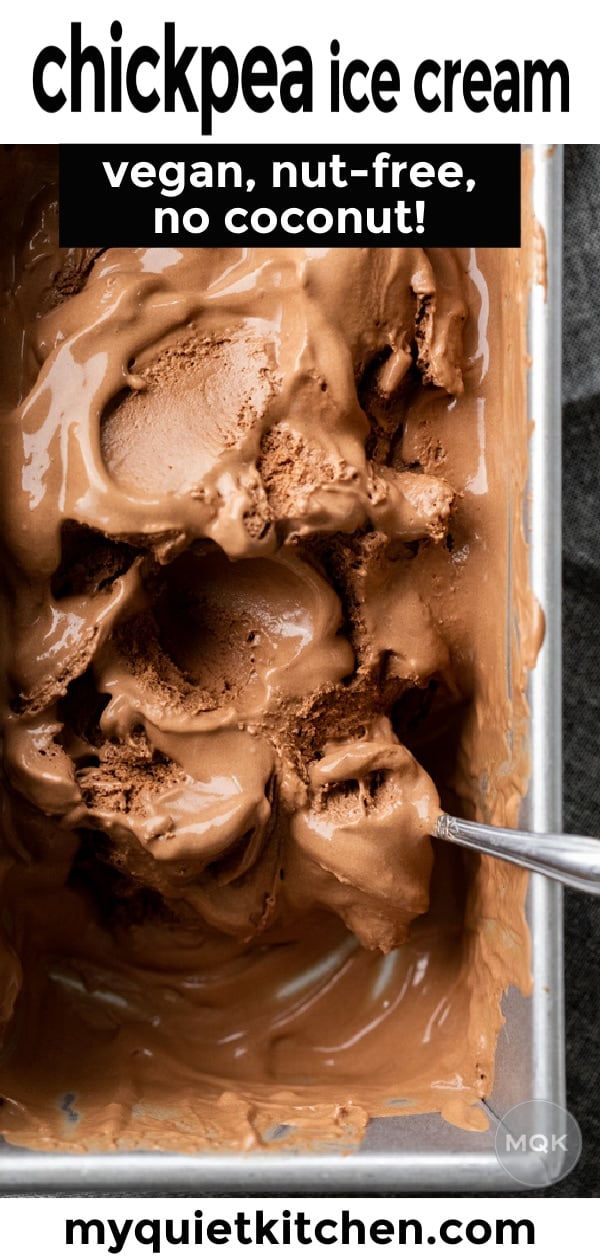
This is easily one of the best vegan chocolate ice creams I've ever tasted.
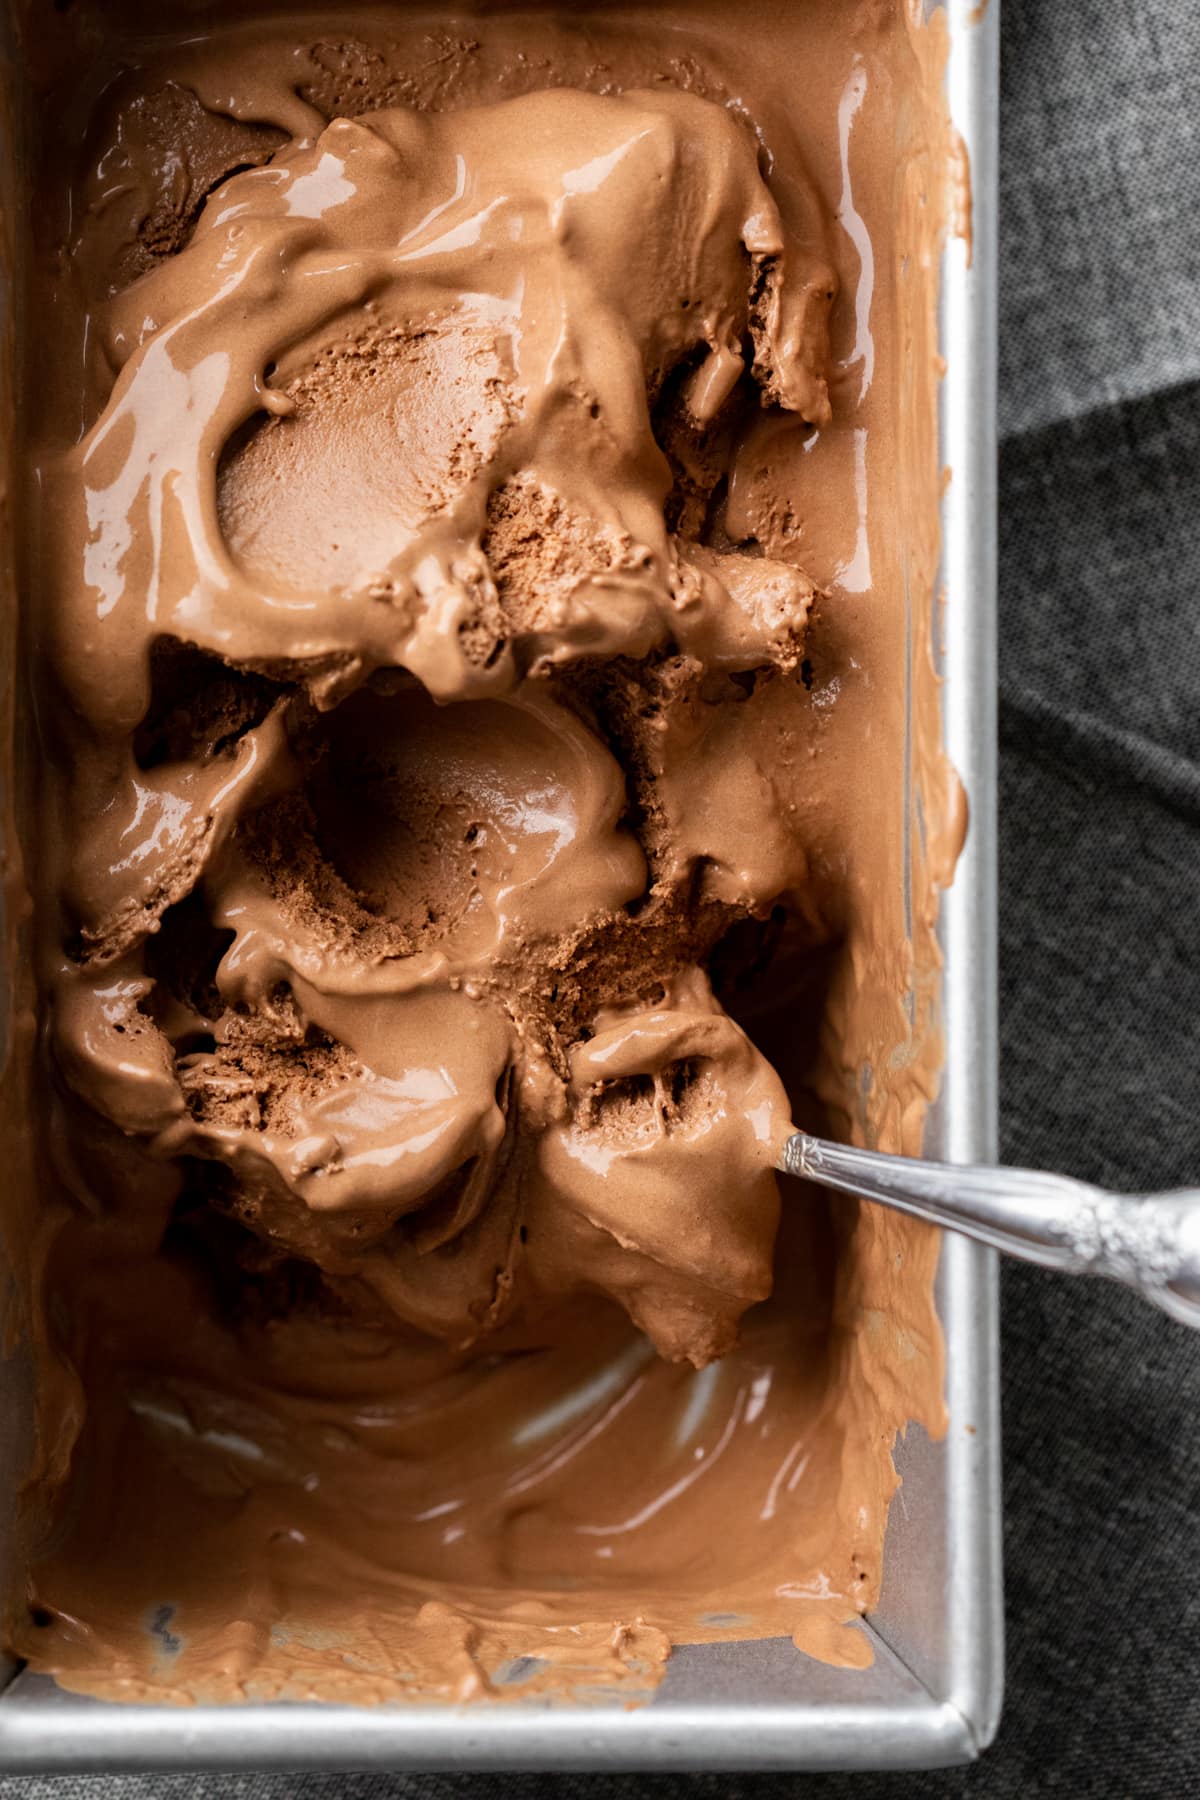
The chickpeas are completely undetectable (thank you, chocolate), and the mouthfeel of this ice cream, especially once it gets all melty, is LEGIT like heavy cream. It actually feels fluffy in your mouth. Shout out to corn starch for that extra creamy element.
When you get to the final photo in the post, just before the recipe, look at the way the melted ice cream clings to the sides and bottom of the pan, and you'll see exactly what I mean.
Simmering corn starch with a portion of the milk creates a beautifully silky texture. Using corn starch in ice cream is often referred to as Sicilian-style.
But on the flip side of the melty stuff, chickpeas have a magical way of preventing this ice cream from melting as quickly as other recipes. So feel free to savor every bite and take your time while enjoying your scoops!
Want to save this recipe? 📩
Keep an eye out for more delicious recipes. Unsubscribe anytime.
Ingredients
To make chocolate chickpea ice cream here's what you'll need:
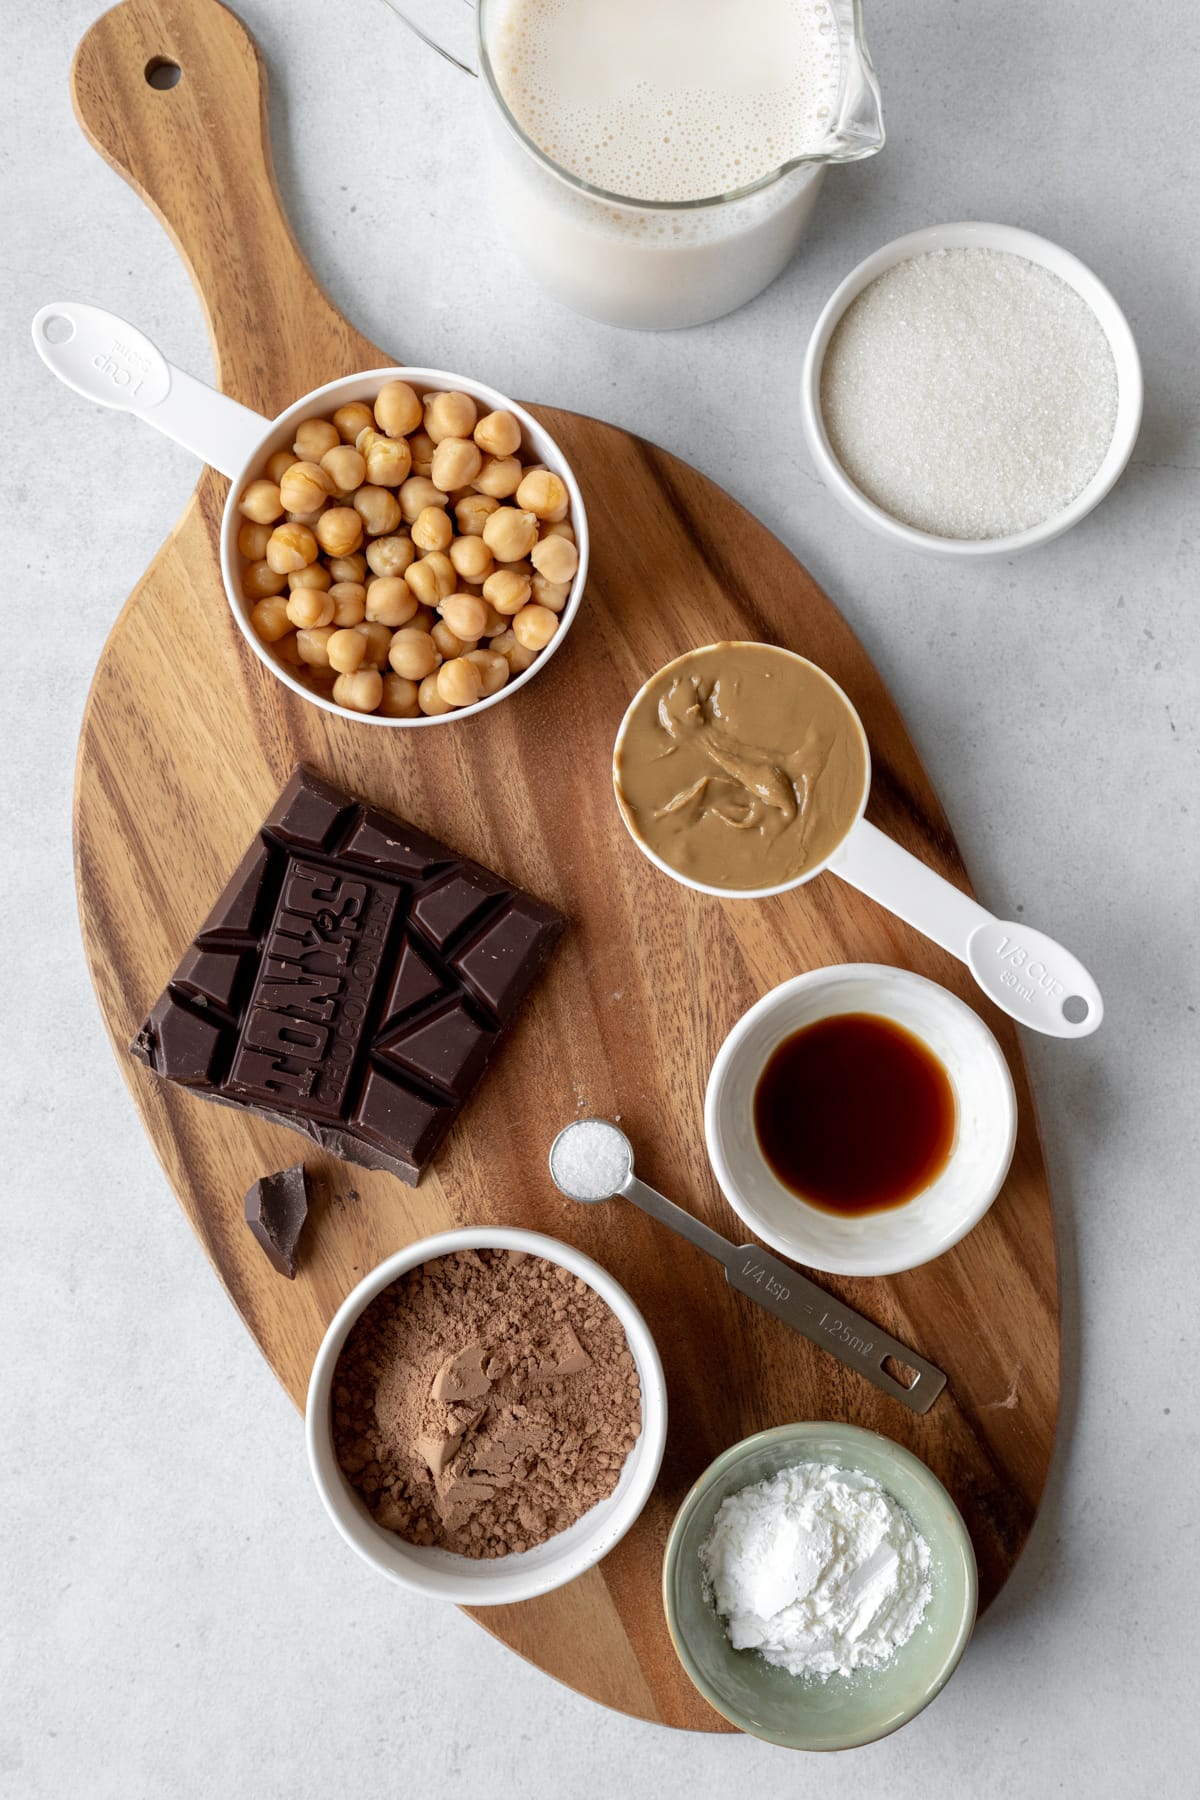
- 1 cup cooked chickpeas - I used canned; rinse and drain very well
- 7 ounces dairy-free chocolate - look for a semi-sweet chocolate, one that's around 60 - 65% cacao; 70% is also good, but will be slightly less sweet.
- 2 cups unsweetened non-dairy milk, such as soy or oat
- ⅓ cup roasted sunbutter - I used Trader Joe's, but any brand is fine.
- scant ½ cup organic cane sugar
- 2 tablespoons corn starch
- ¼ cup cocoa powder
- 2 teaspoons vanilla extract
- ½ teaspoon sea salt
See the recipe card below for full instructions.
How To Make It
Preparing chickpea ice cream is pleasantly simple.
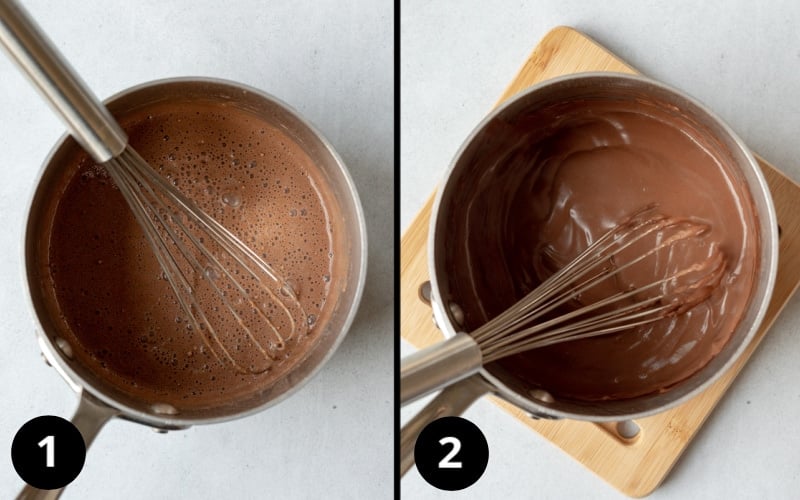
- First, whisk together cocoa powder, corn starch, and 1 cup of milk in a small saucepan.
- Bring to a simmer, then reduce the heat, and cook just until thickened, about 1 to 2 minutes. Be sure to whisk constantly. It will look like chocolate pudding (but it's not sweetened, so I don't recommend sneaking a taste... yet).
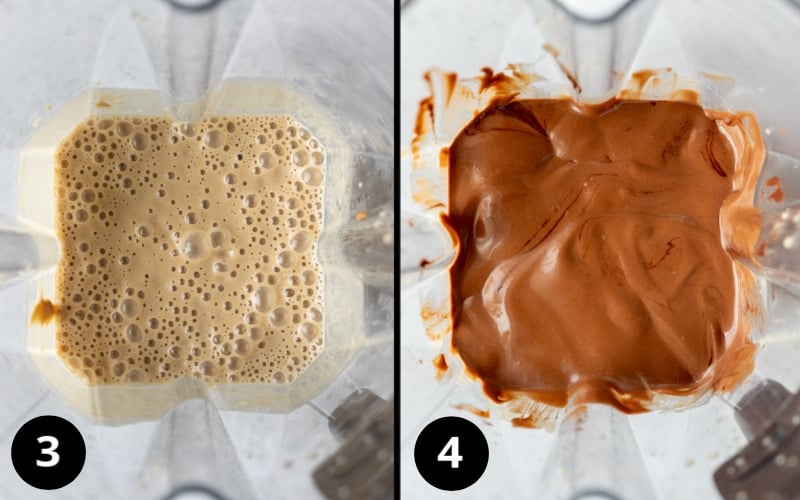
- Set the "pudding" mixture aside, and grab a blender. Blend the remaining cup of milk with the chickpeas, sugar, sunbutter, vanilla, and salt.
- Melt the chocolate, and add it to the blender. Also add the pudding, and blend until fully incorporated. Now give it a taste. If you used a darker chocolate, this is where you may want to add a bit more sugar. Totally up to you!
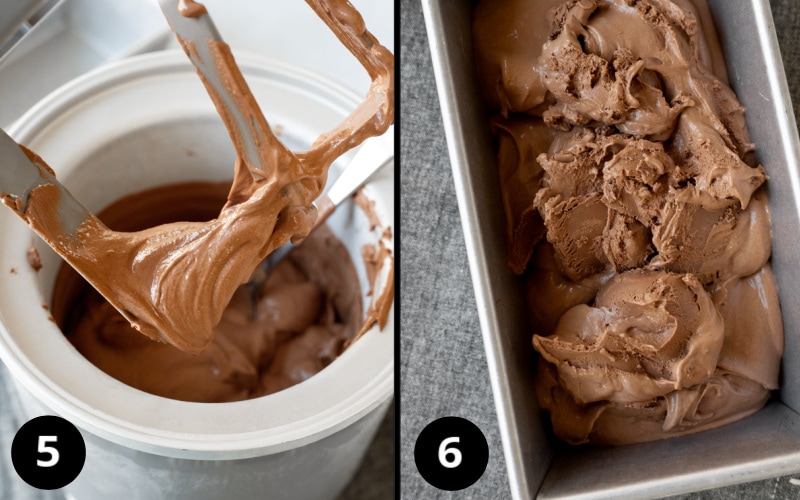
- Freeze according the instructions for your ice cream maker. Now it will be the consistency of soft-serve.
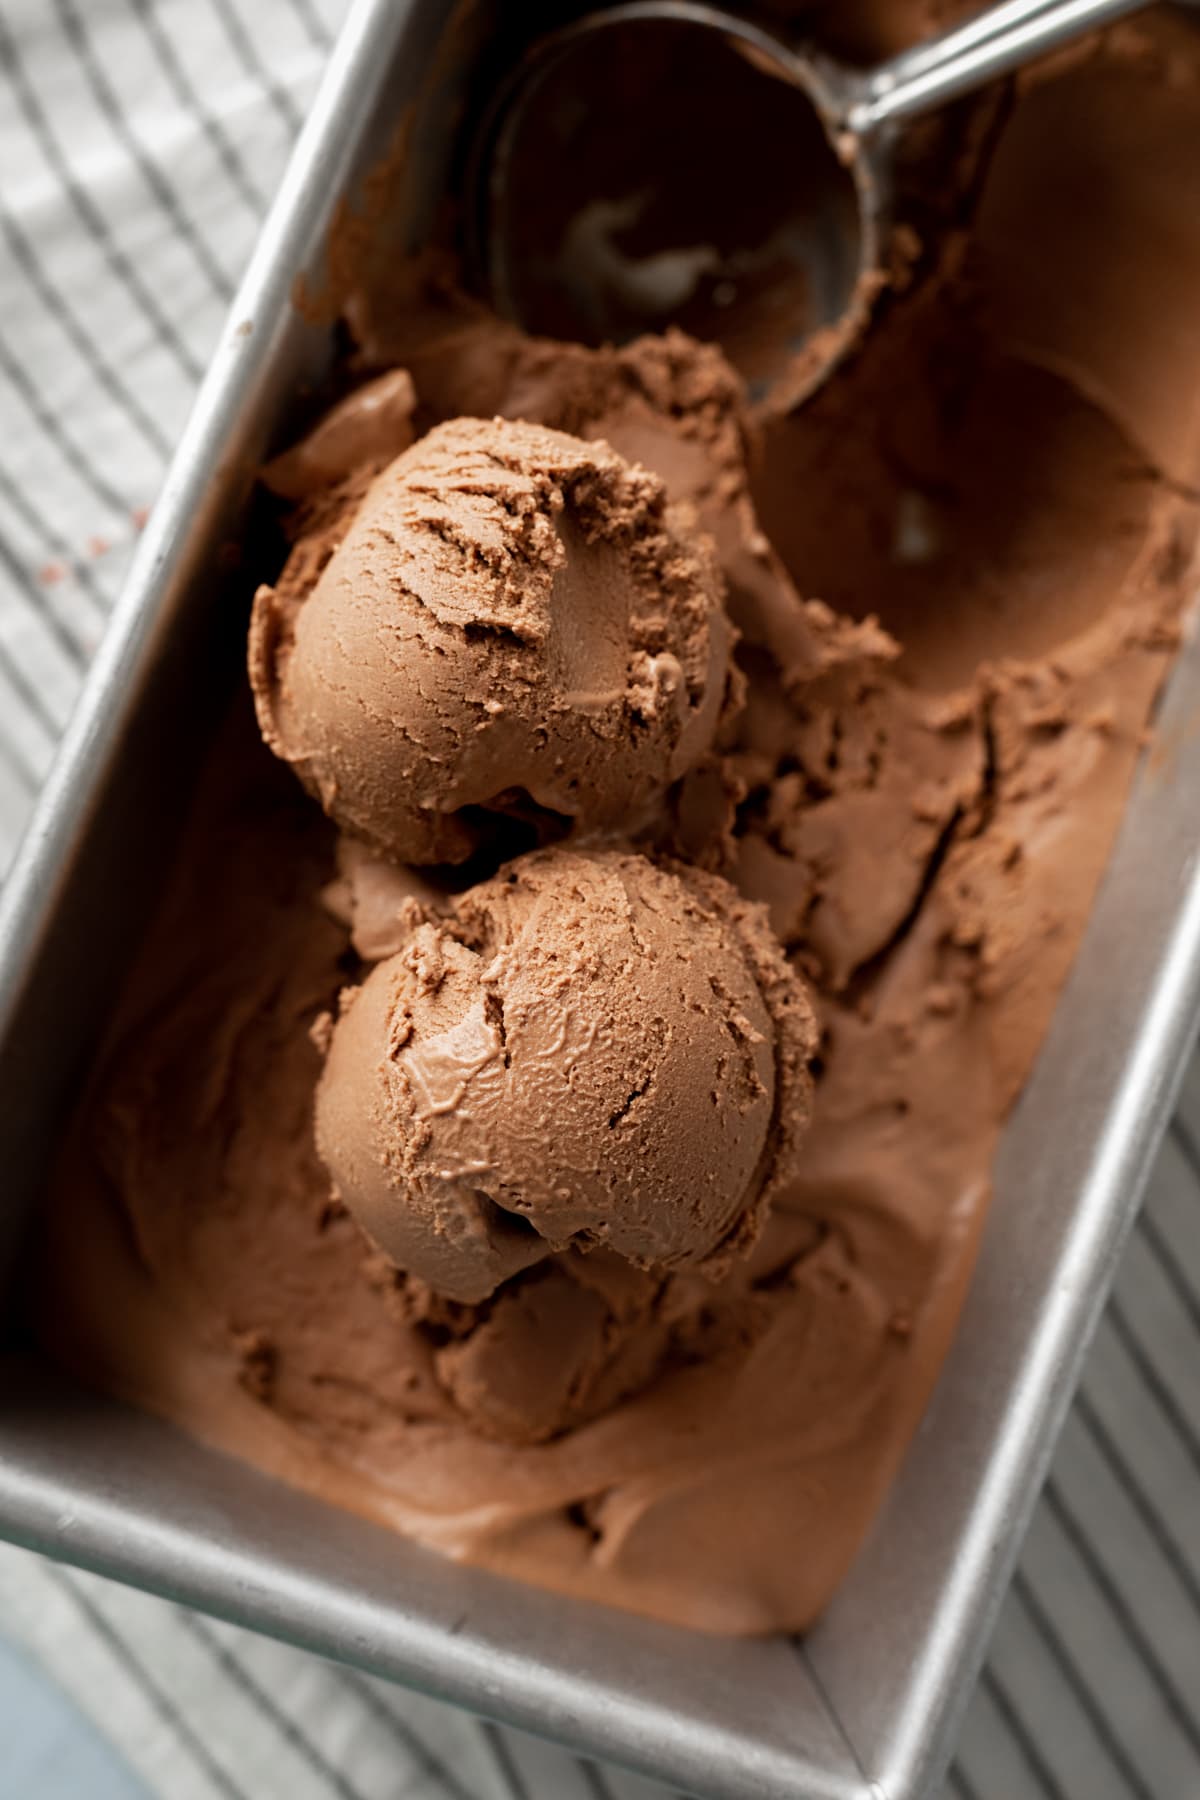
- For firmer, scoop-able ice cream, transfer to a freezer-safe container, and freeze for anywhere from 2 hours to overnight.
Tip! Keep in mind that anytime after 3 or 4 hours the ice cream will be VERY hard straight out of the freezer. So just let it hang out on the kitchen counter for a bit, maybe 20 minutes or so, depending on exactly how long it was in the freezer.
FAQs, Tips, and Substitutions
No, this recipe uses the actual chickpeas, not the chickpea liquid called aquafaba.
Tahini is another nut-free option that tastes great with chocolate. Or if you're okay with nuts, feel free to use almond, cashew, or peanut butter.
My two personal favorites are soy and oat milk. In addition to the chickpeas, soy milk adds even more protein, which is great. You can also use coconut or almond milk, if those are easier for you.
Well, I wouldn't go that far. It IS still ice cream. So even though it's quite a bit healthier than dairy-based ice cream, it is still fairly high in fat and sugar.
I haven't tested this recipe yet without an ice cream maker, but I suspect the standard no-churn method will work. Be sure to check out my other vegan ice cream recipes for tips on no-churn!
Corn starch adds a velvety smooth texture to ice cream similar to that of custard-based ice creams (those use eggs instead). Corn starch is vegan, inexpensive, and readily available in grocery stores. It's possible that another starch could be substituted, like tapioca, but I haven't had a chance to test it yet. If possible, I recommend sticking with corn starch for this particular recipe.
I hope you enjoy this nut-free vegan chocolate ice cream as much as we do. In case you can't tell, I'm completely enamored with it and can't wait to create more flavors!
If you try the recipe I would love to hear from you in the comments below, and be sure to leave a star rating to let everyone know how it turned out!
Recipe
Chocolate Chickpea Ice Cream (Nut Free!)
Ingredients
- 2 cups unsweetened non-dairy milk such as soy or oat - I used plain soy.
- ¼ cup cocoa powder
- 2 tablespoons corn starch - or arrowroot
- 1 cup cooked chickpeas, rinsed and drained
- scant ½ cup organic cane sugar
- scant ⅓ cup sunflower seed butter, salted - Feel free to substitute tahini OR your favorite nut butter if okay with nuts, such as peanut, almond, or cashew.
- 2 teaspoons vanilla extract
- ½ teaspoon fine sea salt - Add another pinch of salt if using an unsalted seed/nut butter.
- 7 ounces dairy-free chocolate (approx. 60 to 65 % cacao solids) - See Notes for selecting a chocolate.
Instructions
Prep:
- If using an ice cream maker with a removable canister, be sure to freeze the canister for at least 24 hours before making ice cream. Also note that the churned ice cream needs about 2 to 3 hours in the freezer to reach a firmer, scoopable consistency.
Make the ice cream:
- In a small sauce pan, whisk together 1 cup of milk, cocoa powder, and corn starch. Bring to a simmer over medium heat, whisking frequently. As soon as it begins to simmer, reduce heat to medium-low. Whisking constantly, cook until thickened, about 1 to 2 minutes. It will look similar to pudding. Remove from heat, and set aside.
- In a blender (see Notes) combine the remaining 1 cup of milk, chickpeas, sugar, sunbutter, vanilla, and salt. Blend on high until completely smooth, about 1 minute.
- Melt the chocolate using a double-boiler or by placing in a microwave-safe bowl and microwaving in 15 to 20 second intervals (stirring in between) until melted. Add the melted chocolate to the blender, and blend until smooth and fully incorporated.
- Add the cocoa "pudding" to the blender, and blend again. If the mixture feels warm at this point, refrigerate for 30 minutes to 1 hour. It doesn't necessarily need to be cold as it goes into the ice cream maker, but definitely no warmer than room temperature for the best results.
- Churn the mixture according the instructions for your ice cream maker. With my Cuisinart 2 Quart machine it takes about 22 minutes to reach soft serve consistency.
- For firmer, scoopable consistency transfer the ice cream to a freezer-safe container. Freeze for 2 to 3 hours. After 3 or 4 hours, and definitely once the ice cream has been in the freezer overnight, it will be VERY hard straight out of the freezer. It's important to let the ice cream soften at room temperature for at least 20 to 30 minutes before scooping, depending on how long it's been in the freezer.TIP: consider using smaller, individual serving-size containers, but keep in mind small containers will freeze and thaw more quickly than described here.
Notes
Estimated Nutrition (per serving)
Nutrition is an estimate and will vary depending on the exact amounts and ingredients used.
Margery says
I can’t eat corn, so I substituted 3 T tapioca starch for the 2 T cornstarch. It worked very well and is delicious. My husband raved over it (I still haven’t told him it was made with chickpeas!).
Lisa says
Quite creamy and delicious!
Delcy Newell says
This is very good. And MUCH better than the nice cream using bananas.It is barely grainy from the chickpeas. I will try using country crock plant cream and see how that affects the smoothness and creaminess. But I will definitely use this as a base to work from. Thank you!
Susan says
Would it be possible to use cocoa from my pantry instead of chocolate? And increase the sunflower seed butter to compensate for the lack of cocoa butter?
Lori Rasmussen says
Hi Susan - The chocolate adds a significant amount of sweetness, too, in addition to the fat and chocolate flavor. So you'd definitely have to play around with it!
Donna says
Would it be possible to substitute the nut or seed butter with sweet potato or something else, as we have a TOTAL nut/seed anaphylactic allergy in our house?
Lori Rasmussen says
Hi Donna - For the best texture you'll want to replace the Sunbutter with another source of fat that will work for your family. Maybe an oil of some kind, avocado? Something like sweet potato or banana will cause it to freeze much harder, but you may not mind that! You could try freezing it in ice cube trays then blending it in a food processor.
Aurelie says
Hey hey, is it possible to do it without sugar? Maybe using a chocolate that has already some sugar in like 85% chocolate? Thank you!
Lori says
Hi Aurelie, the chocolates recommended do already include sugar, as that sweetness is an important part of the recipe. If you were to reduce the sugar overall I'm not sure how it might affect the texture.
Lynn M says
Rich creamy amazing
Lynn M says
My go to. Meant to give 5 stars.
Jeanette says
Do you think I could use this recipe with the Ninja Creami?
Lori says
Hi Jeanette, I don't actually have experience with the Ninja Creami, but I remember looking into it before when another reader asked (on a different recipe). And yes, it should work. Let us know if you give it a try!
Katie Nielson says
I think it will! I used her other oat milk recipe with my ninja creami and it came out amazing.