
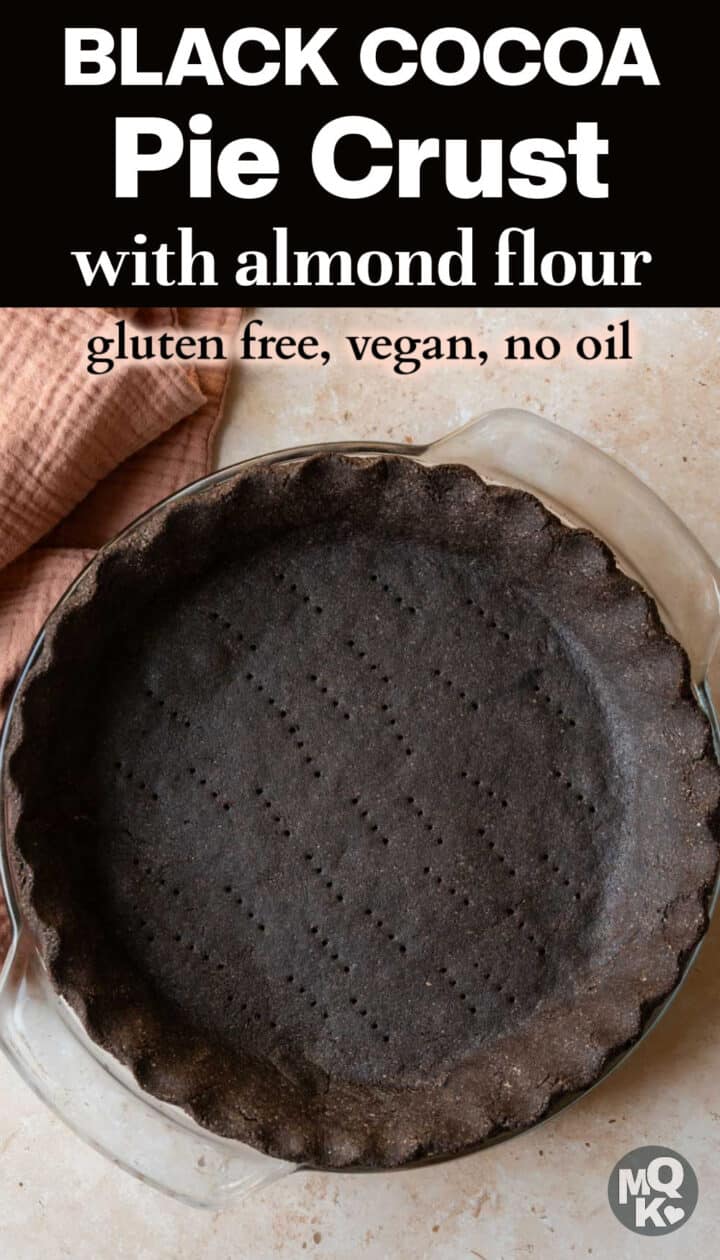
This chocolate pie crust is gluten-free and vegan, deeply chocolatey, and surprisingly simple. Made with black cocoa powder, it has an Oreo pie crust vibe, minus the cookies! Adapted from my almond flour pie crust recipe, this one is also made without butter or oil, yet still tender and sturdy enough for all of your favorite creamy pie fillings!

I've had fun experimenting with black cocoa powder this fall. First came these easy black cocoa cookies. That recipe gave me the idea to make dirt pudding cups for Halloween, with "dirt" from scratch instead of using Oreo cookies.
The next obvious step was to take my vegan gluten-free pie crust and incorporate black cocoa for a dark and dramatic chocolate pie crust! You'll love how easy this crust is and that it's made with just 5 wholesome ingredients.
It's delicious with cool and creamy fillings like the vegan peanut butter pie pictured below (recipe coming soon)!
Jump to:
What You'll Need
- black cocoa powder - this type of cocoa is extra-alkalized and has a unique, Oreo-like flavor. Sub regular/natural cocoa or Dutch-processed if needed.
- almond flour - this is the primary ingredient in the crust and the key to the crisp texture and rich flavor without needing any oil or butter. If you need a nut-free alternative, check out my nut-free sunflower seed pie crust or oatmeal pie crust.
- tapioca starch - this acts as a binder and helps soften the texture of the crust just a tad. Arrowroot is a good substitute.
- granulated sugar - we need more sugar in this recipe than the basic almond flour crust because of the bitterness of the cocoa. Note that even with 4 tablespoons (¼ cup), the pie crust is not overly sweet.
See the recipe card below for quantities and full step-by-step instructions.
Want to save this recipe? 📩
Keep an eye out for more delicious recipes. Unsubscribe anytime.
How to Make Chocolate Pie Crust With Almond Flour

- First, whisk together the dry ingredients in a large bowl. In a small bowl, combine the water, sugar, and vanilla.
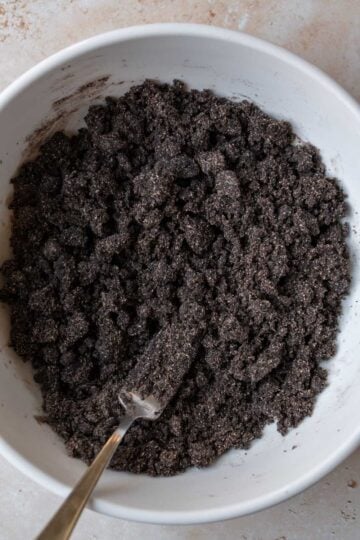
- Pour the wet mixture into the dry, and thoroughly mix with a fork. Initially it will seem dry, but as you continue to mix and knead the dough by hand the moisture will distribute. You don't want to add too much or it will be sticky.

- Work the dough with your hands and once it's uniformly moist and holding together, shape it into a disc.
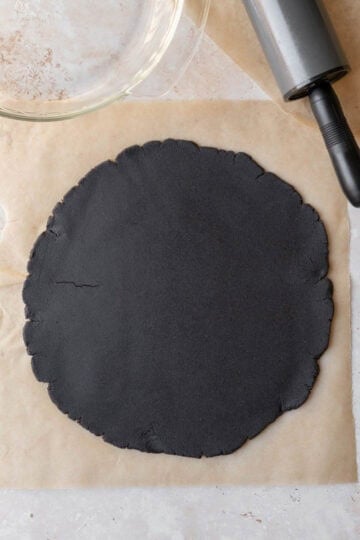
- Place on a large piece of parchment paper and use a rolling pin to evenly roll it to approximately 11 ½ inches in diameter.

- Carefully flip the pie dough onto your pie plate and peel away the parchment. With a paring knife, trim excess dough around the edges. Any cracks or imperfections are easily patched with the scraps.

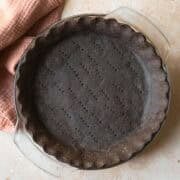
- If desired, create a decorative edge (here's a great tutorial on how to do that). Dock the bottom of the crust with a fork. Bake at 350°F (175°C) for 27 to 30 minutes or until the edges feel crisp but the bottom still feels slightly soft. The crust will continue to crisp up as it cools.
Fillings to Pair With Chocolate Pie Crust
This gluten-free chocolate pie crust pairs well with a wide range of fillings. Think of it like the ready-to-eat cookie crusts you can buy at the store.
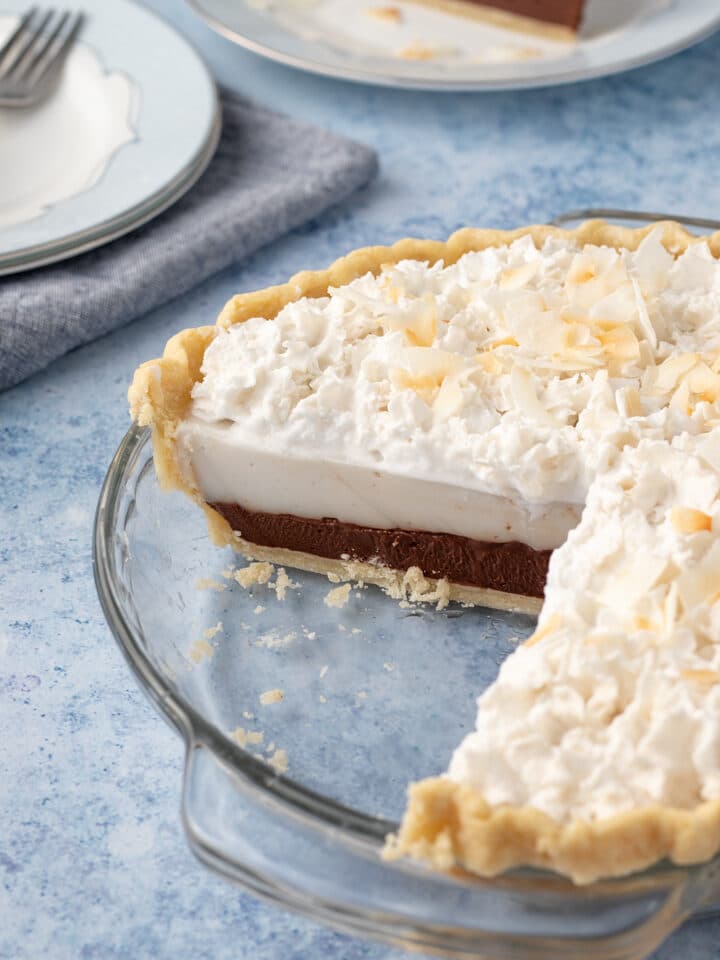
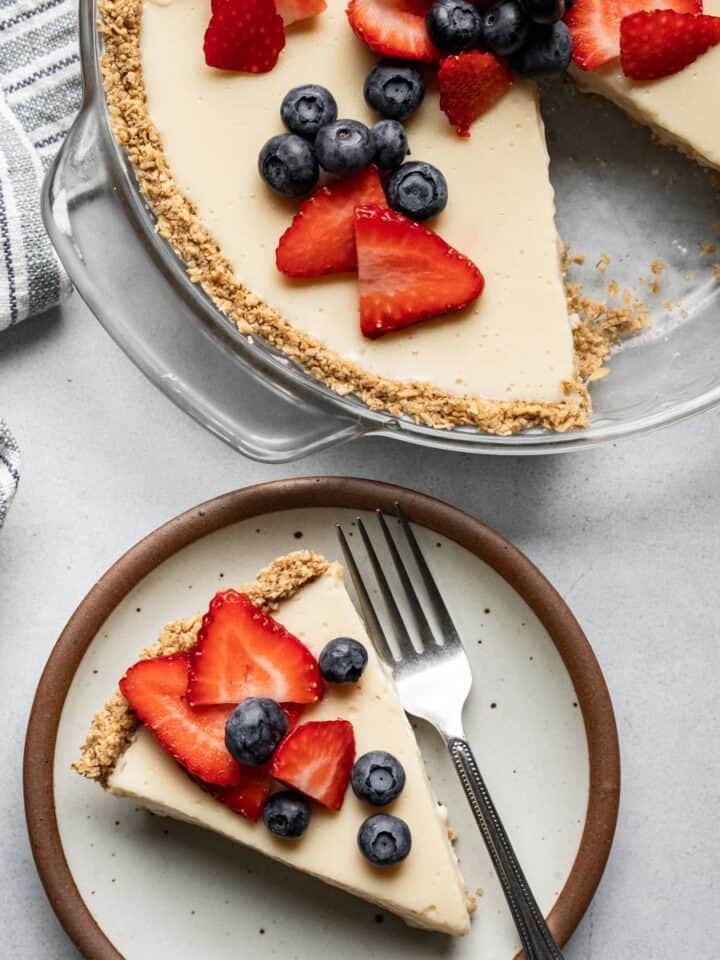
Use it for pies like coconut, chocolate, or banana cream pie, vegan peanut butter pie, no-bake cheesecakes, or a simple pudding-style filling.
Or balance the deep cocoa flavor with fruity flavors like raspberry, cherry, or orange. It's also perfect for grasshopper pie! Here are a few fillings to try:
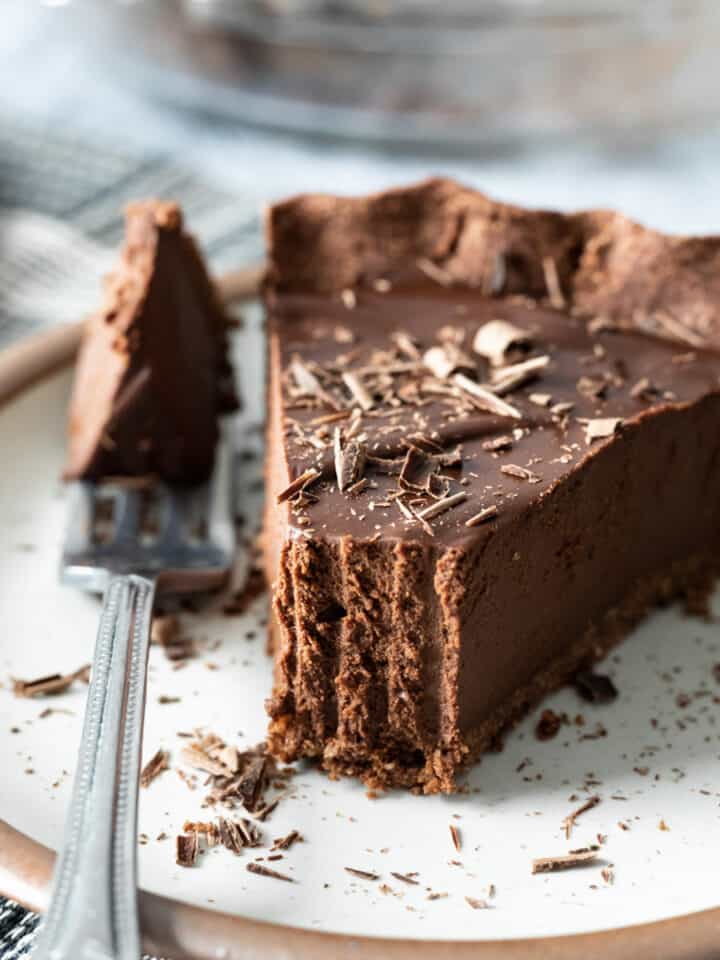

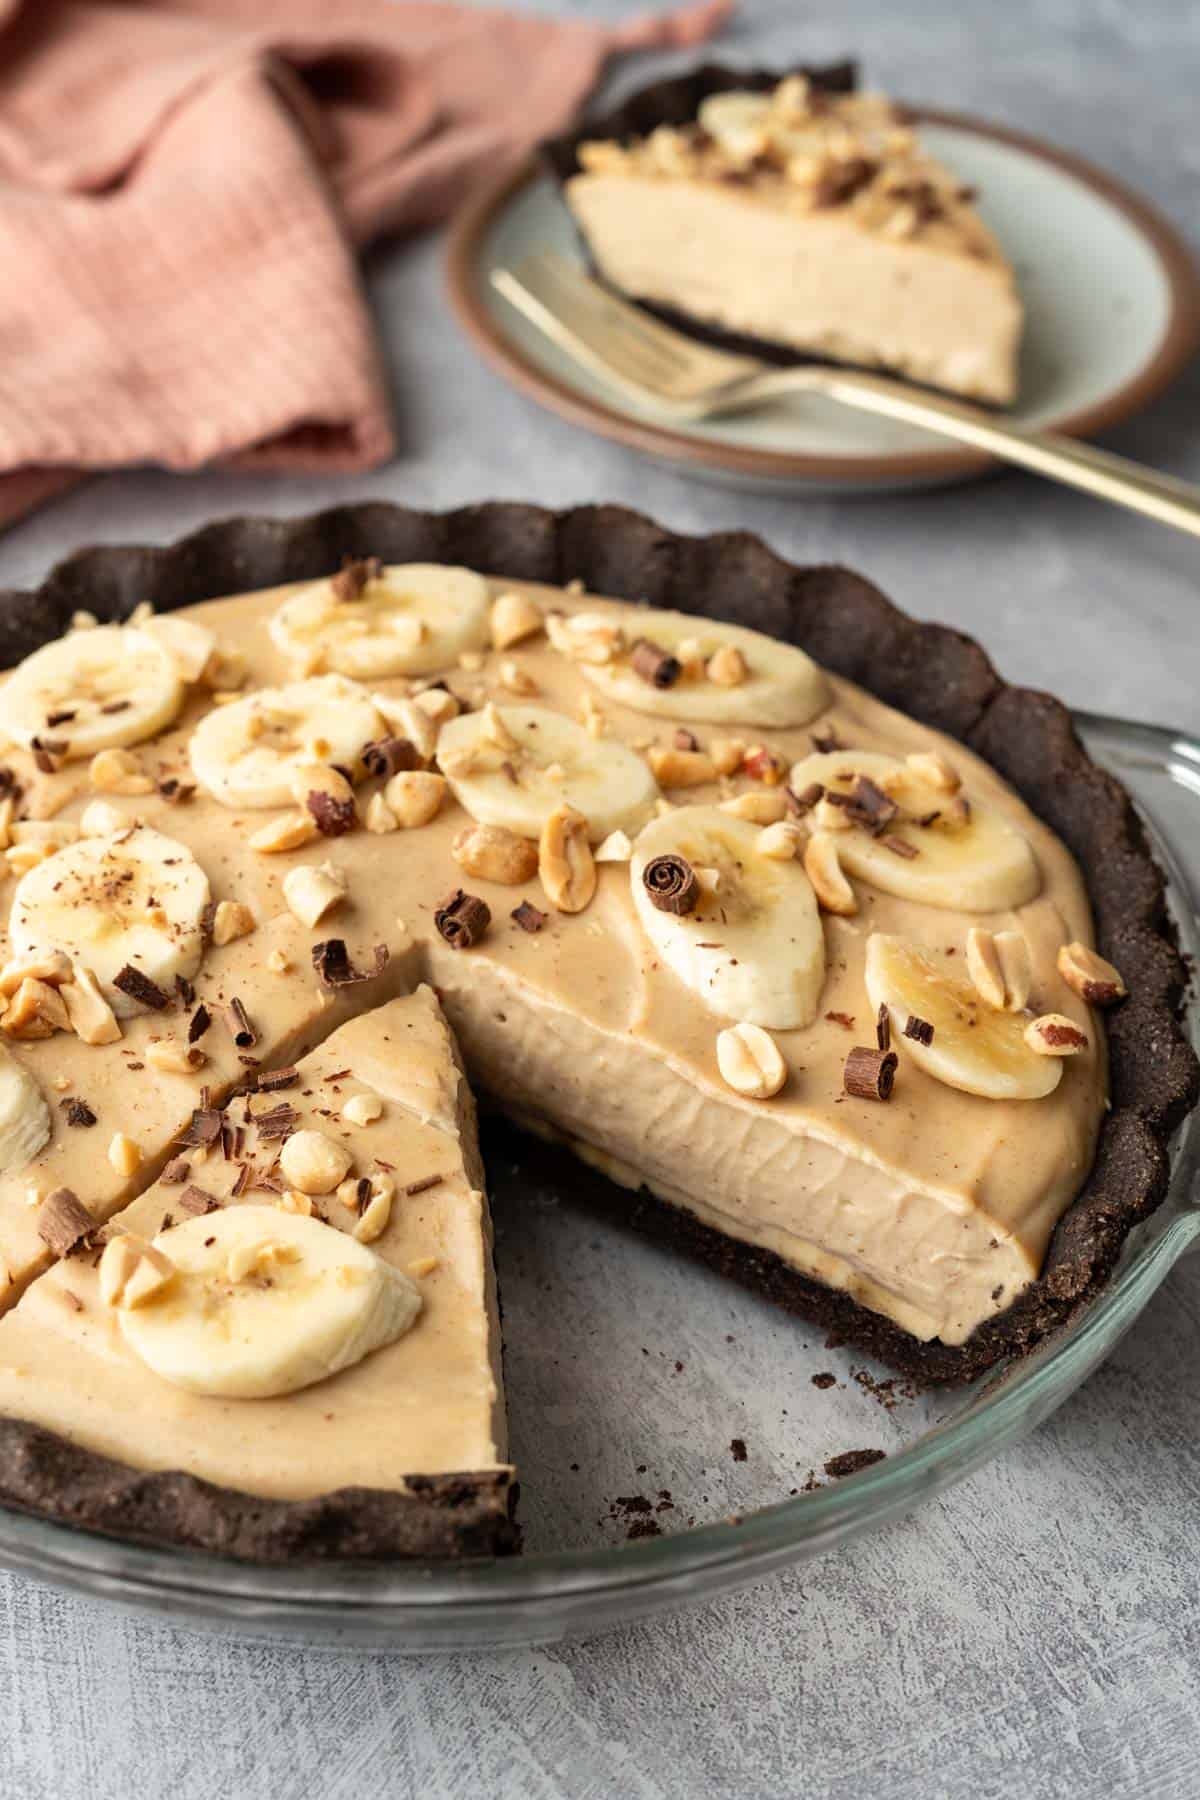
Pictured above: Vegan Gluten-Free Peanut Butter Pie
Helpful Tips
- Measuring: Almond flour and black cocoa can vary quite a bit depending on how they're scooped. For the most consistent texture and structure, use a kitchen scale whenever possible. If measuring by volume, pack the almond flour into the cup as you would with brown sugar. For the cocoa powder, whisk it first then spoon into the cup and level off the excess.
- Avoid thick edges: Press the crust evenly into the pan, especially along the sides. Thick edges tend to bake up firmer than the base, which can make slicing more difficult once the crust has cooled.
- How to know when it's done: When fully baked, the bottom of the crust will still feel just slightly soft to the touch. This is normal. It will continue to firm and crisp up as it cools.
- Don't over-bake: Extended baking time can dry out the crust and compromise the texture. Remove it when the bottom looks done (appears dry and set), and the edges are crisp.
Recipe
Gluten-Free Vegan Chocolate Pie Crust
Ingredients
- 2 cups fine blanched almond flour - see Notes for important tips on measuring
- ¼ cup tapioca starch - or arrowroot
- ¼ cup black cocoa powder - sifted if clumpy; can sub regular or Dutch-process cocoa
- ½ teaspoon fine sea salt
- ¼ cup water - 2 fl. oz.
- ¼ cup sugar
- 1½ teaspoons vanilla extract
Instructions
- Preheat the oven to 350°F (175°C).
- In a large mixing bowl whisk the almond flour, tapioca, black cocoa, and salt. In a small bowl or mug, whisk the water, sugar, and vanilla.
- Pour wet into dry, and use a fork to mix. It will seem dry initially, but as you continue to mash everything together the moisture will distribute. After mixing with the fork, switch to using your hands to finish combining the ingredients. Form into a ball. The dough should be moist enough to hold together but not overly sticky. If it's crumbly, add 1 teaspoon water and mix again. If it's too sticky, add a bit more almond flour.
- Place the dough on a large piece of parchment paper. Use your palm to flatten the dough into a disc. With a rolling pin, use firm and steady pressure and roll to approx. 11½ inches in diameter. If the dough sticks to the rolling pin, place another piece of parchment on top. NOTE: It's important that the dough not be too thick, especially around the edges. After flipping onto the pie plate in the next step, you should have a small amount of excess to trim away.
- Flip the dough onto a 9-inch pie plate (glass or ceramic). Peel away the parchment. Gently press it into the bottom and sides of the pie plate. Use a knife to trim the edges. Any holes or tears can be easily patched with the scraps.
- Decorate the edges of the pie crust as desired. I like the simple knuckle pinch technique (photo example here). Use a fork to dock the bottom of the crust (poke vent holes).
- Bake in a preheated 350 degree F oven for 27 to 30 minutes or until the edges are crisp. The center should look set but will feel slightly soft. The crust will continue to firm and crisp up as it cools. Cool before filling.
Notes
Estimated Nutrition (per serving)
Nutrition information is an estimate and will vary depending on the exact amounts and specific products and ingredients used.
Amy says
Loooove the black cocoa flavor. I had not used it before now I’m excited to try your other recipes with it. This was perfect in texture and so easy. I like that it isn't very sweet , since the filling is. Thank you!