

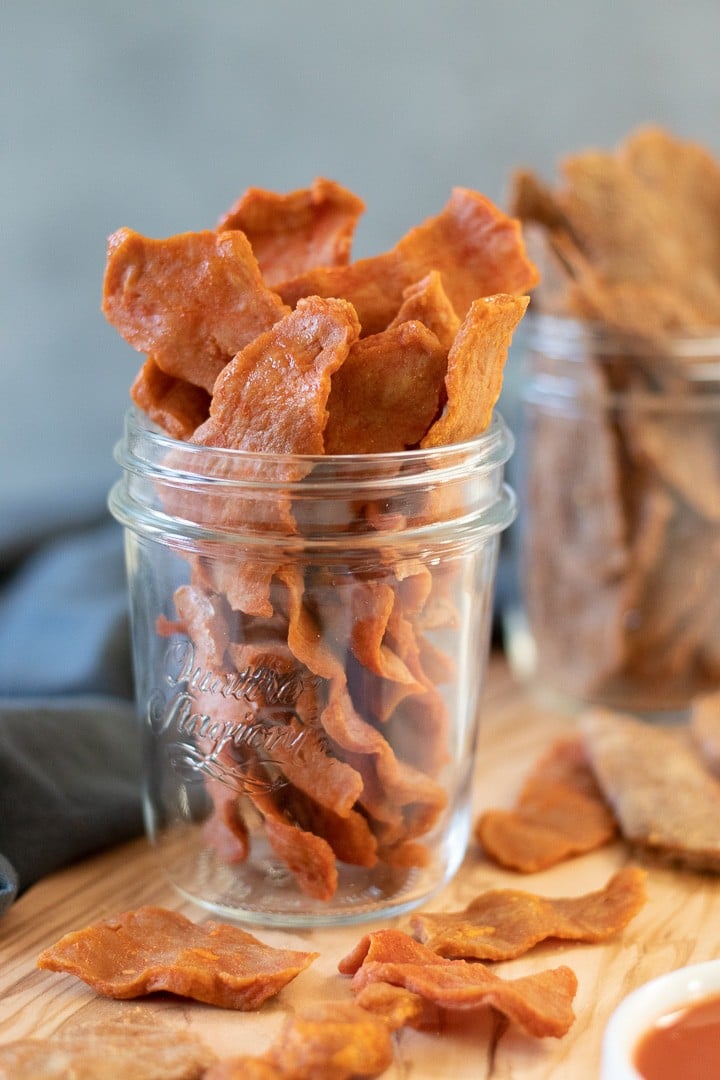
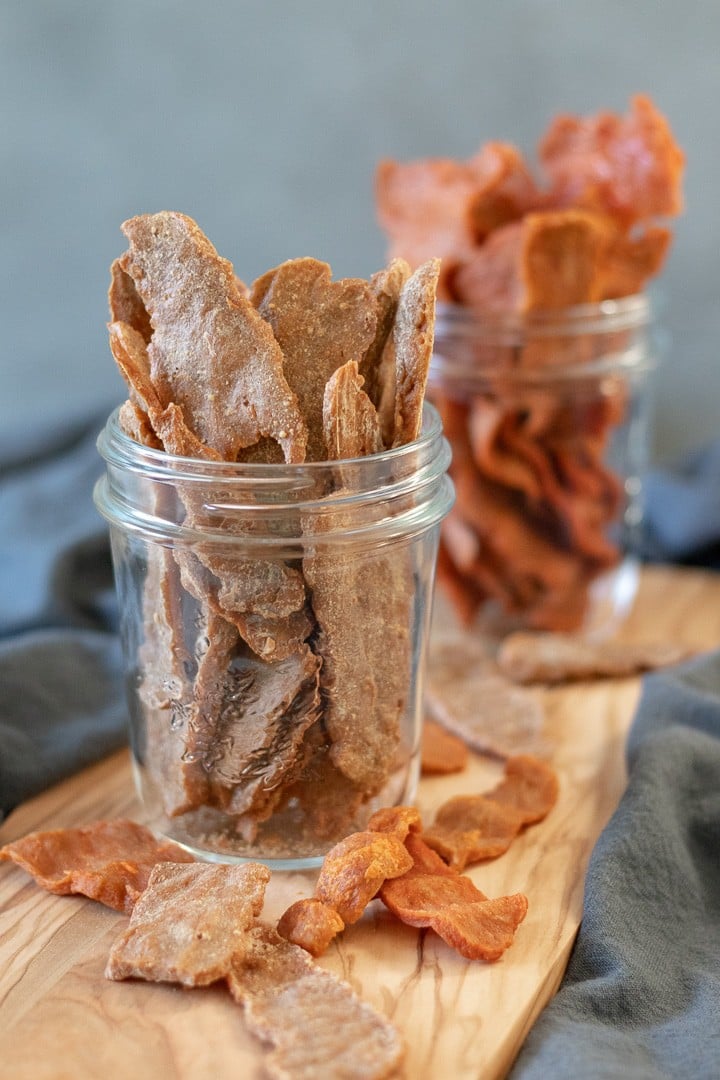
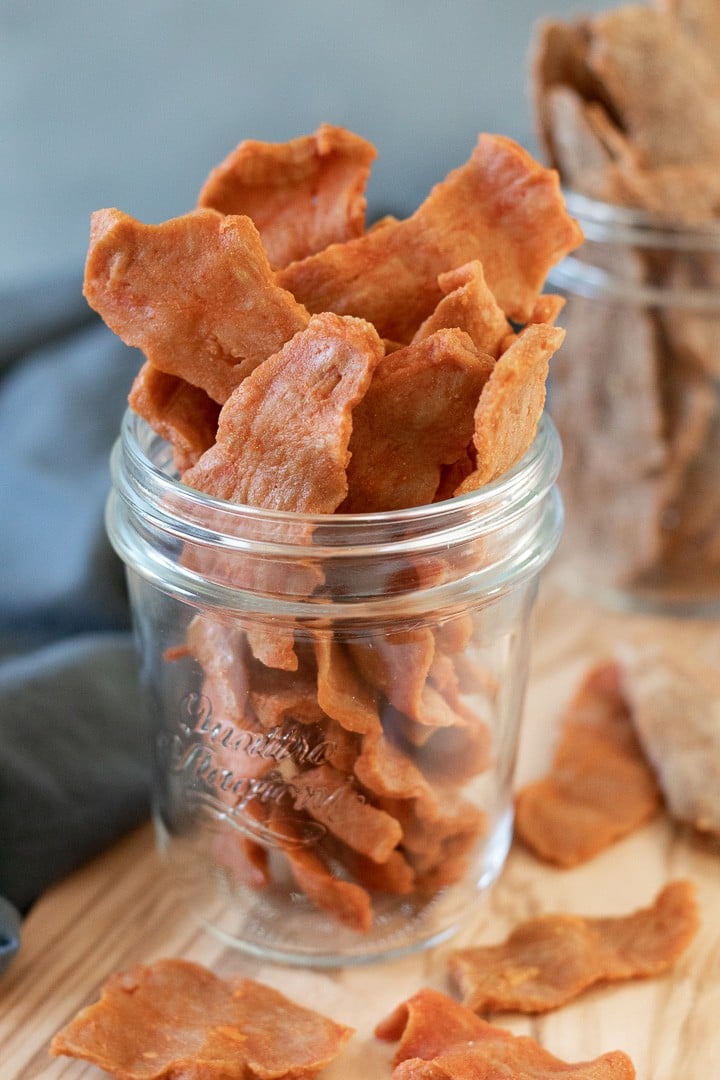
What can I say? I love vegan jerky! And apparently I'm not alone, because my original recipe for Teriyaki Seitan Jerky is one of the most popular posts on the blog (thank you, jerky lovers). So let's get into some new flavors today, shall we? How about Buffalo and Thai Peanut!
How to Make Vegan Jerky
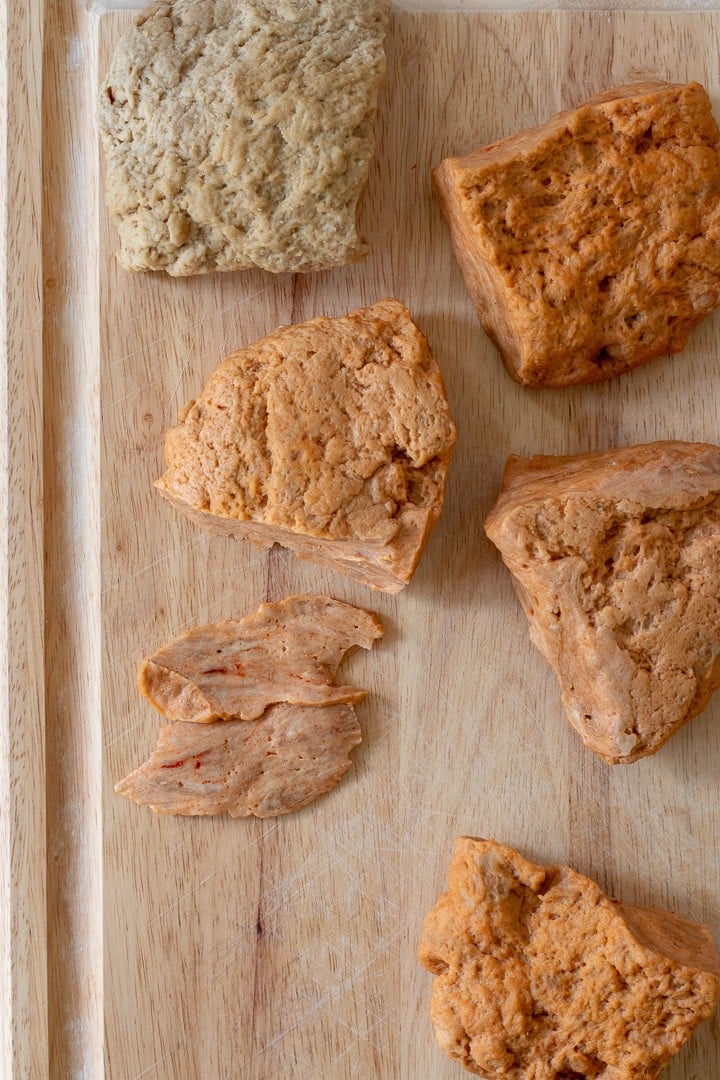
The basic method for these two flavors is similar to the Teriyaki recipe. It starts out like traditional seitan, but we actually build the flavors right into the dough. Once the dough comes together, we knead it, cut it into four equal-sized pieces, and freeze it for about 30 minutes. This firms up the dough and makes it easier to slice.
I like to use a chef's knife to carve my jerky slices, but a serrated knife would probably work, too. You want to slice the seitan as thinly and uniformly as possible. It doesn't have to be perfect, but the more similar in thickness the pieces are, the more consistent the cook time will be. It's definitely okay to embrace the jagged edges and varied shapes, though, you know, to make it look like jerky.
Once the slicing is complete, the seitan takes a dip in sauce and is either draped across racks (if you have them) or put directly on parchment-lined pans. Then, bake it low and slow for about an hour-and-a-half. And just like that, you have delicious, healthy, homemade vegan jerky!
I got a tad impatient while slicing some of these because I was doing two batches at once. So some of the pieces were thicker than I usually like (see the one in the center of the above photo?).
Even still, this really wasn't a problem. It just meant that I had to sort through the tray near the end of cooking, removing some of the thinner pieces that were done, and putting the thicker ones back in the oven for a few minutes. No big deal!
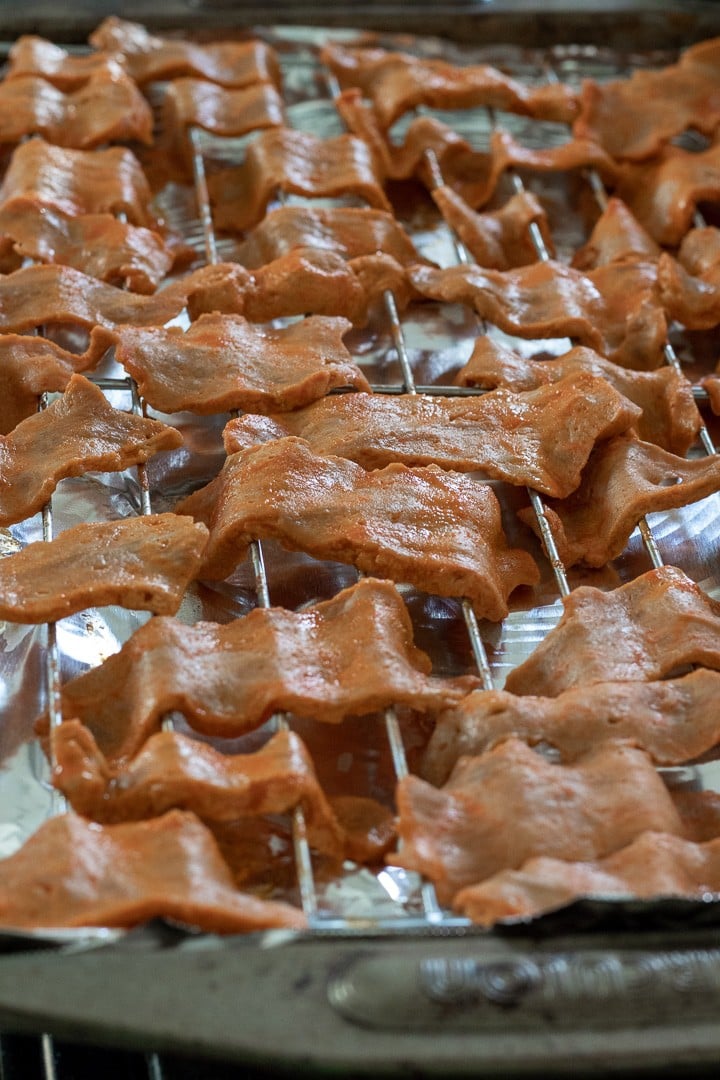
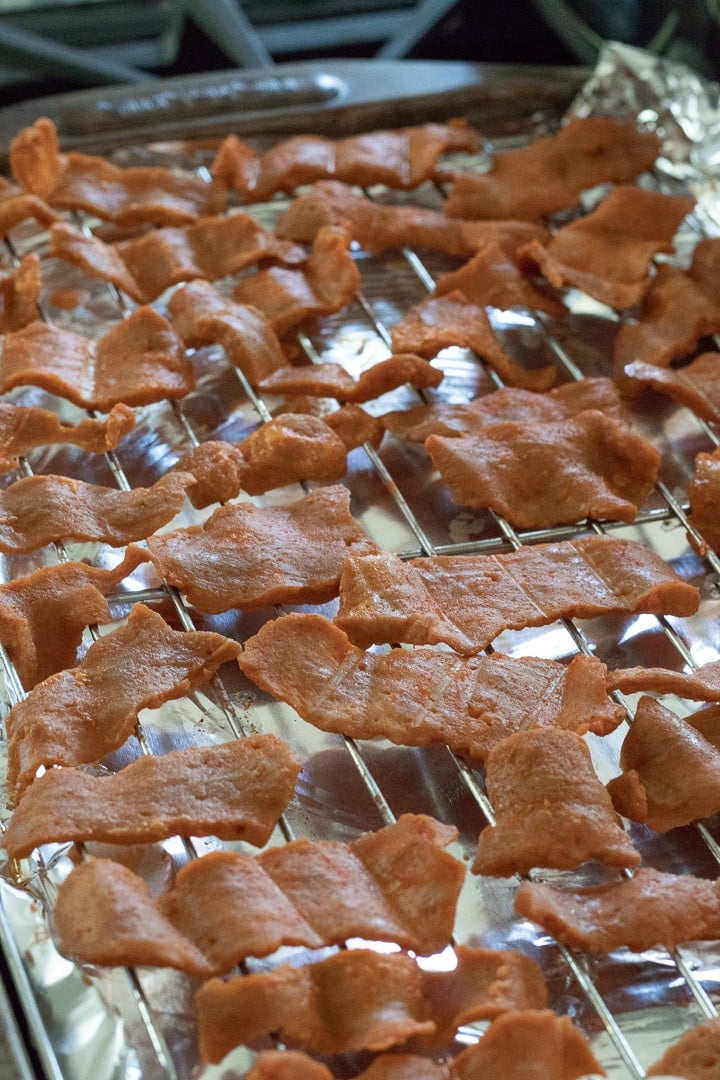
The photo above shows the raw Buffalo jerky just after being dipped in sauce and right before going into the oven. The photo below shows them after 30 minutes of baking at 250 degrees. Even though that's only about one-third of the way through the cook time, you can already see how much drier and jerky-like they look.
The thickness of your pieces, along with a few other factors I'll mention below, determine the cook time, so keep that in mind. Check the consistency at the 30 minute mark (they should still feel pretty soft) and again at the 1-hour mark, and you'll get an idea for the progression of doneness.
Check again 15 to 30 minutes later. When the thickest pieces no longer show signs of that raw seitan texture, you'll know they're done. Allow the jerky to cool completely, and store it in an airtight container.
Honestly, I'm not sure exactly how long the jerky keeps because it never lasts more than two days in our house! So use your best judgment. Considering it's not made from highly perishable ingredients AND it's dried, I feel comfortable keeping it up to a week.
An important tip for the best seitan jerky
As I mentioned in the Teriyaki Seitan Jerky post, storing the jerky in an airtight container for a few hours (or overnight) can correct any pieces that come out of the oven a little too crispy.
Want to save this recipe? 📩
Keep an eye out for more delicious recipes. Unsubscribe anytime.
When they're all cozy and closed up together, the moisture redistributes and helps make the jerky more uniformly chewy. Let's call it vegan jerky magic.
The following is copied from my Teriyaki Seitan Jerky post. Hopefully these additional details will help you achieve jerky success on your very first batch!
Factors that affect the cook time
There is a bit of an art to knowing when the jerky is done. But if you read the tips below (also summarized in the Notes section of the recipe), you'll be ready to make jerky like a pro.
- Because we're working with a flour (vital wheat gluten), the method used to measure it is very important. The wet-to-dry ratio of the seitan directly affects how long it takes to cook. I recommend using a kitchen scale to weigh the vital wheat gluten, but if you don't have a scale, use the following method:
Pour vital wheat gluten into a large bowl and gently whisk to fluff it up (like other flours, it becomes compacted in its original package, causing you to scoop up more than is needed). Gently scoop it up with a measuring cup, then level off the excess using the flat edge of a knife.
Side note: if you enjoy baking and don't yet have a kitchen scale, I've been using and enjoying this affordable one from Escali.
- Also, ovens can vary a lot. When you're cooking something for well over an hour, even just a 5 degree difference in oven temperature can impact the cook time significantly.
- Finally, the thickness of your slices will determine whether the jerky is ready in an hour-and-a-half or closer to two hours! This is where the "art" of knowing doneness comes into play.
But before you start thinking, "Ugh, this sounds too hard!" rest assured that there isn't ONE specific level of doneness, where anything outside of that means failure. Nope! There is actually a somewhat forgiving window. Here are my best tips:
- Check the consistency a few times, and you'll start to get a feel for the progression of doneness. When the thickest pieces no longer show signs of that gelatinous, raw seitan texture but are still a tad soft, you'll know they're done. At this point, the thinnest pieces will seem firm, almost crisp. For me this is usually around 1 hour and 45 minutes.
- Right out of the oven the thinnest pieces of jerky might seem too crisp, but don't despair! Store the jerky in an air tight container for a few hours (or overnight), and you'll find that the remaining moisture magically redistributes, softening the crispier parts and making the thicker pieces firmer and more jerky-like.
If you make either of these seitan jerky recipes I would love to hear about it! Tag a photo @myquietkitchen on Instagram, and leave a comment below to let us know how it goes. Happy snacking!
More Seitan Recipes:
Vegan Pepperoni
Simple Seitan Roast
Vegan Turkey Roast
Maple Breakfast Sausage
All-Purpose Seasoned Seitan
You might also like these vegan bacon bits.
Recipe

Vegan Seitan Jerky (Buffalo and Thai Peanut)
Ingredients
Buffalo Seitan Jerky:
- scant 2 cups vital wheat gluten (230 g) - Use a kitchen scale for the most accurate measurement; otherwise, whisk vital wheat gluten before gently scooping it up with a measuring cup. Level off excess with the flat edge of a knife.
- 2 tablespoons nutritional yeast
- 1 ⅛ cups water
- ¼ cup Frank's hot sauce or similar
- 1 tablespoon soy sauce
- 1 teaspoon garlic powder
- ½ teaspoon smoked paprika
Buffalo Sauce:
- approx. ½ cup Frank's hot sauce (or hot sauce of choice)
- 2 tablespoon vegan butter, melted
- ¼ teaspoon smoked paprika
- ¼ teaspoon garlic powder
Thai Peanut Seitan Jerky:
- scant 2 cups vital wheat gluten (230 g) - Use a scale for the most accurate measurement; otherwise, whisk vital wheat gluten before gently scooping it up with a measuring cup. Level off excess with the flat edge of a knife.
- 2 tablespoons nutritional yeast
- 1 ⅛ cups water
- 2 tablespoon soy sauce
- 2 tablespoon natural peanut butter, salted
- 1 tablespoon toasted sesame oil - Omit for oil-free.
- 2 cloves garlic
- 1 tablespoon rice vinegar
- 2 tablespoon maple syrup
- ½ teaspoon ground ginger or 1 inch piece fresh ginger, zested
Thai Peanut Sauce:
- 3 tablespoon natural peanut butter, salted
- 2 tablespoon soy sauce
- 2 tablespoon maple syrup or agave
- 1 tablespoon rice vinegar
- ½ teaspoon garlic powder
- ¼ teaspoon ground ginger
- 1 teaspoon sriracha, optional
- 1 to 2 tablespoon water, for consistency
- pepper
Instructions
Instructions are the same for both flavors:
- Line two baking sheets with foil. Place racks on top, if using, or cover the foil with a layer of parchment paper.
- Put the vital wheat gluten in a large bowl and set aside.
- In a blender or bowl combine the remaining jerky ingredients and blend/whisk until fully incorporated.
- Pour the wet mixture into the wheat gluten, stirring to combine. Move the dough to a flat surface and knead for 2 to 3 minutes. Cut the dough ball into 4 pieces and freeze for 30 minutes to make it easier to slice.
- Preheat oven to 250 degrees F. In a blender or small bowl combine the sauce ingredients. After the dough has chilled, slice it thinly, dip each piece into the sauce, and place on the rack/pan. Sprinkle with freshly cracked black pepper if desired.
- *If jerky is directly on a parchment-lined pan, flip every 30 to 45 minutes to ensure even drying.Bake the seitan for 1 hour and 30 to 45 minutes, checking doneness a few times during the second half of cooking (see notes). Keep in mind, thicker pieces may take closer to 2 hours.
Notes
- Because the jerky cooks at such a low temperature, the cook time is somewhat forgiving. Depending on the thickness of your slices, as well as the exact moisture content of the seitan (this is why the method used to measure the vital wheat gluten is very important), you may need to experiment a bit to find your favorite level of chewiness. It's better to err on the side of slightly underdone than over.
- When the thickest pieces no longer show signs of that gelatinous, raw seitan texture, you'll know they're done. They may still be a bit soft while the thinnest pieces will seem almost crisp.
- Don't worry if the thin pieces of jerky seem too crisp right out of the oven; they will take on a more uniform chewiness once stored in an airtight container.
- Store jerky at room temperature for several days or in the refrigerator for up to a week (possibly more if very dry).
- Nutrition information represents the Buffalo flavor.
Estimated Nutrition (per serving)
Nutrition is an estimate and will vary depending on the exact amounts and ingredients used.
Kris says
I made the Thai Peanut and it tastes wonderful, and I like the texture too. But the marinade was only enough for half of the jerky, I had to make a whole second batch for the rest of the jerky. Maybe if I had put it in the blender to make it thinner, or added even more water it might have covered a bit more?
Andrew Fast says
Disregard my comment about using Dehydrator, 0 comments loaded before I submitted and I found the answer below. take care
Lori Rasmussen says
Okay great! Glad you enjoyed it, Andrew.
Andrew Fast says
delicious, thank you so much for sharing!
Has anyone tried using a Dehydrator instead of an oven?
Christine says
I made the Thai peanut version and it was INCREDIBLE. I’m doing a solo boundary waters trip and I can’t wait to take it with me. Thank you!
Vanessa says
I make the thai peanut jerky 2-3 times a month! I'm a ski instructor and it's the most perfect snack to keep in my pocket. I love that the peanut butter gives it some fat and makes it extra moist. I'll never make jerky without using nut butter again.
Thanks so much for this recipe!
Jill says
Have you tried making this with an air fryer yet? How would you change the time? Thank you!
Lori says
Hi Jill, no I haven't tried it in the air fryer yet but that's a great idea. Space might be an issue but otherwise I think it will do a great job of both cooking the seitan and drying it out.
I'm really not sure about temp or time without testing it. The temp will need to be low so it doesn't burn. If you do some experimenting please let us know.
MS Alberta says
I am wondering why the strips are dipped in sauce rather than incorporating the sauce ingredients into the jerky dough before cooking.
Lori says
Hi, the flavors are incorporated into the dough as well.
Kat says
When making seitan, the texture is often the hardest part and the texture of this is perfect. I've made both flavors and the buffalo is definitely the best. The peanut one just tastes sweet, the flavor isn't very complex or developed. I think next time I'll use the same recipe for the seitan, but try a thai curry flavor instead with curry paste instead of peanut butter + maple syrup. Overall it's a very good recipe that I'm sure I'll make again and again.
Lori says
Great feedback, Kat. Glad you like the jerky! And a curry flavor sounds awesome.
Lorrie says
I can't rate because I have not tried it yet but I plan to. I am making seitan for my son for Christmas, anyway!
Question : can I use my dehydrator instead of the oven?
Lori says
Hi Lorrie, great question! Unfortunately a dehydrator doesn't get hot enough to actually cook the seitan. You can use one for the drying process, but you would actually need to cook the seitan first. In other words, it adds an extra step and ends up increasing the overall cooking/drying time. Hope that makes sense!
So I would recommend either making this recipe as written using the oven, or starting with pre-cooked seitan and using the dehydrator to dry it. You could use this recipe (so that the buffalo seasonings are built into the dough), then steam it similar to the instructions in my Homemade Seasoned Seitan recipe. Then, slice it and dehydrate it.
Let me know how it turns out! 😀
Jax says
Amazing taste and texture! Will definitely make again. Thank you
Lori says
Thanks, Jax! So glad you enjoyed it.
Suzie says
I've never had jerky before, but you make it very appetizing! Thanks for sharing this recipe!
Also, it is featured on my blog here: https://suzinspire.com/20-incredible-meat-free-recipes-you-should-try-this-summer/
If you like it, please share it on social media. Thank you so much!
Lori says
Wonderful! Thanks, Suzie!